USPS Click-N-Ship Pickup Scheduling Made Safer and Easier

usps click-n-ship pickup scheduling

If you ship even a few packages a month, the part that feels risky isn’t the label — it’s the handoff. Where do you leave the box? Who will open your gate? Will the carrier be delayed so long the package sits outside? Recent updates to how Click-N-Ship handles pickups reduce those variables. The system is quieter, more predictable, and safer if you follow a few straightforward habits.

## How USPS Click-N-Ship Pickup Scheduling Works

USPS Click-N-Ship Pickup Scheduling ties your online label to a real pickup on a real route. You print postage, schedule a pickup, and the carrier scans the package as part of their run. That scan links the package to a specific pickup window and driver, which makes tracking meaningful from the moment the package leaves your porch.

To schedule a pickup, you generally:
– Create and print a label through Click-N-Ship.
– Choose a pickup date and location in the website or mobile flow.
– Place the package where the carrier can access it, or hand it to them directly.

Those are the high-level steps. The details matter. When you pick a location, indicate whether the package will be at the front door, back porch, lobby, gated driveway, or handed directly to the carrier. The more precise you are, the less time the driver will spend searching, and the less time your package is exposed.

## Common Pitfalls People Miss

Pickups go sideways when we assume the carrier will read minds. Two recurring mistakes:
– Leaving a package out the night before without securing it or using an enclosed porch. Weather and opportunistic theft are real threats.
– Scheduling a pickup without supplying clear access instructions for gates or apartment buzzers.

Also don’t forget to attach the reciept or the label where it’s visible. A taped label that’s obscured or on the wrong side of the box slows everything down. When something slows the driver, multiple pickups get delayed and risk exposure.

### Why Clear Access Instructions Pay Off

If your building has a buzzer, put the unit number in the pickup field and note whether the carrier should buzz or knock. For gated properties, include the gate code and where to leave packages if the gate is closed. Small information saves time and keeps the package in the driver’s hands rather than on a sidewalk.

## Safety Improvements And Why They Matter

Safety changes have come from both USPS processes and common-sense behavior you control. On the USPS side, linking the label to a scheduled pickup and requiring carrier scans at pickup reduces ambiguity about time and chain of custody. For shippers, using added options like Signature Confirmation or Adult Signature at Delivery reduces the chance of packages gone missing after the carrier leaves.

Here’s what improved sequencing does: instead of a loose “left with carrier sometime today” stamp, you get a scan that pins a time and place. That makes disputes with buyers or senders simpler. It also means the carrier is more likely to pick up packages directly instead of grabbing a batch from a porch and stacking them in a van.

### Signature Options Cost Less Than Headaches

If the item is moderate to high value, opt for Signature Confirmation. It’s not expensive compared with replacing a lost item. The driver will request a signature or record delivery, which deters casual theft and gives you legal proof of delivery. You can choose Adult Signature if age verification matters. Those small fees prevent much bigger headaches later.

#### When To Choose Signature Confirmation

Choose it when the replacement cost exceeds the convenience fee of the service. For instance, a $50 item? Consider signature. Over $100? Strongly consider it.

## Step-By-Step: Scheduling A Safer Pickup

Follow this routine every time you ship:

1. Print Your Label and Verify The Address
2. Schedule The Pickup Through Click-N-Ship
3. Specify Exact Placement And Access Info
4. Securely Package And Affix The Label
5. Place The Package Near Pickup Time, Not Hours Before

Timing matters. If you place a package outside too early, it’s an easy target. Place boxes as close to the scheduled pickup window as you reasonably can. If the schedule says “by 11 AM,” setting the package out at 10:45 AM is better than 7 AM.

### How To Enter Pickup Details That Get Read

When you use the pickup scheduling form, write short, precise instructions:
– “Front porch under awning, left of main door”
– “Gate code 1234, leave on stoop”
– “Do not buzz; knock only; neighbor will hand off if not home”

These aren’t picky details. They shorten the carrier’s time at your stop and reduce confusion. Less confusion equals fewer mistakes.

## Using Click-N-Ship For Business Volume

For businesses that ship dozens of packages a week, consistency is key. Designate a single person to handle usps pickup coordination. That person will be the one who times the packaging, creates the Click-N-Ship labels, and schedules pickups at predictable times.

Batching labels and scheduling a single pickup window when the carrier prefers to stop by keeps packages from sitting around all day. Many small businesses find that scheduling pickups right before the route’s typical start or mid-route pickup windows minimizes exposure time.

### How To Communicate With Your Carrier

If you have regular pickups, invest five minutes to talk to the carrier and explain where you place packages. A quick conversation can solve recurring problems: “If the gate is closed, please leave on the mailbox shelf.” Carriers appreciate clarity and will often accommodate a consistent, safe handoff routine.

## What To Expect The Day Of Pickup

On pickup day, the carrier should scan the package. That scan updates tracking instantly. If you scheduled via Click-N-Ship, you’ll see movement tied to that pickup. If the scan doesn’t happen, the package might still be on the carrier’s truck; it might also have been missed. Track the scan. If it never appears by the end of the carrier’s route, contact your local post office.

If you choose usps pickup and the carrier doesn’t arrive, check the address used, the pickup date, and whether a delay was posted on the USPS tracking page. Often a late truck or route reassignments are the cause. Don’t assume theft until you confirm.

### What To Do If The Carrier Can’t Access Your Package

If a carrier can’t access a gated area and you didn’t provide clear instructions, they usually leave a notice. Respond to that notice quickly. Re-schedule another pickup or take the package to a nearby USPS location.

#### Tips For Apartment Dwellers

If your building has a management office or a concierge, coordinate pickups through them. Leave packages in a secure lobby area with clear labeling. That keeps packages off the sidewalk and under formal supervision until the carrier arrives.

## Troubleshooting Common Problems

Problem: Pickup shows scheduled but no scan. First, check your confirmation email or Click-N-Ship account for the scheduled pickup details. Second, call your local post office. If you don’t get a timely resolution, you can file a missing mail claim, but that’s a slower route.

Problem: Carrier didn’t find package where you said it would be. Re-evaluate how visible you made the package. Put labels facing outward and avoid leaning packages behind obstructions. Clear signage is your friend.

Problem: Unauthorized person receives a package. If you didn’t request a signature and the package was left, you may have limited recourse. That’s why for higher-value items it’s worth paying for signature options. If a package is stolen after the carrier marks it delivered, file a claim with USPS and check any security camera footage you might have.

## Privacy And Security Best Practices

Treat your pickup as a choreography between you and the carrier. If you schedule a pickup, don’t broadcast it on social media that you’ll be leaving a high-value package outside. Simple steps:
– Put the package out just before the scheduled pickup.
– Use secure, opaque packaging so contents aren’t obvious.
– Choose signature options when appropriate.
– If your neighborhood has an active mail theft problem, use Hold For Pickup at the post office and pick it up there.

Using Hold For Pickup is especially smart for valuable or sensitive items. Instead of leaving a package on a porch, you instruct USPS to hold the package at a ZIP Code–based post office for in-person pickup. That cuts down on exposure and gives you control.

### Digital Security: Keep Track Of Labels

When you print a label through Click-N-Ship, keep a record of the tracking number. Link that number to your shipment records so you can pull it up quickly when something doesn’t go according to plan. Don’t share tracking links publicly if the delivery timing could invite theft.

## Cost Considerations And Alternatives

Click-N-Ship pickup scheduling itself is a convenience. Depending on the service level and whether you request signature services, there may be small fees. Compare fees against the cost and hassle of replacing a lost item. Sometimes it’s cheaper to pay a few dollars for Signature Confirmation than to chase refunds later.

If your shipping needs are heavy, consider scheduled pickups that USPS offers to businesses. For occasional shippers, using a local post office drop-off could be the simpler, cheaper route.

## Real-World Scenarios That Illustrate What Works

Scenario A: A small online seller ships five boxes a week. She schedules a mid-morning pickup, prints all labels the night before, but places boxes outside at dawn. One package disappears. She changes routine: prints labels the morning of pickup, places packages 30 minutes before the scheduled scan, and adds Signature Confirmation for items over $50. No more disappearances.

Scenario B: A customer in a gated community forgets to include the gate code in the pickup instructions. The carrier leaves a notice. The sender reschedules, includes the gate code, and writes “leave on stoop by mailbox if gate closed.” The carrier can now access the package quickly. Small change, big difference.

Scenario C: A seller drops off valuable electronics at a nearby post office instead of leaving them at the door. This removes the timing variable and uses USPS-controlled space for transfer.

## When To Use Alternatives To Click-N-Ship Pickup

Click-N-Ship pickup scheduling is great for convenience, but it’s not always the right tool. If you need absolute control over delivery windows or a guaranteed time, look at couriers that offer tighter windows or scheduled same-day pickup options. For very high–value items, a courier that provides door-to-door insurance and chain-of-custody documentation might be preferable.

However, for most everyday shipments, Click-N-Ship and a few protective steps give you a good balance of cost and security.

### Combining Services For Extra Security

Some sellers use a hybrid approach: schedule Click-N-Ship pickup but request Hold For Pickup for the highest-value items, or drop those items at the counter and let the rest be picked up. That minimizes counter time while keeping valuable items secure.

## Practical Checklist Before You Schedule

– Verify the recipient’s address and unit number.
– Print or attach the label cleanly and visibly.
– Note precise placement and any access codes in the instructions.
– Decide whether Signature Confirmation is worth the cost.
– Place the package near pickup time, not early.
– Keep the tracking number handy.

This set of steps is simple. Do them consistently and your risk of lost or stolen shipments drops markedly.

## What Data You Can Rely On

When the carrier scans at pickup, tracking updates are not a promise of delivery, but they are reliable markers in the chain of custody. Use those scans as timestamps. If there’s an issue later, they’re the key pieces of evidence that link the package to a particular pickup.

If you’ve chosen usps pickup through Click-N-Ship, those scans are what make complaints resolvable. They create a clear trail.

### Filing Claims And Next Steps

If something goes wrong, start with the tracking history and your pickup confirmation. Contact your local post office and provide the tracking number and pickup details. If you paid for signature and it shows delivered without signature, push back. If it shows scanned at pickup and then lost, open a missing mail request. Patience helps; these processes can take days, but a clear paper trail speeds them up.

A final note about expectations: no system is perfect. But when you use the tools Click-N-Ship offers, couple them with clear instructions and sensible timing, you significantly reduce the odds of an avoidable loss.
What Cannot Be Shipped Internationally For Customs Clearance?

what cannot be shipped internationally

Customs officers won’t let everything through. Some things stop at the border not because of bad luck but because they’re illegal to export or import, unsafe, or tightly controlled. If you ship without knowing the rules, your package can be returned, destroyed, or trigger fines — and that’s the mild outcome.

## What Cannot Be Shipped Internationally: Common Categories
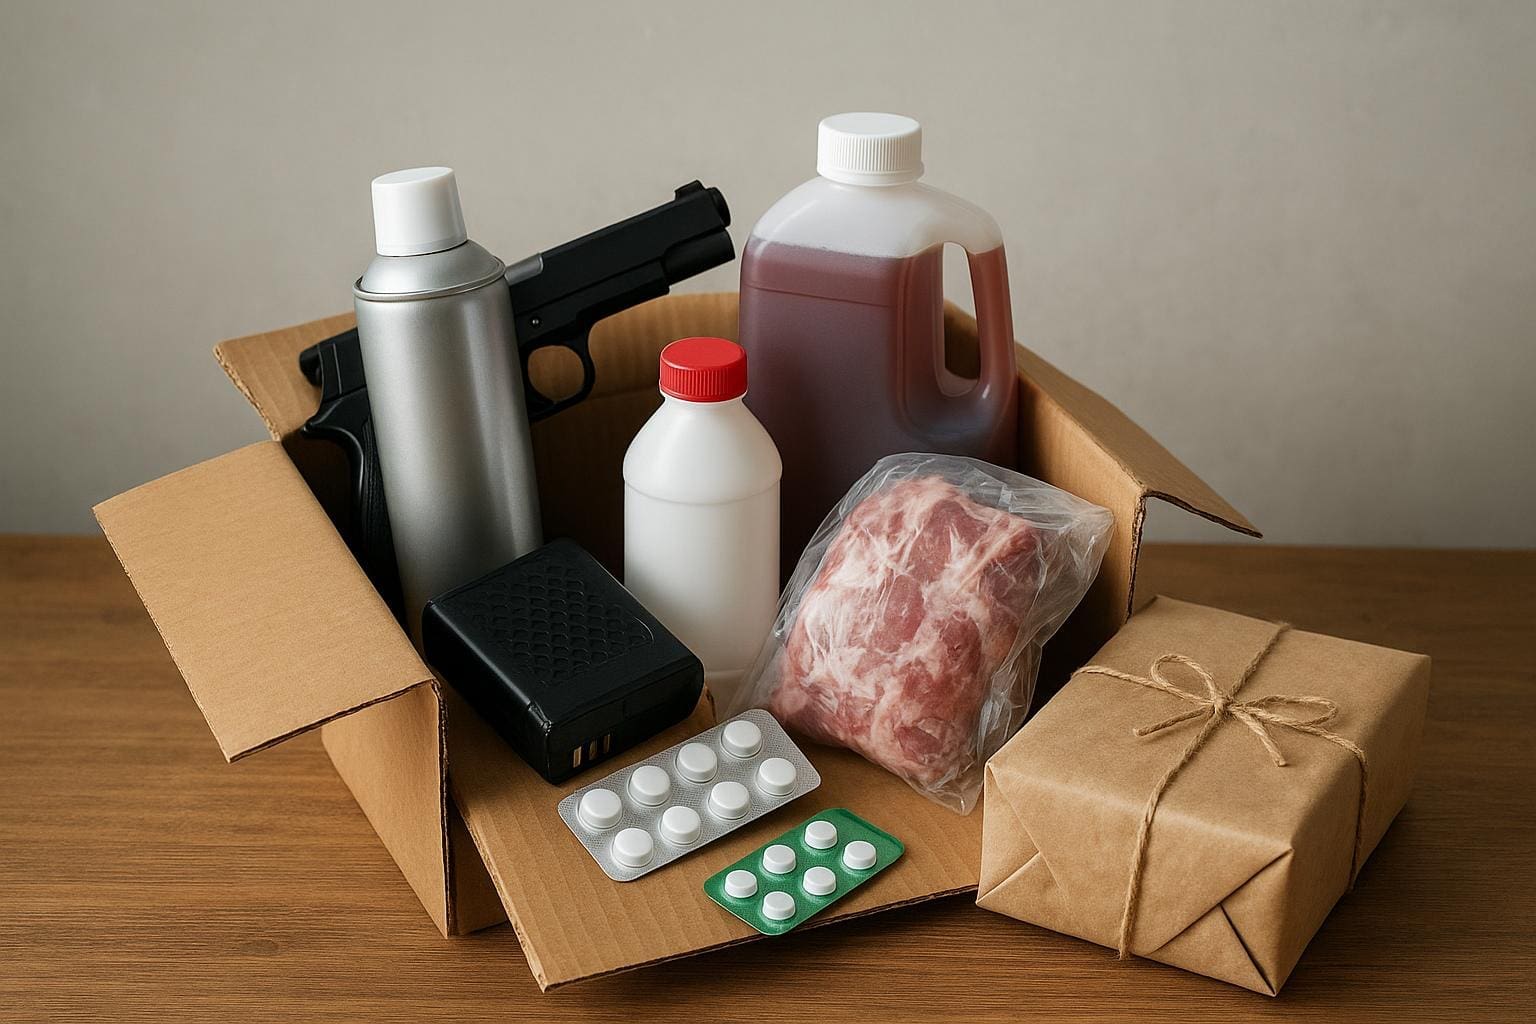
Start with the obvious: dangerous goods. Lithium batteries inside a phone, loose lithium cells, gasoline-powered tools, and aerosol cans are frequently blocked. Even small personal items can get rejected if they’re packed the wrong way or not declared. Other big categories are drugs, weapons, fake brand-name goods, and agricultural products that threaten local ecosystems.

### Dangerous And Hazardous Materials
Lithium batteries top many lists. Airlines and many couriers restrict them because they can overheat and catch fire. Flammable liquids and gases, corrosives like strong acids, and certain chemicals are also risky. Think nail polish remover, spray paint, and industrial solvents. Shipping them often requires special packaging, labeled paperwork, and sometimes a carrier that accepts dangerous cargo.

### Controlled Substances And Weapons
Most countries ban recreational drugs and unlicensed pharmaceuticals. Prescription medication might be allowed with a doctor’s note and correct labeling, but that varies a lot. Firearms, ammunition, certain firearm parts and even some knife designs are restricted or entirely prohibited. Export controls can also cover military-grade items and some tech under arms regulations.

## Where Agriculture And Wildlife Fit In
Plants, seeds, soil, meat, dairy, and live animals are frequently refused because they carry pests or diseases. Countries protect local agriculture fiercely. CITES-listed items — ivory, certain animal skins, and products from endangered species — face strict paperwork or an outright ban. Trying to send a taxidermy trophy or raw hides without permits invites seizure.

### Counterfeit And Cultural Goods
Counterfeit goods and pirated media are classic prohibited items. Sending fake designer bags or unlicensed software risks criminal penalties. Cultural property like archaeological finds or significant artworks may also be restricted; many nations require export permits to prevent looting and illegal sales.

#### Currency, Stolen Property, And Sensitive Information
Large sums of cash, bearer bonds, and stolen items will be stopped. Exporting sensitive technical data or controlled encryption tech can fall under export-control laws even if there’s no physical object moving. Governments sometimes treat data transfer the same as shipping a device.

## How Customs Decide What Cannot Be Shipped Internationally
Customs agencies rely on laws, treaties, and lists that change frequently. They use codes submitted on commercial invoices and electronic manifests to flag banned goods. Carriers screen parcels against their own rules too; FedEx, DHL, and postal services each publish restricted and prohibited lists. So you’re juggling national laws and carrier policies at once.

### Practical Examples
A friend once sent a box of artisanal salami to a relative in Europe; it was returned and destroyed because meat products were banned without veterinary certification. Another person tried to ship a lithium battery pack in checked luggage and was fined. And someone importing a vintage military compass found it required a permit because it was technically a restricted navigation device.

## Dealing With International Shipping Restrictions
First step: check the destination country’s customs site. They list banned items and required permits. Next, consult the carrier’s prohibited items and packaging rules. Some carriers won’t accept certain goods at all, regardless of customs. If you’re unsure, use a customs broker or ask the carrier’s support team.

### Paperwork And Permits
Permits can make an otherwise prohibited item legal. Phytosanitary certificates for plants, CITES permits for wildlife products, export licenses for controlled tech — these things matter. Make sure invoices are accurate and descriptions aren’t vague or misleading. Honesty speeds things up. Also, always get a receipt or tracking number so you can recieve updates and contest seizures fast.

#### Penalties And Risks
Consequences range from delays and extra fees to criminal charges for deliberate smuggling. Packages get seized, fines issued, and reputations damaged. Businesses face bigger fines and potential loss of shipping privileges. Don’t assume small size or low value makes something okay.

## Quick Rules Of Thumb
If the item is dangerous, related to weapons or explosives, involves drugs or wildlife, or could be considered counterfeit, treat it as suspect. If it’s anything that could cross into “controlled” territory — high-tech electronics, defense-related components, dual-use items — get legal or customs advice. When in doubt, don’t ship it until you confirm the rules.

## Where To Find Reliable Information
Start with the destination country’s customs website and your carrier’s guidelines. Look up CITES, relevant export-control lists (like ITAR/EAR in the U.S.), and international postal regulations. A customs broker or experienced freight forwarder can save time and money if your shipment isn’t straightforward.

Keep in mind that “what cannot be shipped internationally” isn’t a short, fixed list you can memorize. It’s a mix of laws, biology, safety, and policy — and it changes.

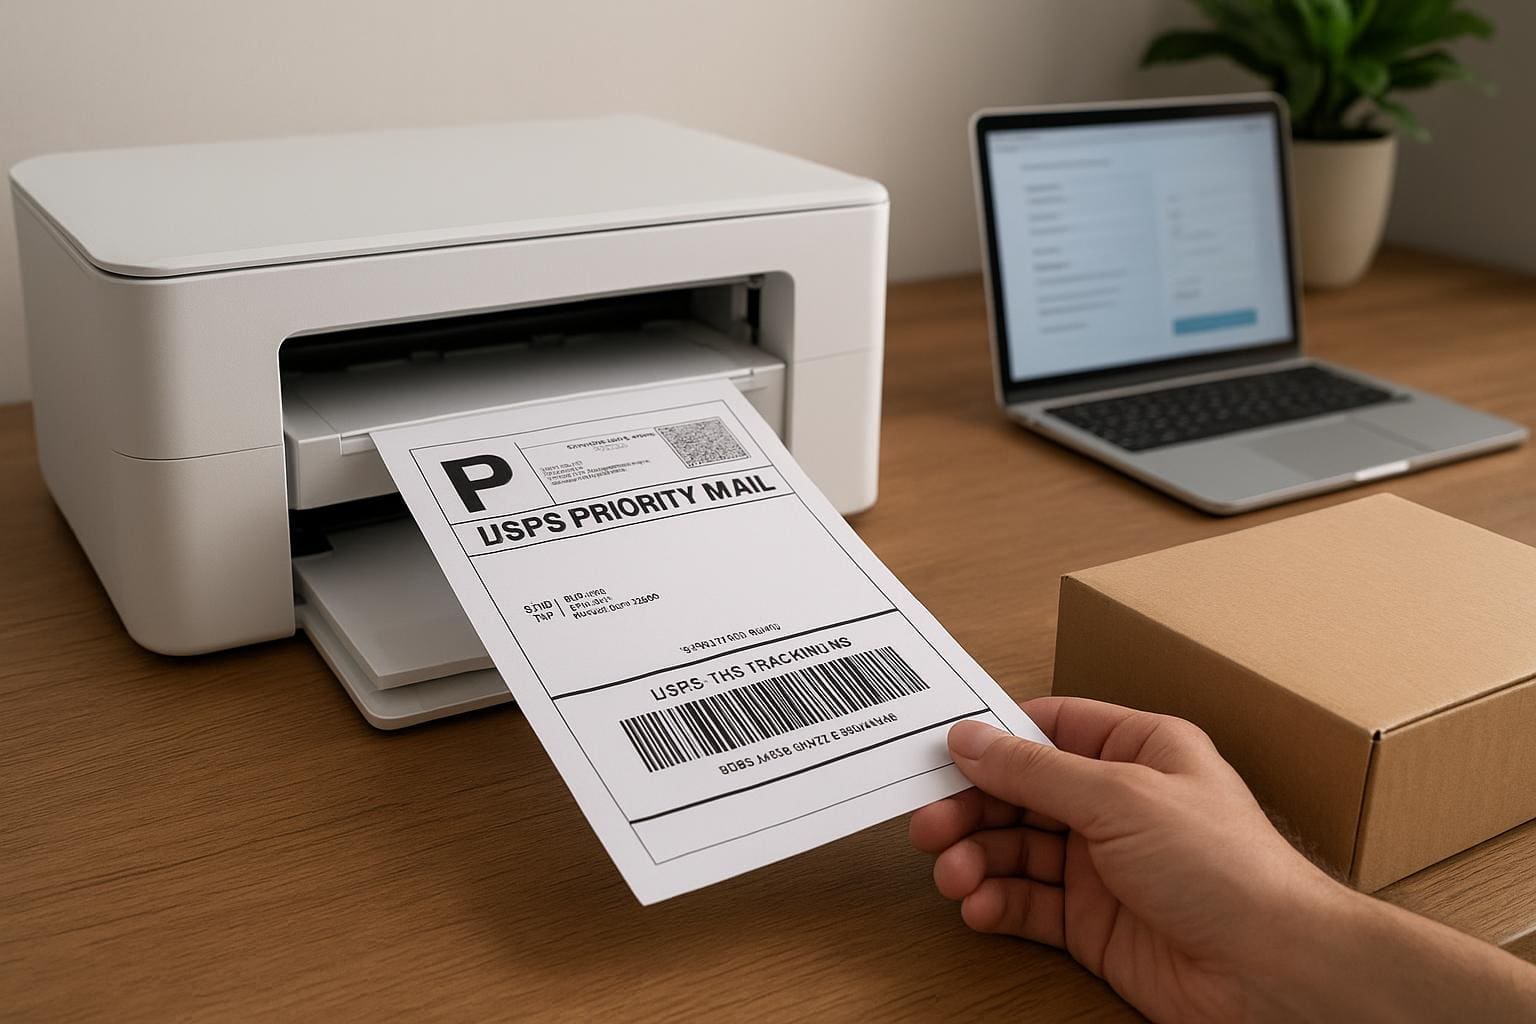
How To Print USPS Shipping Labels At Home And Save Big

how to print usps shipping labels at home

You can stop paying full retail at the post office. Print your own postage, and the numbers quickly add up.

## How To Print USPS Shipping Labels At Home Fast
Printing labels at home is simple once you sort the basics: which service to use, what printer works, and how to save on postage. If you want to know how to print usps shipping labels at home without guessing, the fastest route is picking a platform that gives discounted rates and a printable PDF. Do that and you avoid the counter, save on supplies, and control shipment details from your desk.

### Choose The Right Platform
Start by deciding where you’ll buy postage. You’ve got a few sensible choices:
– USPS Click-N-Ship on USPS.com — straightforward, no third-party fees, great for individuals who ship occasionally.
– Pirate Ship — free account, commercial rates, and no monthly fees. This is where most small businesses shave a lot off postage.
– PayPal, eBay, and ShipStation — good if you already use those services; they’ll integrate with orders.

If your priority is low postage, use Pirate Ship or another service that advertises commercial base pricing. For someone wondering how to print usps shipping labels at home while keeping costs down, commercial rates are the single biggest lever. Also check whether the platform provides a pickup option — that saves you a trip.

### Understand Costs And Service Options
Don’t assume flat-rate boxes are always cheaper. Compare regional rates, Priority Mail Cubic, and First-Class Package Service for light shipments. In many cases, using the right service reduces postage more than any printer choice will. When you buy postage online you can add insurance, signature confirmation, and additional services while still saving over buying at the counter.

## Printer Choices And Supplies For Home Printing
Your printer matters more than most people think.

### Pick The Best Printer For The Job
Thermal label printers (like Dymo or Brother QL series) are fast, cheap per label, and built for continuous shipping. They remove the need for label sheets or tape. The tradeoff: an upfront cost and occasional label roll replacements.

Inkjet or laser printers work fine too. If you use standard 8.5×11 paper, print four labels per page and cut them with a paper trimmer or scissors. For a cleaner workflow, buy 4×6 adhesive label sheets that peel and stick. They fit many thermal printers and some inkjets with proper sheets.

For small volume sellers, a cheap thermal label printer pays for itself within a few months. For occasional shippers, printing on regular paper and taping is OK as long as the barcode prints clearly.

#### Label Sizes And Paper Types
Use 4×6 labels for thermal printers; they’re standard for shipping. For inkjet/laser, 8.5×11 sheets with four labels per page or full-page adhesive labels work. Avoid glossy or coated paper that can jam printers or smear ink. If you ever wonder why a carrier can’t scan your package, check the barcode contrast and placement before sealing the box.

### How To Print Securely And Accurately
Make sure your printer settings are set to “Actual Size” or 100% scaling. Let the PDF drive the layout. Don’t use “Fit to Page” — it can distort barcodes and cause a scan failure. If your platform offers a checkbox for thermal vs. PDF, choose PDF for inkjet and direct thermal for label printers.

## Step-By-Step: Print A Label In Under Five Minutes
1. Create an account with your chosen service and enter your sender information once.
2. Fill recipient address and package details. Weigh your package on a kitchen scale for accuracy.
3. Choose service level and add insurance if needed. Compare prices—sometimes Priority is only a dollar more than First-Class for size.
4. Pay and click “Print Label.” Open the PDF and hit print with scale set to 100%. Peel and stick or trim and tape the label to your box.

If you’re experimenting with how to print usps shipping labels at home, try one package first. Watch the barcode after it prints. If it’s faint, increase print density or switch paper.

### Avoiding Common Mistakes
People often pick the wrong weight or package type and then get reassessed at the facility. Weigh accurately and use measured dimensions when selecting package size. Don’t cover barcodes with tape that wrinkles — it can block scans. If you need a reciept, print or save the confirmation email; some services also offer batch reports for bookkeeping.

## Save Money Beyond Postage
Printing at home is only the start. Consider these practical ways to reduce total shipping spend.

### Smart Packaging Choices
Use lighter boxes and trim excess filler. Reuse boxes when they’re still sturdy; carriers don’t care if the box is reused. For small, heavy items, compare Priority Mail Cubic pricing. For lightweight but bulky items, First-Class might be cheaper.

### Bundle And Automate
If you ship several items per day, set up batch label printing. Most platforms let you upload a CSV to create dozens of labels. That’s an immediate time saver and reduces mistakes. If you sell on marketplaces, integrate order imports to avoid retyping addresses and to speed up the usps label printing process.

### Pickup And Drop-Off Hacks
Schedule free pickup for regular shipments. If you can’t do pickup, drop off at a blue collection box for small packages or use self-service kiosks at USPS locations. Avoid peak hours at the counter; you’ll save time and patience.

### Documenting And Tracking
Save PDFs of your labels for accounting and returns. If a scan is missing, a saved label helps resolve disputes. For small businesses, keeping a spreadsheet of tracking numbers, weights, and service choices helps you spot trends in shipping costs.

## Final Practical Tips Before You Print
Set up defaults for sender address, package type, and signature options so you don’t click the wrong extra service. Keep a small label stock on hand and a paper trimmer near your workspace. Test a few labels at different printers to make sure barcodes scan reliably. There’s a lot of low-hanging fruit when you learn how to print usps shipping labels at home and pair that with smarter packaging decisions.

Is Certified Mail For Legal Documents Required In Court?

certified mail for legal documents

## When Is Certified Mail For Legal Documents Necessary?

People assume the post office is simple: drop a letter, get a signature. But the question here is specific: is certified mail for legal documents required in court? Short answer: sometimes — it depends on the rules of the court, the type of document, and whether you need proof that the other side actually received the papers.

Some courts and statutes explicitly require a particular method of service. Others accept a range of techniques as long as you can prove delivery. For example, certain family law notices or administrative agency filings may demand a signed delivery confirmation. In other situations, a process server or sheriff must personally hand the paperwork to the recipient. You can’t rely on a one-size-fits-all rule.

### How Courts Treat Proof Of Service

Court rules are focused on one thing: did the party get notice? Proof of service shows the judge that the defendant or opposing party had the chance to respond. A signed card from the post office helps, but it’s only one kind of proof.

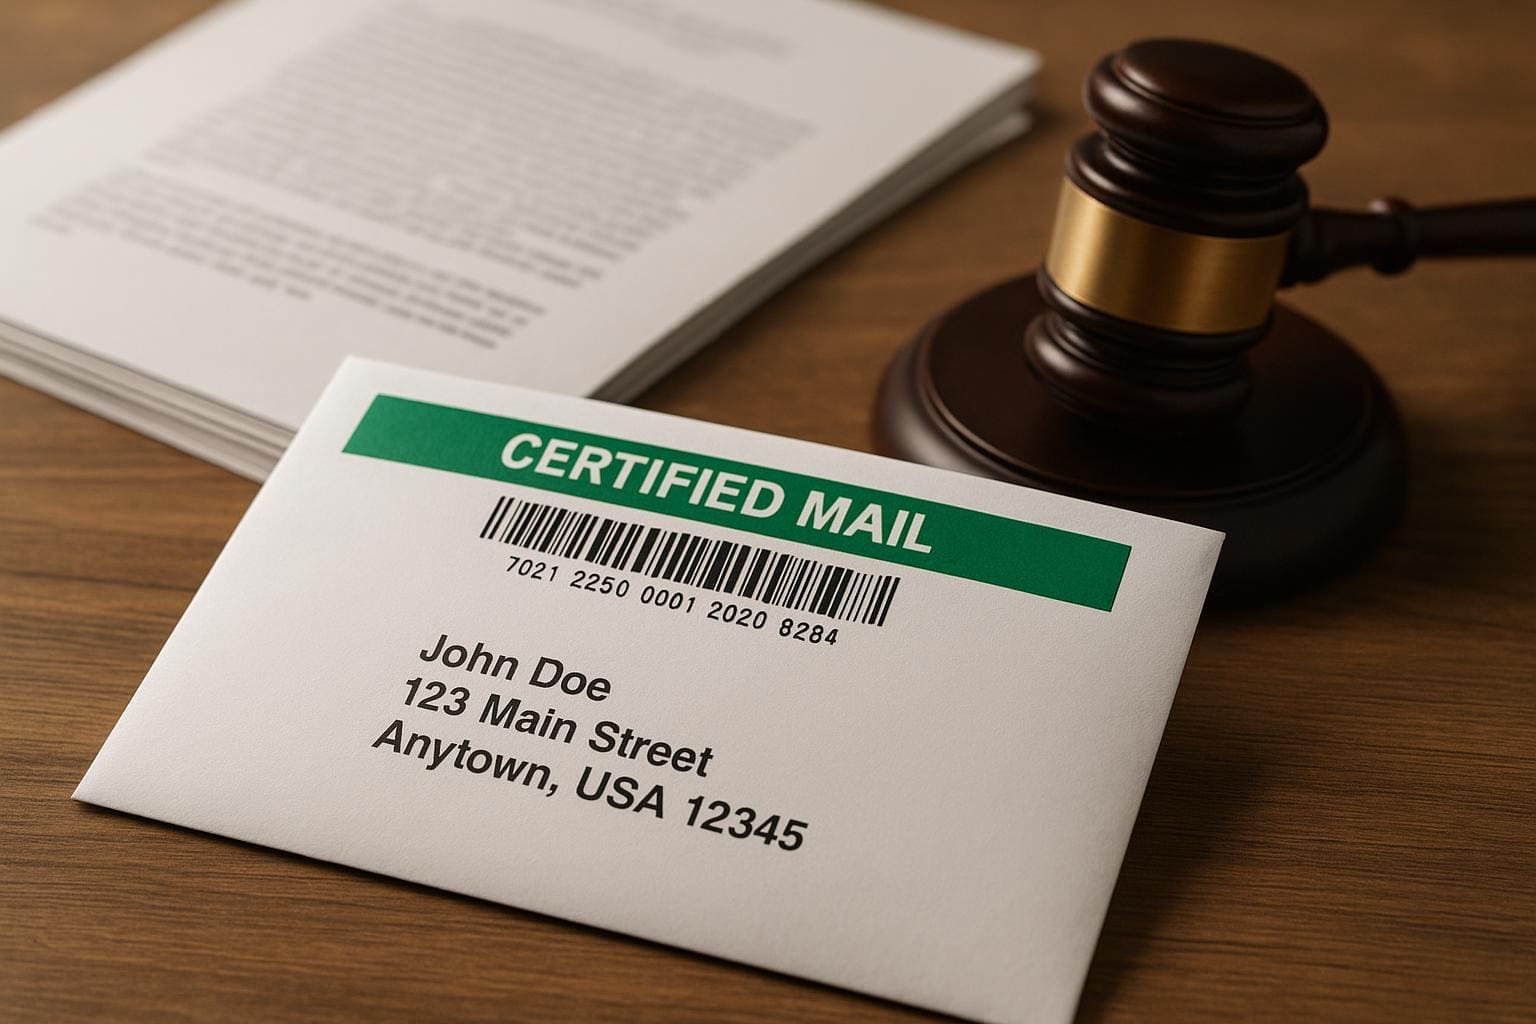
When you use certified mail for legal documents, you get a green-and-white or electronic record showing the item was mailed and, often, a signature showing who received it. That signature can be compelling. But some courts require a sworn affidavit or a formal proof of service that says exactly when and how the papers were delivered. In some jurisdictions, the affidavit must be notarized or filed on a specific form.

If a statute says “personal service” or “served in person,” certified mail alone won’t cut it. If the rules require “service by mail,” they may allow certified mail, regular mail, or even electronic service. Read your local rules carefully. A clerk at the courthouse can tell you which methods are acceptable, but don’t take oral advice as gospel — get it in writing or double-check the rulebook.

### What The Certified Mail Record Shows

Certified mail provides a dated mailing reciept and usually a tracking number. When delivery confirmation is requested, you receive a signed delivery record. Courts like concrete evidence. A signed delivery record ties a name to the event, which is stronger than a plain postage receipt.

But that evidence has limits. The signature might belong to a building manager, receptionist, or a person who never acknowledged the document’s legal importance. The court may allow it, or it might demand personal service. Also, tracking logs can sometimes be incomplete — packages show “delivered” but a signature image may be blurred or missing. If you rely on certified mail for legal documents, preserve every piece of paperwork: the mailing receipt, the tracking printout, and any postal return cards.

## Who Actually Requires Certified Mail For Legal Documents

Different players have different expectations. Administrative hearings, tax authorities, and some civil procedure statutes use mail as their primary service method. Conversely, criminal courts and many eviction proceedings insist on personal service.

A few examples:
– Tax notices and certain fines are often mailed certified because the agency needs a clear paper trail.
– Notices under landlord-tenant statutes sometimes specify mailed notice with proof of service.
– Small claims courts may accept certified mail as proof of service in some counties, but not all.

If you represent yourself, check the statute or the court’s civil rules before mailing. Attorneys usually know the local customs; if you don’t, ask the clerk for the rule citation and pull the relevant statute online.

### When Certified Mail Is The Safer Choice

If the rulebook isn’t crystal clear, choose the method that gives you the best evidence. Certified mail for legal documents is a strong, inexpensive way to show you tried to reach the other party. It costs more than regular postage, but it’s less costly than hiring a process server for every notice.

Think about the stakes. If a missed deadline could cost you a default judgment or a serious sanction, spend the money. Certified mail with a return receipted signature is cheap insurance compared with losing a case because the court says you did not properly serve the papers.

## Alternatives To Certified Mail

Certified mail is useful, but it’s not the only method. Here are commonly accepted alternatives:

– Personal service by a process server or law enforcement. This is the gold standard for many civil and family matters.
– First-class mail with an affidavit of mailing. Some courts accept a sworn statement that you mailed the documents to the correct address.
– Registered mail or restricted delivery. Registered mail adds a chain-of-custody layer. Restricted delivery forces the post office to give the item only to the specific addressee.
– Electronic service. Increasingly, courts permit email service — especially where the parties have agreed or the court has ordered it.

Each alternative has trade-offs. A process server can prove who they handed the papers to, which avoids disputes about whether a receptionist signed. Registered mail is slower and more expensive but creates a tighter trail. Electronic service is fast but only works where the parties consent or the rules allow it.

### Serving Someone Who Avoids Service

Some people try to dodge service. They skip town, avoid the porch, or refuse to sign the mail. If you suspect that, certified mail for legal documents may still help. It shows good-faith effort to notify. But courts also allow substituted service in many cases. That can mean leaving papers with someone of suitable age at the usual place of residence or posting the notice on the door and publishing it in a newspaper.

A judge will look at whether your method gave the person actual notice or was reasonably likely to do so. If you can document your attempts — dates, addresses, copies of returned mail — you increase your chance of success when you ask the court to accept substituted service.

## Practical Steps For Mailing Legal Documents

If you decide to use certified mail, do these things right.

### Prepare A Clean Paper Trail

Make copies of everything before you mail it. That includes the cover sheet, any attachments, and the envelope. Write the recipient’s full name and the address exactly as required by the court rules.

Purchase certified mail with return receipt requested. Keep the receipt stub that shows the tracking number. That stub is the primary proof you took the step to mail the item. If the return card comes back signed, staple that to your copy and file it with the court as part of your proof of service.

### Follow Filing And Timing Rules

Some documents have strict timing windows. Mail delays happen; don’t assume two-day delivery. If the rule requires service a certain number of days before a hearing, mail early enough to account for postal lag.

When you file papers with the court, attach the proof of service form required in your jurisdiction. Often that form asks for the date of mailing, the method, and who received it. Don’t improvise: use the court’s form if one exists. It avoids later arguments about compliance.

### Keep Records And Photographs

In addition to receipts, take a photo of the sealed envelope showing the postage and address. Keep calendar notes of when you bought and posted the certified mail. If the recipient claims they never received the papers, your documentation can rebut that claim.

## Cost, Speed, And Practical Limits

Cost matters. Certified mail with return receipt and delivery confirmation is not free. It’s a modest fee for most people, but it adds up in heavy litigation. Compare this with the cost for a process server or sheriff in your area.

Speed is another factor. Certified mail relies on the postal system, which can be slow. Registered or restricted delivery can add extra days. If time is tight, personal service is usually faster. Also consider reliability: certified mail delivery can be delayed without detailed notice from the post office.

### What If The Mail Is Returned As Unclaimed?

If the post office returns your certified mail as unclaimed, file that card or return envelope with the court and explain your attempts at service. Many judges will permit an alternate method based on that record. Sometimes a second mailing or substituted service will be ordered. The key is to document each step so a judge can see your effort.

## Common Mistakes And How To Avoid Them

Mistake: Relying on a stamped receipt alone. A stamped receipt shows you paid for postage; it does not prove delivery. Always pair it with tracking and a signed return card when possible.

Mistake: Mailing to an old address. Verify addresses before mailing. A forwarded address may not reach the intended recipient for legal notice purposes. If in doubt, do a quick public records search or ask the clerk how to verify.

Mistake: Not filing the proof of service on time. Filing the affidavit or return card late can be the same as not serving at all. Treat service steps as part of the litigation timeline.

Mistake: Assuming certified mail for legal documents is always enough. It isn’t. Read the statute or rule. If personal service is required, use personal service. If the court accepts mail, use certified mail and the proper forms.

### What Judges Look For

Judges want to avoid technical traps that deny a party the chance to be heard. If you can show a reasonable, documented effort to notify the other side, the judge will often allow some flexibility. If, however, you cut corners or fail to follow an explicit procedural requirement, the court may dismiss or delay your case.

Record-keeping is the single thing that separates a defensible mailing from a weak one. Keep every slip, form, and timestamped screenshot of tracking. Include the reciept stub in your filing packet. Those small steps make the difference.

## When To Consult An Attorney

If the stakes are high, get legal advice. Small mistakes in service can cost you a case. An attorney familiar with local practice knows when certified mail for legal documents will work, when you must use personal service, and when an affidavit is required.

An attorney can also handle tricky service situations: serving a corporation, a foreign defendant, or a party who is intentionally evading service. They’ll help you avoid wasting time and money on a service method the court will reject.

Keep in mind that courts vary. What works in one county might not pass muster in another. If you are handling a claim without counsel, a quick consult to confirm the proper service method can save a lot of trouble.

Best Way to Mail Important Documents for Maximum Safety

best way to mail important documents

## Best Way To Mail Important Documents: Practical Guide

If you need to send a birth certificate, a signed contract, a passport, or any irreplaceable paper, the best way to mail important documents is to treat the shipment like a small, valuable package. That sounds obvious, but most mistakes come from treating documents like ordinary letters. Use tracking, require a signature, insure for value, and control the packaging. Do that and you dodge most of the common headaches.

### Choose The Right Carrier And Service

Different carriers handle risk differently. For domestic U.S. shipments, Priority Mail Express and Registered Mail from USPS offer strong tracking and legal proof of delivery. For high-value or time-sensitive items, FedEx Overnight or UPS Next Day Air with signature required is a better bet. Internationally, major couriers are faster and better at customs clearance than postal services.

Which to pick comes down to two things: liability and traceability. If the carrier’s standard liability won’t cover the value of what’s inside, buy additional insurance. If you need evidence the recipient actually got it, require a direct signature. These choices determine the level of protection you’re buying.

### Secure Packaging Beats Fancy Labels

Don’t rely on an ordinary office envelope. Use a document mailer with some rigidity so pages don’t bend, and slip the papers into a smaller inner envelope first. That adds privacy and creates a layer that discourages casual tampering.

Packing checklist:
– A rigid mailer or cardboard-backed envelope
– Inner plain envelope or sleeve
– Tamper-evident tape or security seal
– Clear, legible address label

Wrap the inner envelope so the contents aren’t visible. Don’t write “Important Documents” or list contents on the outside; that attracts attention. Seal the package with tamper-evident tape and, if possible, cover all seams with clear packing tape so anyone opening it will leave obvious signs.

#### Use Tamper-Evident Seals And Labels

Tamper-evident seals aren’t a guarantee, but they make unauthorized access obvious. Use a numbered security label and take a photo of the label before drop-off. That gives you proof if someone claims the package arrived intact when it didn’t.

### Tracking, Signatures, And Proof Of Delivery

The core of the best way to mail important documents is traceability. Tracking lets you see where a package is at every step. Signature requirements force the carrier to hand the package to someone rather than leaving it at a door.

Ask for one of these delivery options:
– Adult or direct signature required
– Return receipt or electronic delivery confirmation
– Delivery exceptions emailed to you

Hold onto the tracking number and the reciept you get at drop-off. Monitor the tracking feed daily and be ready to call the carrier at the first sign of an exception. If a package is delayed or misrouted, early escalation frequently leads to recovery.

### Insure For The True Value And Know Carrier Limits

Standard liability is often small. If the documents have monetary value or are hard to replace, purchase additional insurance. Read the fine print: some carriers exclude certain documents or require a specific declaration to cover them.

For legal documents, the value isn’t just money; it’s time and hassle. Insure accordingly. Keep scans or color photos stored in multiple locations before mailing; that speeds up claims if something goes wrong.

### When To Use Registered Or Certified Mail

Certified mail gives you a record that your mail was accepted and shows who signed for it. Registered mail adds a chain-of-custody process and is handled separately in transit. For items like original wills, deeds, or passport returns, registered mail is often the safest postal choice.

If you need a legal paper trail—proof you mailed something and who received it—use certified or registered services where available. They provide documentary evidence you can use in court or disputes.

### Consider A Courier Or Personal Hand-Delivery For Extremely Sensitive Items

Some documents should never be entrusted to the post. If you’re transferring highly sensitive originals—like certain legal instruments or negotiable assets—hire a professional courier who offers door-to-door service and full chain-of-custody documentation. For local transfers, personal hand-delivery is often fastest and safest.

If cost matters, balance it against risk. Overnight courier fees are high but cheaper than the cost of replacing a lost original or the liability that follows.

#### International Shipments Need Extra Care

When you mail important documents across borders, customs are the wildcard. Declare contents honestly but succinctly. Use courier services experienced with documents; they can prepare paperwork and avoid customs delays. Always check import requirements for the destination country—some governments require notarized translations or extra documentation.

If the documents are time-sensitive, choose a shipping option that guarantees transit times and provides full tracking to the final consignee.

### Minimize Exposure Before And After Mailing

Keep the number of people who touch the documents to a minimum. If you have to mail multiple copies or originals, log who handled each copy and when. Create and keep a short manifest listing what you mailed, serial numbers if applicable, and images of the contents.

Once the recipient confirms delivery, follow up to validate that the documents are intact. If the recipient refuses to sign or accepts but later reports missing pages, having scans, photos, and tracking entries will speed resolution.

### Use Digital Alternatives Where Possible

Sometimes the best way to mail important documents is not to mail them at all. Many institutions accept digitally notarized documents or uploads to secure portals. If the other party accepts electronically signed or certified copies, use encrypted email or a reputable e-signing service. That eliminates transit risk entirely.

But don’t assume a scan replaces an original. For legal or archival needs, the original may still be required. When originals must move, combine digital and physical precautions: send a scanned copy first, then ship the original with the security measures described.

### Practical Habits That Cut Risk

A few small habits save time and trouble:
– Ship early in the week to avoid weekend holds.
– Drop off at a staffed counter rather than an unmonitored box.
– Use discreet packaging with no logos or markings that identify contents.
– Request delivery notifications to multiple email addresses or phone numbers.

Do not leave packages in carrier lockers unless you can retrieve them immediately. Those lockers are convenient but can be targeted by thieves.

### How To Handle A Missing Or Compromised Shipment

If tracking shows a delivery but the recipient denies it, file a claim immediately. Have your scans, receipts, photos of seals, and tracking logs ready. For registered mail, the carrier has extra accountability, which helps. If you purchased insurance, follow the carrier’s claim process and keep records of every communication.

If you suspect fraud or theft, report it to the carrier and local law enforcement. A police report can strengthen an insurance claim and is sometimes required.

### Final Practical Example

Imagine you need to send an original college diploma to an employer across the country. The best way to mail important documents in that case:
1. Make a high-quality scanned copy and save it on cloud storage.
2. Place the diploma in a plain inner sleeve.
3. Put that sleeve inside a rigid mailer and seal with tamper-evident tape.
4. Choose overnight courier with signature required and added insurance.
5. Drop off at a staffed counter, take photo of the receipt, and watch tracking until delivered.

The diploma arrives intact, someone signs for it, and you’ve got scans and photos if anything goes wrong.

Follow these steps and you’ll cut the odds of loss, tampering, or long, expensive fights to get things resolved. Mailing important papers doesn’t have to be nerve-wracking if you pick reliable services, secure the packaging, and keep proof at every step.