Guidelines For Secure Mailing Of Tax Documents Safely

secure mailing of tax documents

If you’re sending W-2s, 1099s, or anything that contains Social Security numbers through the post, assume someone else could intercept it unless you take specific steps.

## Secure Mailing Of Tax Documents: Practical Steps
Secure mailing of tax documents starts before you drop an envelope in a box. Decide whether the information needs to go by physical mail at all. When it does, prepare documents to reduce risk: remove unnecessary personal details, make copies for your records, and use a clear addressing method that won’t advertise the contents.

Use a sturdy, security-tinted envelope that hides text through the paper. Seal it carefully and reinforce corners with clear tape if the contents are thick or folded. For an extra layer, insert the documents into a plain inner envelope before placing them in the outer one. That double-envelope trick defeats casual peeking.

### Preparing Documents For Mailing
Only include what’s required. For example, if you’re sending a tax return to a preparer, don’t include bank statements unless asked. If you must send multiple items, group them logically so no single sheet reveals everything.

Redact or black out unrelated account numbers and personal info that aren’t needed on the recipient’s copy. Keep a digital scan before mailing so you have an exact record. Don’t write “Tax Documents” on the outside. That phrasing invites trouble; prefer a neutral label or simply the recipient’s name and address.

When you’re packaging multiple pages, use a staple or binder clip inside. Unfolded papers move less and are less likely to be damaged. If photocopies are involved, mark them “COPY” in light ink so originals are clearly identified.

### Choosing The Right Postal Service Options
The cheapest stamp isn’t always the safest. For sensitive pieces, choose tracked services. Certified mail with a return reciept creates an audit trail and is appropriate for sending sensitive tax paperwork. Tracking numbers let you confirm delivery and spot stalled packages before they’re a problem.

Private carriers like FedEx and UPS offer signature-required delivery and more granular tracking. Their hold-for-pickup options reduce street-level theft because the recipient collects the package from a secure location. If you use a courier, request adult signature or restrict delivery to a business address during business hours.

Do not rely on standard first-class mail when sending multiple SSNs or full returns. It moves in bulk and offers no delivery confirmation. For high-value or legally required mailings, invest in the additional fees for proven delivery methods.

### Labeling, Addressing, And Handling Best Practices
Print labels when possible. Handwritten addresses can be misread and delay delivery. Include a return address that matches the sender’s official name. If privacy is a concern, use a company or PO Box as the return address instead of a personal home address.

Avoid listing contents anywhere on the outside. Don’t write “Tax Return Enclosed.” Keep labeling neutral. Place fragile or thick packages flat in the collection bin or hand them to a clerk so they’re scanned into the system properly.

If you’re handling multiple recipients, organize mailings in batches and double-check each name and address. A quick cross-check with a spreadsheet reduces misrouting errors.

#### Using Digital Alternatives And Hybrid Approaches
Sometimes a secure portal is a better choice than physical mail. Many tax professionals and services offer encrypted portals designed for tax document transfer. Upload files there and send an email that the documents are ready. If you must email attachments, encrypt the files and send the password via a different channel, like a text or phone call.

Consider hybrid tactics: ship a cover letter or low-sensitivity item by mail and deliver the high-sensitivity file through a secure portal. That approach minimizes the data moving through the postal network while keeping both parties’ workflows intact.

#### Responding To Lost Or Compromised Mail
Act fast if tracking shows a delivery problem. Contact the carrier immediately to open an inquiry. File a theft report with local law enforcement if you suspect deliberate interception.

Notify affected parties and consider placing fraud alerts with credit bureaus. For tax-specific breaches, inform your tax preparer or the IRS when appropriate; they can flag accounts or advise on identity protection steps. Keep records of all communications and claims — you’ll need them for disputes and potential reimbursements.

Secure mailing of tax documents isn’t complicated, but it requires thought and a short checklist: minimize what you send, use opaque inner and outer packaging, choose tracked delivery, and favor signature controls. These are small steps that stop most problems before they start.

If you send tax document mailing frequently, create a repeatable protocol. Tape a copy of your chosen service and addressing standards to the work area. Over time that routine becomes habit and reduces mistakes that lead to identity theft or lost paperwork.

Mail Documents Flat To Prevent Bending In Transit Safely

mail documents flat to prevent bending

If you need papers to arrive exactly as they left your desk, packaging matters more than you think. Envelopes fold, machines twist, and packages get slid around. You can cut most of that risk down with simple materials and a methodical approach that keeps documents flat and readable when they reach the other side.

## Mail Documents Flat To Prevent Bending Without Damage

Mail documents flat to prevent bending by removing slack, adding stiffeners, and choosing a mail class that treats the item as a parcel rather than a flexible envelope. Start by deciding whether the recipient must receive the pages pristine, or merely legible. A stack of invoices? Less risk. A signed contract, original certificate, or fine art print? Treat it like something fragile.

Make the item a sandwich. Put the documents in a protective sleeve, then between two pieces of rigid board. Tape around the edges so the boards can’t shift. Slip that assembly into a rigid mailer or a small box. That simple sandwich is the one thing that will stop a postal worker’s hand or a sorting machine from folding your paper.

### Choose The Right Envelope Or Mailer

Paper envelopes are designed for sheets, but they are not designed to stop bending. A regular number 10 business envelope will protect content from casual scuffs, but not from creases. To really prevent bending mail, pick one of these options:

– Rigid mailers: These are flat, thickboard sleeves sold for photos and documents. They give good protection with little bulk.
– Cardboard-backed envelopes: Thin document sleeves with stiff paperboard built in. Cheap and widely available.
– Small corrugated boxes: Best when you’re sending several pages or thicker items. They resist crushing.
– Flat rate rigid envelopes from carriers: Some services offer sturdy mailers that are treated like parcels.

Whatever you choose, the key is rigidity. Poly mailers and padded envelopes protect from moisture and shock, but they don’t stop creasing unless you add a board stiffener inside.

#### Match Mail Size To Document Size

Cut the stiffeners slightly larger than the document but small enough to fit comfortably in the mailer. For standard 8.5 x 11 pages, cut boards to about 9 x 12. That leaves space for a sleeve and tape without exposing the document to the edges. If you’re mailing legal-size or A4, use matching boards. Oversized backing that extends beyond the envelope increases the chance of catching or tearing in transit.

### Make A Stiffener Sandwich That Won’t Shift

A good sandwich is composed of layers, each with a purpose. Layering achieves two things: it keeps the document flat and prevents local pressure points that cause small creases.

1. Sleeve the document. Use a clear plastic sleeve (polyethylene or polypropylene) for water resistance. For photographs or archival certificates, choose acid-free glassine or archival sleeves.
2. Place the sleeved document on one rigid board.
3. Top with a second board. Align corners precisely.
4. Seal edges with tape so the boards can’t slide.

Use cloth-backed paper tape or wide packing tape for the edges. Run tape all the way around the perimeter, but avoid sticking tape directly to the document. If you do get tape near paper, make sure it only touches the board or the outside of the sleeve.

Keep tape application smooth. Wrinkled tape can create pressure points that show up as creases. If the boards are very thin, reinforce them with an extra layer to prevent flex.

#### Materials That Protect Photos And Certificates

Photos, certificates, and art prints need more than a rigid board. They also need a surface that won’t scratch and an inner layer that prevents movement.

– Use glassine paper between photo and board to avoid sticking or abrasion.
– For anything high-value, add a foam-core sheet as the outer layer and thin acid-free board next to the print.
– Avoid PVC sleeves for long-term storage. They can off-gas and discolor delicate inks.

Remember that lamination changes a document. It might look permanent, but it can complicate notarization or authentication. Don’t laminate legal originals unless you’re sure you want that alteration.

### Choose Carrier Service Based On Handling, Not Just Speed

Next, decide how you want the parcel handled. Carriers differ in how they sort and move items. The fastest service is not always the safest for flat items.

– USPS Priority Mail treats a rigid mailer like a parcel. It often moves quickly and with less folding risk than standard letters.
– FedEx and UPS small-package services keep items moving through parcel aisles and subject them to less bending. They are usually safer for rigid mailers.
– If you use an oversized envelope that meets the postal service’s “flat” category, it may be handled differently by automated machinery. Consider shipping as a parcel if you want to avoid machines.

Add tracking and request a signature for high-value or legal documents. Tracking won’t keep a document flat, but it does give you data if a problem occurs.

### Labeling And “Do Not Bend” Isn’t A Guarantee

Sticking a “Do Not Bend” sticker or writing it on the envelope helps. It tells people how to handle the item. But it is not a guarantee. Machines and human error still exist. Use the sticker as a last line of communication, not your only protective measure.

Place the shipping label flat on the largest rigid surface. Don’t place labels so they obscure important information or are partly on an edge. If authorities need to attach a customs form, provide a separate envelope for those forms and tape it to the outside so the document inside remains untouched.

### Steps To Mail Documents Flat To Prevent Bending (A Practical Sequence)

Follow this practical sequence to mail documents flat to prevent bending reliably:

1. Inspect and prepare the document. Remove staples or paper clips that could cause bumps. Place any loose pages in sequence and sleeve them.
2. Pick appropriate backing boards sized slightly larger than the document.
3. Sandwich the sleeved document between the boards; align carefully.
4. Tape the bundle around the edges to lock boards together.
5. Insert the sandwich into a rigid mailer or small box with minimal extra space.
6. Seal the mailer; label and affix postage on the rigid face.

This process costs a few dollars more than a simple envelope, but it eliminates most bending during transit. For critical items, it’s worth it.

### Addressing Common Document Types

Different kinds of documents need slightly different care.

– Contracts and signed agreements: Use single-thickness cardboards and clear sleeves. Add a copy inside labeled “Copy” so the original stays intact if questioned.
– Certificates and diplomas: Use archival glassine and foam-core outer layers. Consider a small box instead of an envelope for maximum protection.
– Photographs and prints: Glassine next to the print, stiff boards outside, then a waterproof outer sleeve.
– Checks and invoices: These are less sensitive but still deserve a card-backed mailer to prevent creases that could affect scanning.

If you’re sending multiple documents, stack them in order and include a table of contents sheet on top. That sheet can be a buffer too.

#### Avoid Common Mistakes That Cause Bends

People often make simple mistakes that defeat the sandwich idea. Don’t make these errors.

– Leaving slack inside the mailer. If the bundle rattles, it can rotate and end up folded by chance.
– Using a single thin board. Thin boards flex easily and don’t stop heavy folds.
– Taping in a way that allows one corner to detach. A loose corner can get bent by a sorting machine.
– Putting heavy labels or postage directly over the document area. The adhesive and pressure can leave marks.

Fix these and you’ll reduce the odds of bending dramatically.

### International Shipping And Customs Considerations

When sending documents abroad, expect additional handling. Customs clerks may open packages for inspection. To prevent bending mail in international transit, take these steps:

– Use a small box rather than an envelope in many cases. Boxes survive more handling.
– Place customs paperwork in a pouch on the outside. Do not staple it to the document.
– Consider insured or tracked services. If a customs office opens the package, tracking reduces dispute friction.

Be mindful of any rules about sending original legal documents to certain countries. Some governments prefer scanned copies for initial review. When unsure, contact the receiving agency before shipping.

### When To Use Tubes Instead Of Flat Mail

Not every document belongs flat. Posters, architectural plans, and large maps are often safer rolled. If the recipient plans to unroll and frame, mailing in a rigid tube is better. But if flattening is required at arrival, use a tube only when the recipient has the ability to store it under weight until it lies flat. Otherwise follow the sandwich approach.

### Tracking, Insurance, And Proof Of Condition

For valuable or irreplaceable documents, take a few extra steps:

– Photograph the document before packing. Include a ruler or date in the photo to prove condition and date.
– Use tracking and insurance. If something happens, you’ll have recourse.
– Choose delivery services that offer proof of delivery and signed receipts. If your document is time-sensitive, require a signature.

If a recipient claims damage, your photos and a record of packing method strengthen a claim.

### Small Tricks That Help A Lot

A few small habits prevent a lot of headaches.

– Use two boards instead of one. It costs little and reduces the chance of bending.
– Wrap the sandwich in a thin sheet of bubble wrap just at the edges. That cushions knocks while keeping the center flat.
– If using a padded envelope, first insert the sandwiched boards in a thin plastic sleeve to keep moisture away from the edges.
– For multiple similar shipments, create a simple jig to trim boards to size in bulk. It saves time and makes each package consistent.

One final note: people often over-trust labels. My reciept of several “Do Not Bend” envelopes came creased because the internal protection wasn’t there. Labels are communication, not protection.

### When Cost Competes With Protection

If budget is the main constraint, choose your battles. For low-value documents, a sturdy cardboard-backed envelope and careful taping is usually sufficient. For anything irreplaceable, prioritize protection over postage savings. It’s better to spend a few extra dollars than to lose or ruin a one-of-a-kind original.

There’s no single perfect method for every situation. But if you consistently use sleeves, matched boards, a locked edge tape job, and a rigid outer mailer or box, you’ll achieve the aim: mail documents flat to prevent bending and keep the recipient from having to smooth out someone else’s mistake.

Is Certified Mail For Legal Documents Required In Court?

certified mail for legal documents

## When Is Certified Mail For Legal Documents Necessary?

People assume the post office is simple: drop a letter, get a signature. But the question here is specific: is certified mail for legal documents required in court? Short answer: sometimes — it depends on the rules of the court, the type of document, and whether you need proof that the other side actually received the papers.

Some courts and statutes explicitly require a particular method of service. Others accept a range of techniques as long as you can prove delivery. For example, certain family law notices or administrative agency filings may demand a signed delivery confirmation. In other situations, a process server or sheriff must personally hand the paperwork to the recipient. You can’t rely on a one-size-fits-all rule.

### How Courts Treat Proof Of Service

Court rules are focused on one thing: did the party get notice? Proof of service shows the judge that the defendant or opposing party had the chance to respond. A signed card from the post office helps, but it’s only one kind of proof.

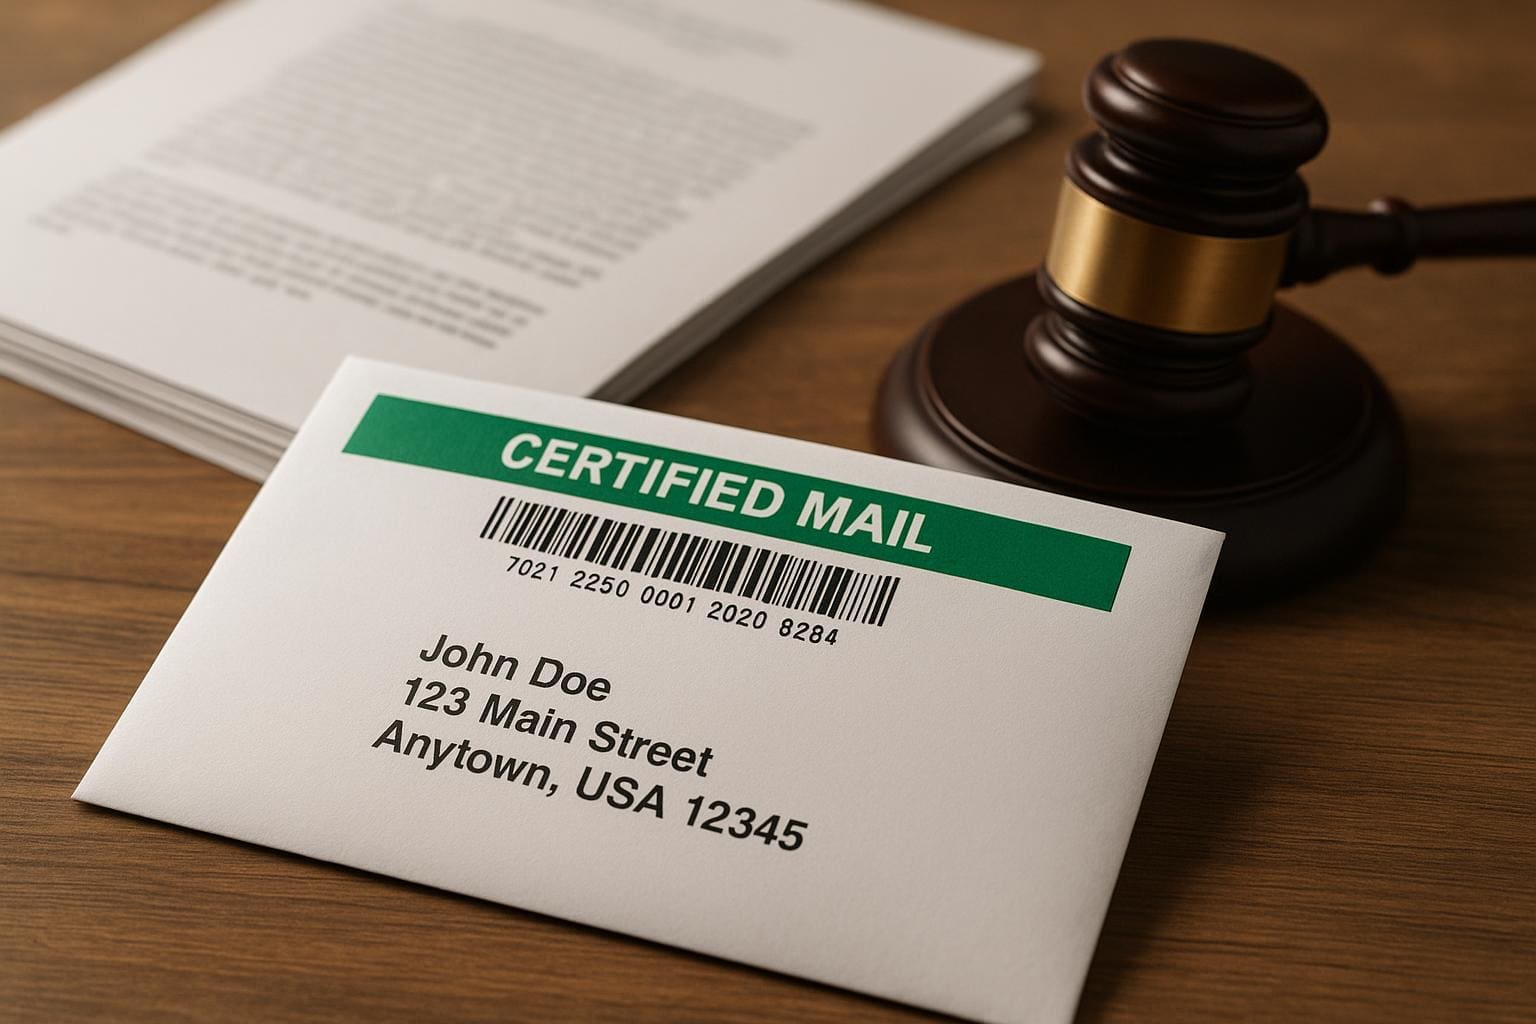
When you use certified mail for legal documents, you get a green-and-white or electronic record showing the item was mailed and, often, a signature showing who received it. That signature can be compelling. But some courts require a sworn affidavit or a formal proof of service that says exactly when and how the papers were delivered. In some jurisdictions, the affidavit must be notarized or filed on a specific form.

If a statute says “personal service” or “served in person,” certified mail alone won’t cut it. If the rules require “service by mail,” they may allow certified mail, regular mail, or even electronic service. Read your local rules carefully. A clerk at the courthouse can tell you which methods are acceptable, but don’t take oral advice as gospel — get it in writing or double-check the rulebook.

### What The Certified Mail Record Shows

Certified mail provides a dated mailing reciept and usually a tracking number. When delivery confirmation is requested, you receive a signed delivery record. Courts like concrete evidence. A signed delivery record ties a name to the event, which is stronger than a plain postage receipt.

But that evidence has limits. The signature might belong to a building manager, receptionist, or a person who never acknowledged the document’s legal importance. The court may allow it, or it might demand personal service. Also, tracking logs can sometimes be incomplete — packages show “delivered” but a signature image may be blurred or missing. If you rely on certified mail for legal documents, preserve every piece of paperwork: the mailing receipt, the tracking printout, and any postal return cards.

## Who Actually Requires Certified Mail For Legal Documents

Different players have different expectations. Administrative hearings, tax authorities, and some civil procedure statutes use mail as their primary service method. Conversely, criminal courts and many eviction proceedings insist on personal service.

A few examples:
– Tax notices and certain fines are often mailed certified because the agency needs a clear paper trail.
– Notices under landlord-tenant statutes sometimes specify mailed notice with proof of service.
– Small claims courts may accept certified mail as proof of service in some counties, but not all.

If you represent yourself, check the statute or the court’s civil rules before mailing. Attorneys usually know the local customs; if you don’t, ask the clerk for the rule citation and pull the relevant statute online.

### When Certified Mail Is The Safer Choice

If the rulebook isn’t crystal clear, choose the method that gives you the best evidence. Certified mail for legal documents is a strong, inexpensive way to show you tried to reach the other party. It costs more than regular postage, but it’s less costly than hiring a process server for every notice.

Think about the stakes. If a missed deadline could cost you a default judgment or a serious sanction, spend the money. Certified mail with a return receipted signature is cheap insurance compared with losing a case because the court says you did not properly serve the papers.

## Alternatives To Certified Mail

Certified mail is useful, but it’s not the only method. Here are commonly accepted alternatives:

– Personal service by a process server or law enforcement. This is the gold standard for many civil and family matters.
– First-class mail with an affidavit of mailing. Some courts accept a sworn statement that you mailed the documents to the correct address.
– Registered mail or restricted delivery. Registered mail adds a chain-of-custody layer. Restricted delivery forces the post office to give the item only to the specific addressee.
– Electronic service. Increasingly, courts permit email service — especially where the parties have agreed or the court has ordered it.

Each alternative has trade-offs. A process server can prove who they handed the papers to, which avoids disputes about whether a receptionist signed. Registered mail is slower and more expensive but creates a tighter trail. Electronic service is fast but only works where the parties consent or the rules allow it.

### Serving Someone Who Avoids Service

Some people try to dodge service. They skip town, avoid the porch, or refuse to sign the mail. If you suspect that, certified mail for legal documents may still help. It shows good-faith effort to notify. But courts also allow substituted service in many cases. That can mean leaving papers with someone of suitable age at the usual place of residence or posting the notice on the door and publishing it in a newspaper.

A judge will look at whether your method gave the person actual notice or was reasonably likely to do so. If you can document your attempts — dates, addresses, copies of returned mail — you increase your chance of success when you ask the court to accept substituted service.

## Practical Steps For Mailing Legal Documents

If you decide to use certified mail, do these things right.

### Prepare A Clean Paper Trail

Make copies of everything before you mail it. That includes the cover sheet, any attachments, and the envelope. Write the recipient’s full name and the address exactly as required by the court rules.

Purchase certified mail with return receipt requested. Keep the receipt stub that shows the tracking number. That stub is the primary proof you took the step to mail the item. If the return card comes back signed, staple that to your copy and file it with the court as part of your proof of service.

### Follow Filing And Timing Rules

Some documents have strict timing windows. Mail delays happen; don’t assume two-day delivery. If the rule requires service a certain number of days before a hearing, mail early enough to account for postal lag.

When you file papers with the court, attach the proof of service form required in your jurisdiction. Often that form asks for the date of mailing, the method, and who received it. Don’t improvise: use the court’s form if one exists. It avoids later arguments about compliance.

### Keep Records And Photographs

In addition to receipts, take a photo of the sealed envelope showing the postage and address. Keep calendar notes of when you bought and posted the certified mail. If the recipient claims they never received the papers, your documentation can rebut that claim.

## Cost, Speed, And Practical Limits

Cost matters. Certified mail with return receipt and delivery confirmation is not free. It’s a modest fee for most people, but it adds up in heavy litigation. Compare this with the cost for a process server or sheriff in your area.

Speed is another factor. Certified mail relies on the postal system, which can be slow. Registered or restricted delivery can add extra days. If time is tight, personal service is usually faster. Also consider reliability: certified mail delivery can be delayed without detailed notice from the post office.

### What If The Mail Is Returned As Unclaimed?

If the post office returns your certified mail as unclaimed, file that card or return envelope with the court and explain your attempts at service. Many judges will permit an alternate method based on that record. Sometimes a second mailing or substituted service will be ordered. The key is to document each step so a judge can see your effort.

## Common Mistakes And How To Avoid Them

Mistake: Relying on a stamped receipt alone. A stamped receipt shows you paid for postage; it does not prove delivery. Always pair it with tracking and a signed return card when possible.

Mistake: Mailing to an old address. Verify addresses before mailing. A forwarded address may not reach the intended recipient for legal notice purposes. If in doubt, do a quick public records search or ask the clerk how to verify.

Mistake: Not filing the proof of service on time. Filing the affidavit or return card late can be the same as not serving at all. Treat service steps as part of the litigation timeline.

Mistake: Assuming certified mail for legal documents is always enough. It isn’t. Read the statute or rule. If personal service is required, use personal service. If the court accepts mail, use certified mail and the proper forms.

### What Judges Look For

Judges want to avoid technical traps that deny a party the chance to be heard. If you can show a reasonable, documented effort to notify the other side, the judge will often allow some flexibility. If, however, you cut corners or fail to follow an explicit procedural requirement, the court may dismiss or delay your case.

Record-keeping is the single thing that separates a defensible mailing from a weak one. Keep every slip, form, and timestamped screenshot of tracking. Include the reciept stub in your filing packet. Those small steps make the difference.

## When To Consult An Attorney

If the stakes are high, get legal advice. Small mistakes in service can cost you a case. An attorney familiar with local practice knows when certified mail for legal documents will work, when you must use personal service, and when an affidavit is required.

An attorney can also handle tricky service situations: serving a corporation, a foreign defendant, or a party who is intentionally evading service. They’ll help you avoid wasting time and money on a service method the court will reject.

Keep in mind that courts vary. What works in one county might not pass muster in another. If you are handling a claim without counsel, a quick consult to confirm the proper service method can save a lot of trouble.

Best Way to Mail Important Documents for Maximum Safety

best way to mail important documents

## Best Way To Mail Important Documents: Practical Guide

If you need to send a birth certificate, a signed contract, a passport, or any irreplaceable paper, the best way to mail important documents is to treat the shipment like a small, valuable package. That sounds obvious, but most mistakes come from treating documents like ordinary letters. Use tracking, require a signature, insure for value, and control the packaging. Do that and you dodge most of the common headaches.

### Choose The Right Carrier And Service

Different carriers handle risk differently. For domestic U.S. shipments, Priority Mail Express and Registered Mail from USPS offer strong tracking and legal proof of delivery. For high-value or time-sensitive items, FedEx Overnight or UPS Next Day Air with signature required is a better bet. Internationally, major couriers are faster and better at customs clearance than postal services.

Which to pick comes down to two things: liability and traceability. If the carrier’s standard liability won’t cover the value of what’s inside, buy additional insurance. If you need evidence the recipient actually got it, require a direct signature. These choices determine the level of protection you’re buying.

### Secure Packaging Beats Fancy Labels

Don’t rely on an ordinary office envelope. Use a document mailer with some rigidity so pages don’t bend, and slip the papers into a smaller inner envelope first. That adds privacy and creates a layer that discourages casual tampering.

Packing checklist:
– A rigid mailer or cardboard-backed envelope
– Inner plain envelope or sleeve
– Tamper-evident tape or security seal
– Clear, legible address label

Wrap the inner envelope so the contents aren’t visible. Don’t write “Important Documents” or list contents on the outside; that attracts attention. Seal the package with tamper-evident tape and, if possible, cover all seams with clear packing tape so anyone opening it will leave obvious signs.

#### Use Tamper-Evident Seals And Labels

Tamper-evident seals aren’t a guarantee, but they make unauthorized access obvious. Use a numbered security label and take a photo of the label before drop-off. That gives you proof if someone claims the package arrived intact when it didn’t.

### Tracking, Signatures, And Proof Of Delivery

The core of the best way to mail important documents is traceability. Tracking lets you see where a package is at every step. Signature requirements force the carrier to hand the package to someone rather than leaving it at a door.

Ask for one of these delivery options:
– Adult or direct signature required
– Return receipt or electronic delivery confirmation
– Delivery exceptions emailed to you

Hold onto the tracking number and the reciept you get at drop-off. Monitor the tracking feed daily and be ready to call the carrier at the first sign of an exception. If a package is delayed or misrouted, early escalation frequently leads to recovery.

### Insure For The True Value And Know Carrier Limits

Standard liability is often small. If the documents have monetary value or are hard to replace, purchase additional insurance. Read the fine print: some carriers exclude certain documents or require a specific declaration to cover them.

For legal documents, the value isn’t just money; it’s time and hassle. Insure accordingly. Keep scans or color photos stored in multiple locations before mailing; that speeds up claims if something goes wrong.

### When To Use Registered Or Certified Mail

Certified mail gives you a record that your mail was accepted and shows who signed for it. Registered mail adds a chain-of-custody process and is handled separately in transit. For items like original wills, deeds, or passport returns, registered mail is often the safest postal choice.

If you need a legal paper trail—proof you mailed something and who received it—use certified or registered services where available. They provide documentary evidence you can use in court or disputes.

### Consider A Courier Or Personal Hand-Delivery For Extremely Sensitive Items

Some documents should never be entrusted to the post. If you’re transferring highly sensitive originals—like certain legal instruments or negotiable assets—hire a professional courier who offers door-to-door service and full chain-of-custody documentation. For local transfers, personal hand-delivery is often fastest and safest.

If cost matters, balance it against risk. Overnight courier fees are high but cheaper than the cost of replacing a lost original or the liability that follows.

#### International Shipments Need Extra Care

When you mail important documents across borders, customs are the wildcard. Declare contents honestly but succinctly. Use courier services experienced with documents; they can prepare paperwork and avoid customs delays. Always check import requirements for the destination country—some governments require notarized translations or extra documentation.

If the documents are time-sensitive, choose a shipping option that guarantees transit times and provides full tracking to the final consignee.

### Minimize Exposure Before And After Mailing

Keep the number of people who touch the documents to a minimum. If you have to mail multiple copies or originals, log who handled each copy and when. Create and keep a short manifest listing what you mailed, serial numbers if applicable, and images of the contents.

Once the recipient confirms delivery, follow up to validate that the documents are intact. If the recipient refuses to sign or accepts but later reports missing pages, having scans, photos, and tracking entries will speed resolution.

### Use Digital Alternatives Where Possible

Sometimes the best way to mail important documents is not to mail them at all. Many institutions accept digitally notarized documents or uploads to secure portals. If the other party accepts electronically signed or certified copies, use encrypted email or a reputable e-signing service. That eliminates transit risk entirely.

But don’t assume a scan replaces an original. For legal or archival needs, the original may still be required. When originals must move, combine digital and physical precautions: send a scanned copy first, then ship the original with the security measures described.

### Practical Habits That Cut Risk

A few small habits save time and trouble:
– Ship early in the week to avoid weekend holds.
– Drop off at a staffed counter rather than an unmonitored box.
– Use discreet packaging with no logos or markings that identify contents.
– Request delivery notifications to multiple email addresses or phone numbers.

Do not leave packages in carrier lockers unless you can retrieve them immediately. Those lockers are convenient but can be targeted by thieves.

### How To Handle A Missing Or Compromised Shipment

If tracking shows a delivery but the recipient denies it, file a claim immediately. Have your scans, receipts, photos of seals, and tracking logs ready. For registered mail, the carrier has extra accountability, which helps. If you purchased insurance, follow the carrier’s claim process and keep records of every communication.

If you suspect fraud or theft, report it to the carrier and local law enforcement. A police report can strengthen an insurance claim and is sometimes required.

### Final Practical Example

Imagine you need to send an original college diploma to an employer across the country. The best way to mail important documents in that case:
1. Make a high-quality scanned copy and save it on cloud storage.
2. Place the diploma in a plain inner sleeve.
3. Put that sleeve inside a rigid mailer and seal with tamper-evident tape.
4. Choose overnight courier with signature required and added insurance.
5. Drop off at a staffed counter, take photo of the receipt, and watch tracking until delivered.

The diploma arrives intact, someone signs for it, and you’ve got scans and photos if anything goes wrong.

Follow these steps and you’ll cut the odds of loss, tampering, or long, expensive fights to get things resolved. Mailing important papers doesn’t have to be nerve-wracking if you pick reliable services, secure the packaging, and keep proof at every step.