How To Format A Mailing Address For Correct Postage

how to format a mailing address

## How To Format A Mailing Address: Postage Rules That Work

Getting mail where it needs to go starts with one thing: the right layout. If you wonder how to format a mailing address so the post office doesn’t stall your letter, you need a few simple habits more than a rulebook. Use the right lines, the right abbreviations, and the right order, and most mail moves without drama.

### When It Actually Matters

There are times sloppy address formatting creates real problems: bulk mailings, packages with automated sorting, international parcels. The machines read the same few fields every time. If those fields are messy, your piece gets routed slowly or returned. Knowing how to format a mailing address is the fast way to avoid those headaches.

### Basic Elements Of A Proper Address

A clean address usually fits on three to four lines. Think of each line as a unit the postal scanner expects to see:

– Recipient name. Put the person or company first. If you’re sending to a department, include that on the same line or the line below.
– Secondary unit or company line. Optional, but use it if the piece needs a department, attention line, or c/o.
– Street address or PO Box. Use the street number and name, plus apartment or suite if applicable.
– City, state or province, and postal code. For U.S. mail that means CITY, ST ZIP+4. For international, finish with the country in capital letters.

For domestic U.S. mail, follow standard USPS state abbreviations (CA, NY) and include the ZIP+4 when available. That four-digit suffix boosts delivery accuracy. If you’re still wondering how to format a mailing address, keep these lines in this order and avoid extra punctuation. That’s not decorative—it’s functional.

### A Few Practical Rules About Abbreviations And Case

Use common abbreviations for street suffixes and directional indicators: St, Ave, Blvd, N, S, NE. Don’t invent variants. Keep the address compact. All-caps used to be recommended, but it’s not required. Legibility matters more than case. If you’re printing labels, use a clear sans-serif font at readable size.

When you’re handling address formatting for a database or label maker, store components in separate fields: name, street, unit, city, state, postal code, country. That makes it easier to validate and to format automatically for different carriers.

### Formatting For Apartments, Suites, And Units

Where to put an apt or suite number? Either on the same line as the street address or directly below it works. Common, reliable forms look like these:

123 Main St Apt 4B
or
123 Main St
Apt 4B

If your label maker forces everything onto one line, place the unit after the street number. Don’t write “4B Apartment” or spell out unnecessary words. Keep the unit clear so sorting software recognizes it. If you use a PO Box instead of a street address, put PO BOX on its own line and don’t mix it with a street number.

### International Mail: Small Differences That Matter

Every country has its own convention. In some places the postal code comes before the city, in others it follows. If you send internationally, format the address the way the destination country prefers. Put the destination country on the last line in uppercase English. For example, send to:

123 Rue de Example
75008 PARIS
FRANCE

If you’re mailing from the U.S. to another country, include the country name to help your local post office route the item. Customs forms and commercial invoices require that same accurate mailing address information.

### What Carriers Look For When Reading An Address

Postal systems and private carriers primarily search for three elements: recipient, delivery point (street plus number or PO Box), and postal code. If those are clear, the rest gets filled in. That’s why knowing how to format a mailing address is more about these anchor points than about filler words.

Keep names short but complete. Avoid extra titles like “Manager of Widgets” unless needed for delivery. Use the legal or commonly used name so databases match. When in doubt, mirror what the recipient uses on invoices or membership cards.

#### Examples

Domestic U.S. example:
Jane R. Lopez
456 Oak Ave Apt 2C
San Diego CA 92101-1234

PO Box example:
Acme Supply Co.
PO BOX 789
Dover DE 19901

International example:
Mr. David T. Jones
Flat 5, 12 High Street
OXFORD OX1 4AA
UNITED KINGDOM

These examples show line order and placement. If you abbreviate street types, keep spellings consistent—don’t write “Rd” on one line and “Road” on another; such inconsistency can make the adress look sloppy.

### Common Mistakes That Slow Or Misroute Mail

People trip up in predictable ways. Watch for these:

– Missing or wrong postal code. A single digit off can add days.
– Mixing PO Box and street address lines. Use one or the other correctly.
– Long lines and messy handwriting. If you can’t read it, the machine won’t either.
– Extra punctuation and clutter. Commas, parentheses, and periods add no value and sometimes confuse OCR.

Also double-check names for spelling. The recipient’s name is part of the delivery match; a misspelling can cause a carrier to pause and verify.

### Tools That Make Formatting Easy

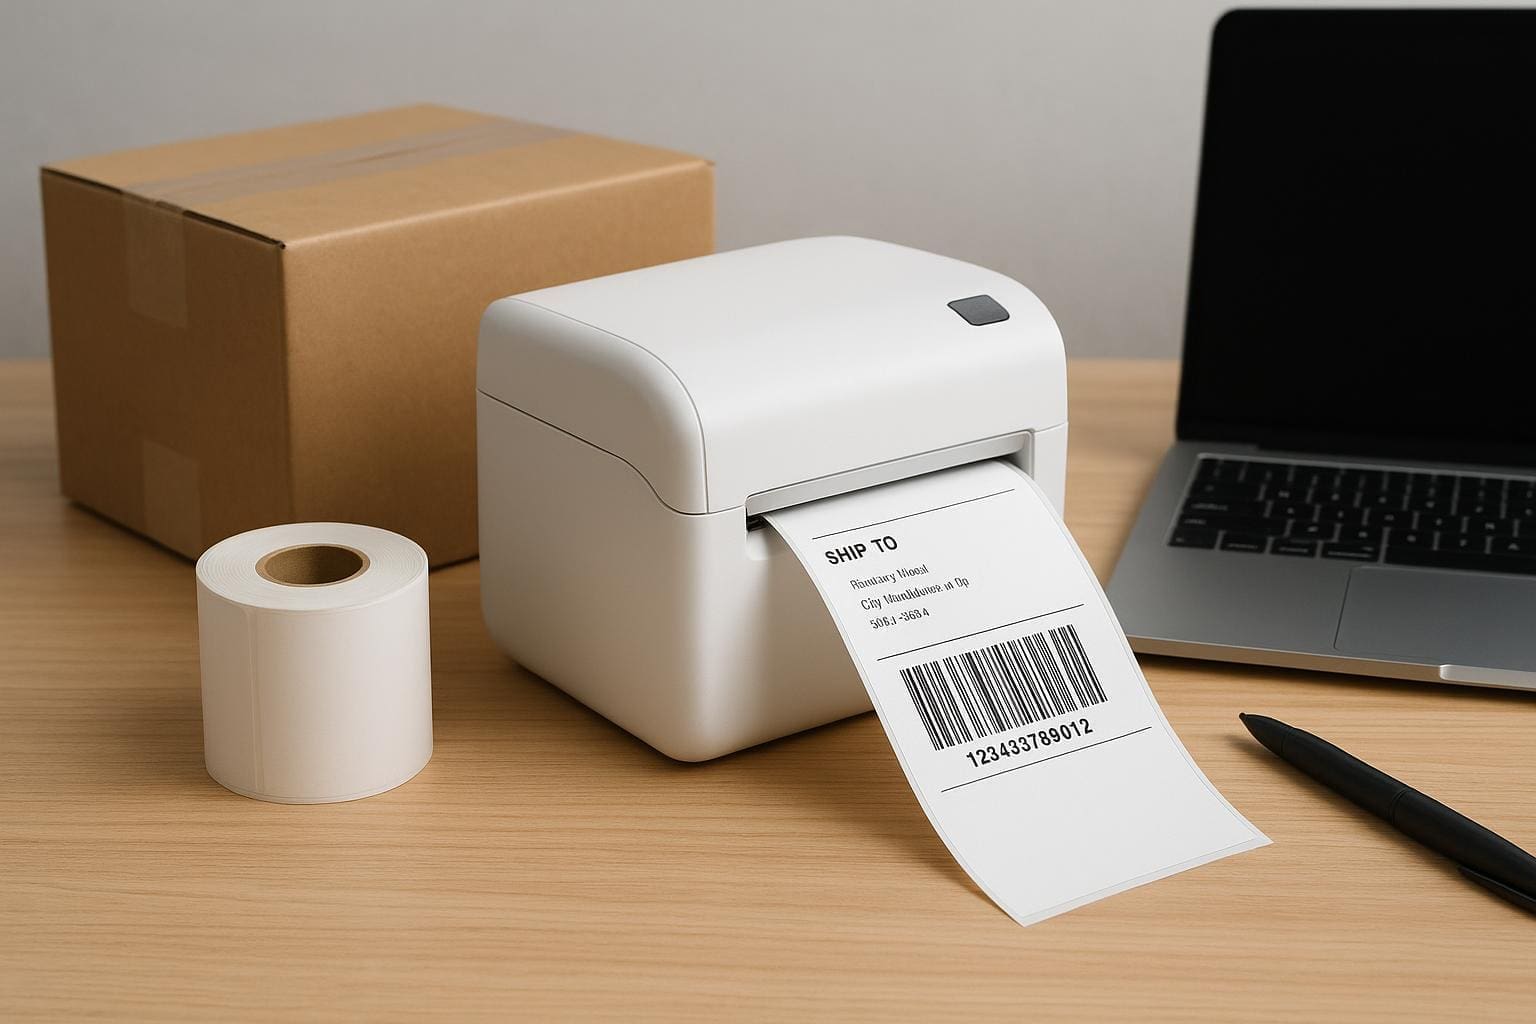
Use the postal service’s address verification tools online when you can. They’ll standardize state codes and append ZIP+4 for U.S. addresses. For bulk mailings, invest in a list-cleaning service to remove duplicates and fix invalid entries. If you prepare labels manually, print them rather than handwriting whenever possible. Printed labels are consistent and machine friendly.

### Packaging And Placement

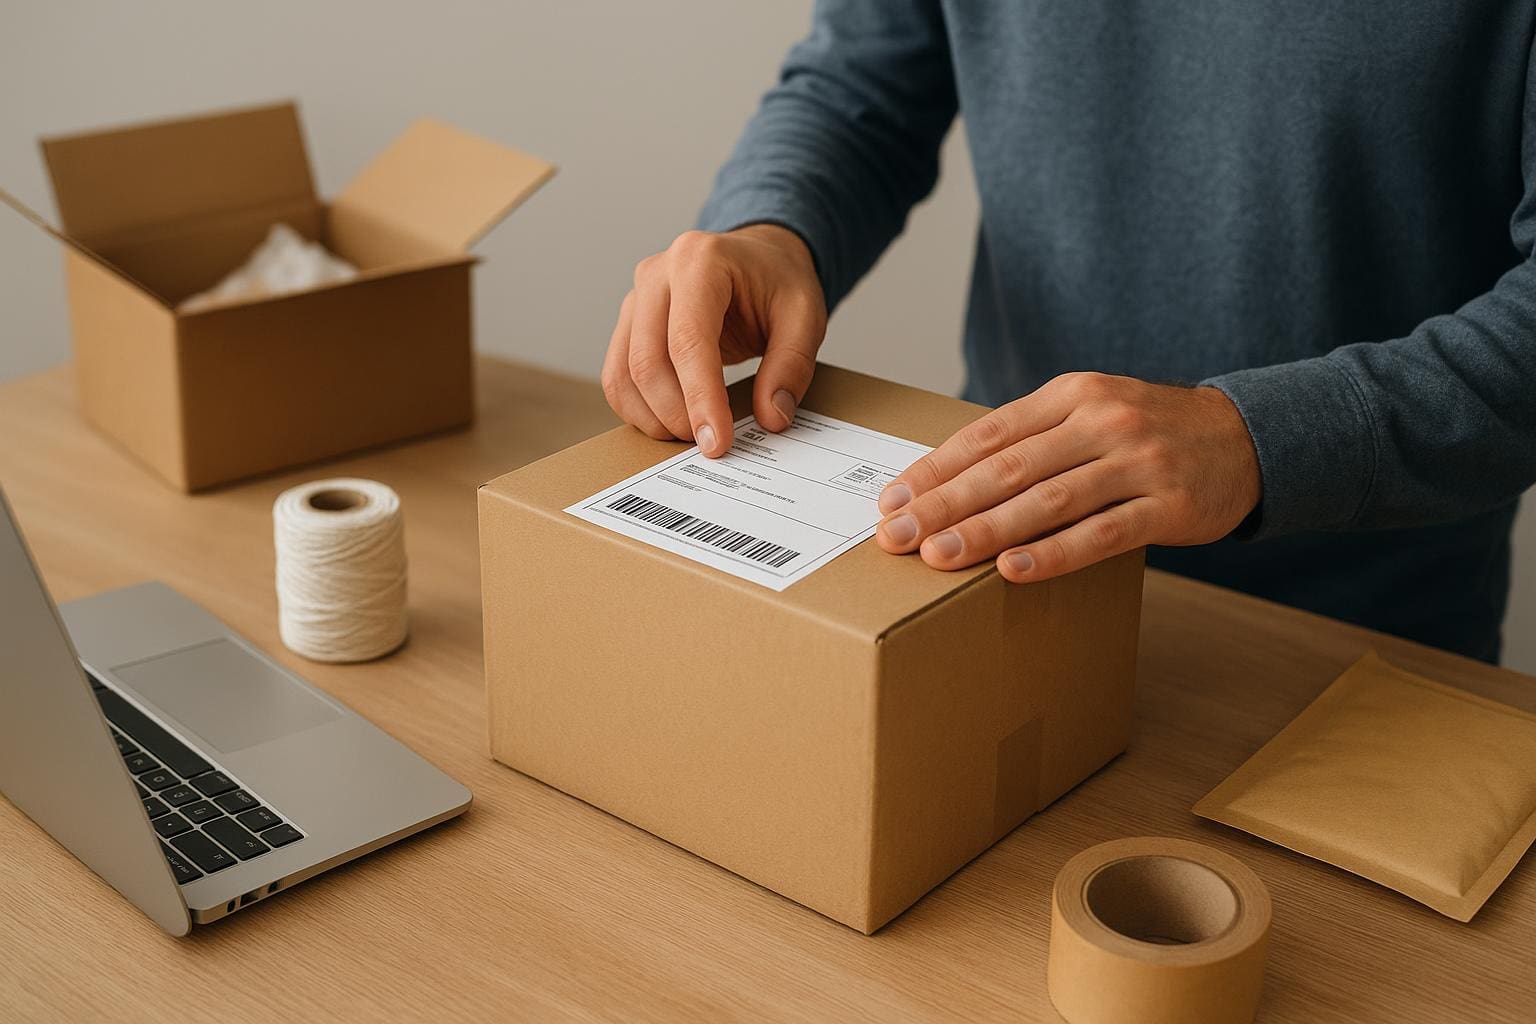
Where you put the address on the package matters. Place the delivery address on the largest flat surface and leave a quiet area around it—no logos or barcodes in the same block. Put the return address in the top-left corner or on the flap. For envelopes with windows, make sure the address aligns and stays visible after inserting the contents.

### A Quick Checklist Before You Send

One last habit: before you seal the envelope or schedule the pickup, read the address one more time. Confirm the postal code, ensure the unit number is present, and check the country name for international items. If you’ve used an automated tool to validate the list, scan for any flagged entries and correct them. That small extra step prevents a lot of rework and customer calls.

If you follow these practical steps, you’ll stop wondering how to format a mailing address and start seeing on-time deliveries instead. Good format, clear printing, and a thoughtful check make the difference between mail that drifts and mail that arrives.

Thermal Printer Vs Inkjet For Shipping Labels Sparks Debate

thermal printer vs inkjet for shipping labels

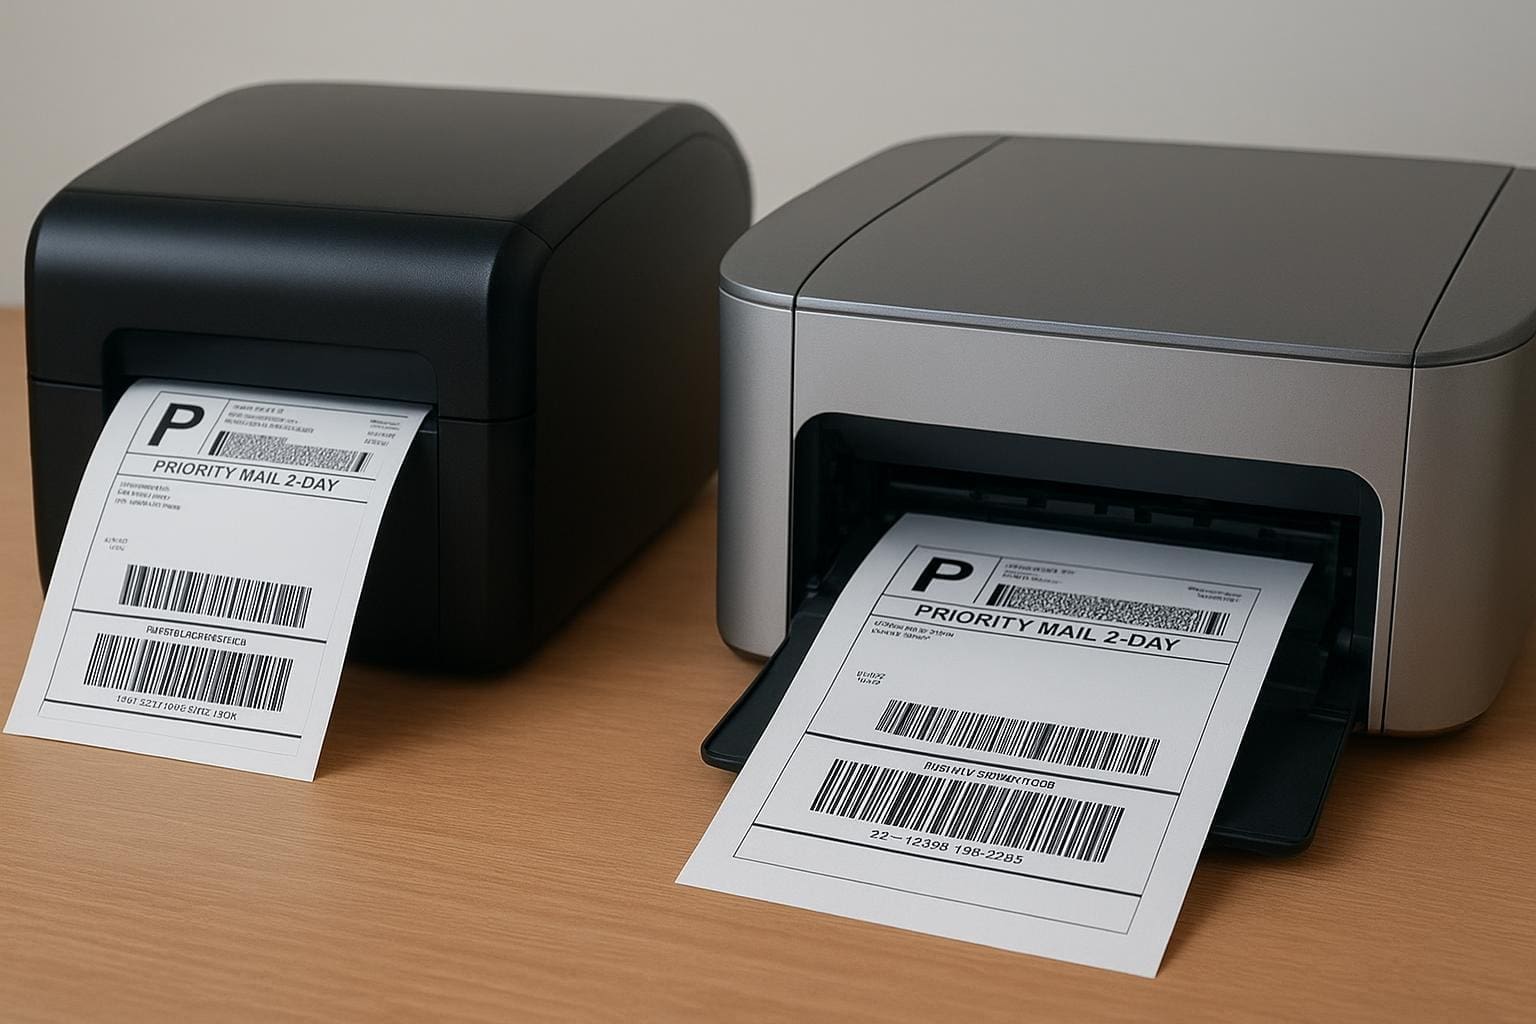
## Thermal Printer Vs Inkjet For Shipping Labels: Real-World Tradeoffs

If you ship even a handful of packages a week, the choice between thermal and inkjet printers matters. It shapes your daily routine, your supply budget, and how often you have to intervene when a label jams or smears. This isn’t a marketing debate — it’s about what actually happens in a packing room at 8 a.m. when a rush of orders hits. I’ll walk through the tradeoffs so you can match the gear to the workload.

### How Thermal Printing Works

There are two practical thermal types you’ll see for shipping: direct thermal and thermal transfer. Direct thermal uses heat to darken a chemically treated label stock. No ink, no ribbon, just heat and paper. Thermal transfer presses a heated ribbon against plain label stock; the ribbon melts ink onto the label for a more durable mark.

Direct thermal is fast and cheap to run. Rolls of 4×6 labels, compatible with most shipping workflows, are inexpensive and easy to change. Thermal transfer makes sense when you need long-term durability or chemical resistance — think labels that must survive outdoor storage, sunlight, or oily surfaces.

Thermal mechanisms are straightforward, and most thermal shipping label printers support common label languages like ZPL or EPL. That matters when you integrate with scanners or warehouse systems. A little setup up front, and the printer becomes nearly invisible on busy days.

### How Inkjet Printers Handle Labels

Inkjet printers spray tiny droplets of ink onto paper. That gives you flexibility: color logos, promotional stickers, or brightly branded packing slips. But that flexibility comes with caveats.

First, ink needs time to dry, and many shipping label stocks—especially glossy or top-coated sheets—don’t accept water-based inks well. Labels printed with standard dye-based ink will smear when they touch moisture or even oils from handling. Pigment inks are better for durability, but they’re usually found in higher-end inkjet machines and can still pale if exposed to heat or sunlight.

There’s also workflow friction. Inkjet label printing often uses sheets or roll-fed label kits meant for home or office users. Those are fine for low volume, but swapping a stack of cut-sheet labels during a busy shift is a pain. Ink costs and head maintenance also creep up—nozzle clogs and frequent cartridge swaps are real.

## Cost, Speed, And Volume Considerations

Choosing between thermal printer vs inkjet for shipping labels usually comes down to volume and recurring expenses. The up-front device price is only part of the picture.

### Per-Label Cost Breakdown

Numbers vary, but here’s a realistic snapshot:

– Direct Thermal: A roll of 4×6 direct thermal labels (around 2,500 labels) might cost $15–$30 depending on supplier and adhesive. That’s roughly $0.006–$0.012 per label. No ink, no ribbon.
– Thermal Transfer: Add ribbon costs—ribbons that handle 2,000–3,000 labels might run $12–$25. Per-label cost creeps up slightly, but durability improves.
– Inkjet: Label sheets or roll labels for inkjets carry a higher per-sheet cost. Add the cost of ink: cartridge yields for heavy label printing can mean $0.03–$0.15 of ink per label, depending on printer efficiency and whether you print color. Combined with label stock, you’re often over $0.05 per label.

If you ship a few dozen packages monthly, the inkjet per-label costs feel small. When you scale to hundreds or thousands per week, thermal quickly pulls ahead on pure cost-per-label math. That’s why most high-volume shippers standardize on a shipping label printer that’s thermal-based.

### Throughput And Downtime

Thermal printers are optimized for continuous label output. A 203 dpi thermal unit will spit out a 4×6 label in under a second. You can stack labels on dispensers, automate peel-and-present workflows, and keep the packing line humming.

Inkjet printers are slower for single labels and are prone to interruptions: drying time, paper misfeeds, nozzle cleaning cycles. If your operation expects spikes in volume — flash sales or holiday rushes — the downtime from maintenance becomes a real cost.

#### Media Costs And Sourcing

Thermal label stock is ubiquitous. Bulk suppliers, online marketplaces, and local office-supply chains all carry compatible rolls. That reliability lowers risk: you can buy five rolls from any vendor and expect consistent adhesive and print quality.

Inkjet label media is more fragmented. You need to choose label material and a compatible adhesive. Some glossy or polymer stocks that look great might actually reject common inks. That adds a procurement headache to the packing process, and it’s where small operators often trip up when they scale.

## Print Quality, Durability, And Barcode Readability

If a barcode doesn’t scan on day one, a lot can go wrong downstream. This is where the “thermal printer vs inkjet for shipping labels” debate becomes technical.

### Durability Tests

Direct thermal labels are sensitive to heat and sunlight — prolonged exposure will fade the print. Thermal transfer labels withstand heat and abrasion much better because the ribbon bonds pigment to the surface. Inkjet labels vary widely: pigment inks on a suitable label can match thermal transfer in resilience, but that requires careful pairing of ink and media. An inkjet with dye inks on standard paper will fail quick if it touches moisture or gets roughed up.

From a practical standpoint, if your packages spend time outdoors, in a hot truck, or in retail backrooms, thermal transfer or pigment-based solutions are safer.

### Barcode Readability

Scanners don’t care about colors or logos; they want sharp contrast and consistent bar widths. Thermal printers, especially at 203 or 300 dpi settings, produce crisp, high-contrast codes that scan reliably at high read rates. Inkjet can achieve high resolution too, but dot gain and variable droplet placement can alter barcode edges. That’s one of those subtle things: an occasional misread is manageable; a 2% read-failure rate across thousands of packages becomes a customer service headache.

## Maintenance, Reliability, And Workflow Integration

Owning a printer is more than its purchase price. Maintenance time, consumables, support, and software add up.

### Common Failure Modes

Thermal printers: the main wear points are the print head and platen roller. Dusty label environments and abrasive label materials accelerate wear. But replacement heads are a known cost and many business-class units have tool-free head replacement and clear error indicators.

Inkjet printers: nozzle clogging is the recurring enemy. If you don’t print daily, water-based inks can dry in the nozzles and force cleaning cycles that waste ink. Professional inkjet models mitigate this, but at a higher price point.

### Software And Driver Support

Most shipping platforms (Shopify, ShipStation, Shippo, Amazon Seller Central) have strong support for thermal label printers. Thermal printers often accept raw label commands and can be fed directly from warehouse management systems. Inkjet printing typically routes through Windows or Mac print drivers, which introduces variability: different drivers, paper handling settings, or scaling options can break layouts unexpectedly.

Integration matters when you scale. A shipping label printer that takes a single network command and outputs a correctly sized label every time saves human steps and reduces errors.

## Environmental And Practical Considerations

People talk about “greener” choices without getting specific. Here’s what actually matters in the packing room.

– Waste: Direct thermal rolls create less packaging waste than individual label sheets and fewer empty cartridges. However, thermal paper uses coating chemicals that have raised concerns; if that matters for compliance, consider sourcing BPA-free thermal stock.
– Energy: Thermal printers use bursts of heat; their idle power is low. Inkjets, especially office multi-function units, can draw more power and have longer warm-up cycles.
– Noise And Footprint: Thermal units tend to be compact and quiet. Office inkjets can be larger and noisier when performing maintenance cycles.

### Color And Branding Tradeoffs

If your brand needs colorful labels, promotional headers, or stylized logos on each shipping label, inkjet wins on flexibility. There are workarounds: print a separate color sticker or use thermal printers that can handle pre-printed media. But those add steps.

For most standard shipping labels where barcode readability and adhesive reliability matter most, color is secondary. If the package aesthetic is a competitive differentiator for you—say, a boutique brand that treats unboxing as a marketing channel—then accept the extra cost and complexity of inkjet or hybrid approaches.

## Which One Should You Buy?

Decide by workload, not by hypotheticals. Here are practical scenarios to guide the choice.

### Best For High-Volume Shipping

If you’re doing hundreds of labels per day, go thermal. A mid-range 203 dpi direct thermal unit or a thermal transfer model will reduce your per-label costs, minimize downtime, and play nicely with fulfillment systems. Look for reputable industrial or commercial models with user-replaceable heads and clear service paths.

A reliable shipping label printer in this context becomes part of the infrastructure — like a scale or a conveyor. Spending a bit more up front saves time and frustration weekly.

### Best For Low-Volume Or Color Needs

If you ship irregularly or need color branding on every label, an inkjet can be the right choice. Stick with pigment-based inks and compatible label media if durability is required. Plan for occasional maintenance and accept that consumable costs will be higher.

For very small operations, the flexibility of printing shipping label printing on a regular office printer may be acceptable. Just be ready for more manual steps and potential reprints.

### Hybrid Approaches

You don’t have to choose one. Some shops use thermal printers for core 4×6 shipping labels and keep a small inkjet for marketing materials, colored tags, or specific one-off jobs. Others outsource color label runs to a print shop and use a thermal shipping label printer for day-to-day fulfillment.

Outsourcing is another valid option. If you ship seasonally or have unpredictable spikes, sending label production to a third-party logistics partner or a fulfillment center can remove the need to invest in high-volume gear.

### Practical Shopping Tips

– Match DPI To Need: 203 dpi is fine for most carriers’ 4×6 labels. Use 300 dpi for smaller barcodes or denser graphics.
– Check Media Specs: Don’t assume any label will work in any printer. Verify compatibility, especially with inkjet media.
– Buy From Known Vendors: Warranty and replacement-head availability matter. The cheapest unit can cost more in downtime.
– Test Before You Scale: Order a small roll of labels, print a few hundred, and try them through your scanner, wrapping, and shipping process. It’s the fastest way to find problems.
– Monitor Consumable Costs: Track your spend over a few months — initial purchase price is the smallest part of total cost of ownership.

A quick practical example: a small e-commerce seller that prints 500 labels a month would see thermal pay off quickly in lower per-label cost and fewer maintenance interruptions. A craft seller printing 30 colorful labels a month might choose an inkjet for its visual flexibility and accept the higher per-unit cost. If you expect to scale, think about moving to thermal before volume becomes a bottleneck.

Recieve a few sample rolls and run them through your typical packing cycle. Test scanning success, check how the print ages in transport, and evaluate how often you have to intervene. Those simple checks will tell you more than any spec sheet.

Shipping Cutoff Times Explained For Ecommerce Shippers

shipping cutoff times explained

You can lose a day’s worth of orders by misunderstanding one simple number: the hour you stop accepting packages for the day. That hour dictates whether a customer gets their order tomorrow or next week. It affects staffing, carrier choices, and how you promise delivery on the product page.

## Shipping Cutoff Times Explained: What They Actually Mean
Call them cutoff times, cut-off windows, or last-pickup hours. Fundamentally, a cutoff time is the latest moment you can hand an order to a carrier and still have it processed under the carrier’s next available transit slot. When people say “shipping cutoff times explained,” they usually want to know two things: how the carrier defines the deadline, and how your internal operations must align with that deadline.

Carriers set a pickup or drop-off time. Your warehouse sets a processing time. Together they create the effective shipping deadline for an order. Miss one side and customers see delays. Miss both and you spend the afternoon answering angry emails.

### Why Cutoff Times Matter For Ecommerce
Cutoff times control expectations. They are the difference between promising “ships today” and actually shipping today. For a 2 PM cutoff, an order placed at 1:45 PM might still ship the same day; an order at 2:05 PM probably won’t. That small gap drives conversion on time-sensitive items: replacement parts, birthday gifts, or products for a weekend event.

Cutoff times also affect costs. Same-day or next-day options require faster carriers and sometimes higher pickup fees. If you miscalculate how many orders you can process before the cutoff, you’ll either pay premium fees to rush fulfillment or miss the carrier cutoff and force customers into slower transit.

### How Carrier Schedules Work
Carriers maintain a calendar of pickup windows and cutoff times that vary by service level and location. For example:
– Ground carriers may have multiple pickups a day in urban centers but only one in rural areas.
– Express services typically have later cutoff times but cost more.
– International shipments have earlier cutoff times because of customs and airline schedules.

When you ask carriers for their published cutoff times, pay attention to the fine print: some times are for retail counter drop-offs, others are for scheduled pickups at your dock. A 6 PM drop-off window at a retail store does not mean your scheduled truck will collect packages then.

### What Shipping Deadlines Mean To Customers
Customers see a promise: “Order by 3 PM for next-day delivery.” That promise bundles your internal processing lag and the carrier’s last-mile schedule. The phrasing matters. Saying “Order by 3 PM to ship today” implies shipment; “order by 3 PM for next-day delivery” includes transit. Confusing the two creates missed expectations and returns.

## Setting Practical Cutoff Times In Your Operations
There’s a difference between an ideal cutoff time and a sustainable one. Setting a 7 PM cutoff because competitors do it is meaningless if you’re a two-person operation. Pick a cutoff that reflects realistic packing throughput, carrier pickup reliability, and buffer for anomalies.

Start by measuring: how long does it take to pick, pack, and label a typical order during peak? Track how that time changes as order volume rises. Use those metrics to build a cutoff schedule that scales. If packing time per order is 10 minutes and you expect 100 orders during the late afternoon, you’ll need 16+ staff or a later cutoff.

### Staffing And Shift Alignment
Align staff shifts to meet your cutoff. If carriers pick up at 5 PM, having the whole packing team leave at 4:45 PM defeats the point. Staggered shifts work: one team handles morning orders, another handles midday spikes, and a final team closes out the cutoff window. Don’t forget time for QA—rushed packing increases errors and returns, which kills margins.

### Technology That Helps
Use your WMS or order management system to enforce time-based rules. Set an order cutoff field that adjusts in real time as inventory and staffing change. Show the customer a dynamic promise: “Order within 1 hour 20 minutes for same-day shipping.” That level of precision reduces complaints and takes pressure off CS teams.

#### Example: Same-Day Fulfillment Flow
A small brand uses a 3 PM cutoff. Workflow looks like:
– 12:00–2:00 PM: Pick and consolidate morning batch.
– 2:00–2:30 PM: Pack and label for morning batch.
– 2:30–3:00 PM: QA and handoff to carrier.
– 3:00 PM: Last-minute orders are processed only if intake queue is below threshold.

If the queue is too long, the system auto-updates the checkout promise to “ships tomorrow,” preventing disappointment.

## Handling Peak Seasons And Exceptions
Cutoff times are not static. Black Friday, holidays, and supply chain hiccups all demand temporary changes to shipping deadlines. Communicate these updates early and loudly. If you need to move a cutoff earlier for the holiday surge, announce it on product pages, checkout, and email.

Carriers often publish holiday schedules weeks in advance. Factor those into a rolling cutoff calendar and automate calendar alerts for your ops team. If a carrier reduces pickups from five times a day to two, you may need to extend your packing shifts or offer fewer same-day options.

### Communicating Shipping Deadlines To Customers
Be blunt about limits. Replace ambiguous phrases like “order soon” with exact times and time zones: “Order by 2 PM ET for same-day processing.” Include a cart-level countdown for customers within the cutoff window; that simple timer reduces confusion and adds urgency without deception.

Also make exceptions visible. If an item is oversized or requires third-party fulfillment, show a separate promise. Customers prefer clarity over false hope.

## Common Mistakes That Cause Missed Cutoffs
– Counting on a single person to be the bottleneck carrier for all pickups. If they’re out sick, the day falls apart.
– Treating carrier retail counter times as pickup promises.
– Not building a buffer for label printing, scale issues, or carrier manifest rejections.
– Leaving cutoff time changes buried in an internal doc. If CS or product pages don’t reflect the reality, customers will notice first.

### Negotiating With Carriers
If you regularly hit a cutoff ceiling, talk to your carrier rep. You might qualify for later pickups, additional truck stops, or dedicated routes. Sometimes a small monthly fee unlocks a later cutoff that pays for itself in saved expedited fees.

#### When To Add A Secondary Carrier
Relying on a single carrier simplifies operations but creates risk. If your volume justifies it, add a backup carrier for late pickups or specific regions. That redundancy smooths out days when a primary carrier’s schedule changes unexpectedly.

## Measuring And Adjusting Cutoff Times
Metrics tell you whether a cutoff is working. Track metrics like:
– Percentage of orders shipped same day versus promised.
– Pickup miss rate (orders that missed carrier cutoff).
– Customer complaints tied to late shipments.

If the pickup miss rate rises above a preset threshold, tighten the cutoff or add staff. If miss rate is near zero and operational costs are low, consider pushing the cutoff later to win more conversions.

### The Human Factor
Don’t forget human ops. Packages get delayed because someone misreads a label, a printer jams, or a truck shows up early. Build simple SOPs and drills. If a carrier shows up an hour early, your team should have a plan to prioritize urgent shipments. Training and small redundancies reduce late shipments more than fancy software.

## Pricing Strategies Around Shipping Deadlines
You can monetize tighter cutoff service. Offer guaranteed same-day for an upcharge. Or provide free standard shipping for orders that meet the regular cutoff and a premium fast option for late orders. Pricing signals help smooth demand spikes: many customers will pay to meet their schedule, which reduces the pressure to extend your free cutoff.

Remember: whatever you promise, operationalize it. “Ships today” only works if your team and carriers agree with the timetable. Keep the wording tight and the calendar honest. If you do that, cutoff times become a competitive advantage, not a daily headache.

A small note for teams setting expectations: test changes in a single region before rolling them out nationally. Real-world fulfillment is full of edge cases—don’t assume one-size-fits-all. And yes, you will still forget to adjust for that one holiday and scramble. It happens to everyone; just document it so it doesn’t happen twise.

Charting the Best Label Printer for Small Business Shipping

best label printer for small business shipping

## Best Label Printer For Small Business Shipping: What To Look For

If you ship packages regularly, the right gear changes everything. The best label printer for small business shipping isn’t the fanciest machine on the block; it’s the one that matches your volume, software, and budget while staying reliable. You want crisp barcodes, sticky labels that don’t peel mid-transit, and a workflow that doesn’t slow you down.

### Picking The Right Printing Technology

There are two main thermal technologies: direct thermal and thermal transfer. Direct thermal printers darken paper with heat. They’re simple, fast, and cheap to run because you don’t need ink or ribbons. They work perfectly for most shipping labels that get scanned within a few months. But they fade if exposed to sunlight or heat for long periods.

Thermal transfer uses a ribbon to transfer ink onto the label. It’s slightly more expensive per label but makes tough, durable labels for long-term storage, outdoor use, or packages that might sit in a hot truck. If you print specialized labels—like vinyl or polyester—you’ll want thermal transfer.

A laser or inkjet can print shipping labels, but they’re slower, require consumables, and often need label sheets that jam. For volume and reliability, go with a thermal model.

### How Much Volume Do You Expect?

Match printer class to daily throughput:

– Occasional (under 50 labels/day): Compact desktop thermal units like Dymo or Brother models work fine. They’re inexpensive and easy to set up.
– Moderate (50–200 labels/day): A 4-inch direct thermal desktop with better cooling and an ethernet option is a pragmatic choice.
– High (200+ labels/day): Industrial or heavy-duty desktop printers from Zebra or TSC. Look for fast print speeds and easy media handling.

Think about peak days. A single busy morning of 300 labels will kill a small unit. Plan for 20–30% headroom.

### Connectivity And Software Compatibility

If you’re printing from shipping platforms—Shopify, ShipStation, Shippo, Etsy, Amazon—you’ll want a printer that plays nicely. USB-only models are fine at a single workstation. If multiple people need access, pick Ethernet or Wi‑Fi. Bluetooth works for mobile packing stations but can be finicky with older phones.

Drivers and integration matter. Zebra, Brother, and Rollo have solid credential histories with third-party shipping software. Lower-cost options can require a workaround like printing to PDF then sending to the printer. That’s tolerable if you only do a few labels, annoying at volume.

### Size, Label Width, And Label Types

Most shipping carriers accept 4×6 labels. That’s the de facto standard for parcel printers, so prioritize 4-inch-wide capability. Smaller wallets and address labels are fine for receipts, but the 4×6 format keeps barcodes readable and layouts consistent.

If you print customs or fragile notices, check whether your label printer supports fanfold or roll labels, perforations, and die-cut sizes. The wrong size leads to wasted labels or clipped tracking numbers.

### Print Quality, Speed, And Cost Per Label

DPI matters for tiny barcode clarity. For shipping labels, 203 dpi is usually enough. If you also print detailed barcodes or small text, 300 dpi helps. Speed is measured in inches per second. A 4 ips (inches per second) printer handles basic needs, while 6–8 ips is better for busier shops.

Cost per label is mostly paper and, if applicable, ribbons. For direct thermal, compare roll lengths and core sizes. Some cheaper printers force proprietary labels that cost more. That alone can change your total cost of ownership in six months.

### Top Picks For Typical Use Cases

Here are a few real-world options that tend to perform well in small business shipping operations:

– Dymo LabelWriter 4XL: Cheap and compact. Good for occasional shipping and small shops. Limited to direct thermal and sometimes finicky with non-Dymo rolls.
– Rollo 4-Inch Commercial Printer: Affordable, works with many shipping platforms, accepts generic labels, and prints fast enough for small-to-medium volumes.
– Brother QL-1100: Reliable, supports 4-inch widths, and integrates smoothly with Windows and Mac drivers.
– Zebra GK420d / ZD420: Built for higher volume. Durable, accurate barcodes, and excellent network options. A better fit if you expect to scale.

These aren’t exhaustive, but they illustrate the trade-offs: price, compatibility, and robustness.

### Practical Setup Tips To Avoid Headaches

Get the right label stock first. Generic rolls are fine, but check the roll diameter and inner core size. Some printers need 1-inch cores; others use 0.5-inch. If you change suppliers, confirm the adhesive and paper type—water-based glues are cheaper but don’t hold up on some surfaces.

Label orientation and margins matter. Set up templates in your shipping software before running a batch. Test with five labels to confirm alignment. Clean the printhead with isopropyl alcohol every few rolls to avoid streaks. If you use direct thermal, avoid storing rolls in sunlight; they’re heat-sensitive and can darken.

### Workflow And Packing Station Setup

A label printer is only part of the system. Place the printer next to your scale and packing tape, not across the room. Use a label dispenser or a peel-off model if you have one person applying labels all day. A small stand or shelf keeps rolls tidy and prevents dust from entering the printer.

If your team prints from different devices, put the printer on ethernet or a shared Wi‑Fi network and use a consistent hostname. For multiple printers, name them by station—“Shipping‑Station‑1”—so staff pick the right device in the software.

### When You Need Durability Or Specialty Labels

If your shipments go to construction sites, plants, or overseas storage, consider thermal transfer with polyester labels and resin ribbons. These survive abrasion, chemicals, and sunlight. Also use specialty adhesives when labels need to stick to rough or curved surfaces. That’s outside what the cheapest direct-thermal machines can reliably deliver.

#### Maintenance And Troubleshooting

Cleaning is simple: power down, gently wipe the printhead, and remove dust from rollers. Avoid abrasive cleaners. Replace worn rollers and checked gears if you notice slippage. When barcodes fail to scan, first check DPI, then label contrast. If printing fades, confirm you’re using the correct label type for direct thermal printers.

If drivers act up after an OS update, check the manufacturer website for new versions. Legacy models may need community drivers or a small middleware tool to talk to modern shipping platforms. It’s irritating but often solvable without buying new hardware.

### Budgeting And Total Cost Considerations

Buy the cheapest printer you can that still meets your needs. But don’t skimp on reliability. A $100 printer might be fine for a side hustle. For a growing storefront, a $300–$600 model often saves headaches and labor time. Factor in labels, ribbons, cores, and spare parts. A single misprinted batch can eat the savings from a cheap model.

The best label printer for small business shipping balances cost, speed, and durability. Match your choice to the real work you do every day, and plan for slightly more capacity than you think you need so you don’t outgrow the unit in six months. Also, remember to keep a spare core and a small supply of labels or you’ll be stuck on a shipping day waiting for a delivery that could have been prevented with one extra roll that was mispelled in the order list.

Beginner Ecommerce Shipping Strategy For Small Business

beginner ecommerce shipping strategy

## Beginner Ecommerce Shipping Strategy Essentials

Shipping can make or break a small shop. Get it wrong and customers abandon carts or leave one-star reviews. Get it right and you reduce cost, speed deliveries, and actually increase repeat buyers. This beginner ecommerce shipping strategy walks through practical choices, trade-offs, and steps you can implement this week.

### Know Your Starting Point

Most small sellers begin with guesswork: they set a flat rate, throw on “free shipping” when sales slow, or let the checkout calculator do the work. That’s fine for getting off the ground. But before changing anything, measure three things for a month: average order weight and size, cost to ship per order, and the percentage of orders that are free shipping. You don’t need a spreadsheet with ten tabs. A simple list of 50 recent orders and the carrier invoice per order will tell you where the leaks are.

#### Practical Metrics To Track

– Average shipping cost per order as a percentage of order value.
– Rate of cart abandonment on the shipping page.
– Frequency of returns and replacement shipments.

Knowing those numbers keeps choices concrete. For example, if shipping eats 12% of your average order value, offering sitewide free shipping without raising prices will kill your margins.

### Set Clear Goals And Constraints

A shipping strategy is not just about saving money; it’s about meeting customer expectations within doable limits. Decide early what you’re optimizing for: speed, cost, convenience, or simplicity. You can’t maximize all four.

If your product is low-cost and margin-sensitive, prioritize low-cost shipping even if it’s slower. If your brand sells premium products, prioritize fast and trackable services. Write down a one-line goal you can return to: “Deliver under $5 average cost for orders under 2 lbs” or “95% of items ship same-day with tracking.”

#### Choose Your Free Shipping Policy

Free shipping increases conversion, but it must be funded. Options that work for beginners:

– Free over threshold: Free for orders above $75. Simple to manage and increases AOV.
– Free for specific SKUs: Offer free shipping on high-margin items.
– Flat-rate shipping: $4.95 across the board. Good when average order value aligns.

Whatever you pick, be explicit on the product page. Customers resent surprises. Also test raising prices slightly to cover shipping rather than eating the cost outright.

### Pick Carriers And Services With Purpose

Carrier choice matters more than people realize. Big carriers offer reliability and broad reach. Regional carriers can be cheaper and faster for local shipments. USPS, UPS, FedEx, and a regional player often form the baseline set.

Start by comparing rates for the most common package weights and destinations you have. Many small businesses overpay because they default to one carrier. Use one shipment per carrier for similar packages and compare the landed cost.

#### Negotiating And Using Discounts

When you hit regular volume, ask carriers for small-business discounts. If you’re not there yet, use an aggregator like Pirate Ship, ShipStation, or your ecommerce platform’s negotiated rates. These services often provide better rates than retail counter pricing and save time.

### Optimize Packaging And Dimensional Weight

Dimensional weight is a silent killer. A bulky box with light content can cost more than the item itself. Measure your most common orders and switch to right-sized boxes or padded mailers. Use poly mailers for soft goods. Use corrugated boxes sized to the product for fragile items.

Minimize packaging layers without sacrificing protection. For fragile items, consider custom inserts that reduce void space and lower DIM weight. If you use inserts, standardize a few sizes so packing time stays predictable.

Be careful with branded boxes. They look great but can add cost and weight. Consider branded tissue and a plain mailer for most orders, reserving branded boxes for premium orders.

Also, one quick tip: double-check shippng settings in your platform. I’ve seen stores charge based on box size rather than the actual package, adding unexpected cost.

### Create Shipping Rules In Your Storefront

Most ecommerce platforms let you create shipping profiles or rules. Use these to match carriers and services to product types and destinations.

Examples:
– Heavy items ship freight only with a third-party carrier.
– Small, lightweight items use USPS First Class.
– Perishable goods are restricted to expedited services and specific regions.

These rules reduce manual errors and customer confusion. Configure handling time clearly. If you say “Ships in 1–2 business days,” be ready to hit that target.

### Automation And Labeling Tools

Buy a label printer and scale. Print labels in bulk. Use shipping software that auto-selects the cheapest viable service based on your rule set. This reduces human error and speeds fulfillment.

Integrations matter. Make sure your platform syncs orders with the label tool and updates tracking automatically. Customers expect tracking emails. Don’t make them hunt for shipment status.

### Decide Fulfillment: In-House Or Outsource

In-house fulfillment keeps you in control and often cheaper at low volumes. Outsourcing to a 3PL makes sense if handling becomes the bottleneck.

If you choose a 3PL, look for:
– Transparent fee structures.
– Clear SLAs for pick, pack, and ship times.
– Easy integrations with your storefront and inventory system.

If you use Fulfillment by Amazon (FBA), factor in their inbound prep rules and storage fees. FBA can dramatically speed delivery but shifts a lot of control away from you.

### Handle Returns Intelligently

Returns drive costs and customer trust. Create a return policy that balances both. For small businesses, a prepaid return label for damaged or wrong items is a must. For buyer’s remorse, consider a restocking fee for oversized items.

Make the process easy: a clear portal, simple instructions, and an expected refund timeline. Track return rates by SKU. High return rates can point to product description issues or fragile packaging.

### International Shipping Basics

International orders add complexity: duties, taxes, customs paperwork. Decide whether you will ship DDP (delivered duty paid) or DDU (duties unpaid). DDP is friendlier for customers but requires you to estimate and collect taxes at checkout.

Limit the number of countries you ship to at first. Choose a few where demand is real, and learn the paperwork. Use harmonized codes and accurate weights to avoid customs delays. Consider working with a broker or a 3PL that specializes in international fulfillment.

### Pricing Tactics That Affect Behavior

Customers respond predictably to shipping language and numbers. Try these experiments:

– Offer a “free shipping” threshold just above your current average order value to nudge behavior.
– Offer cheap expedited shipping as an add-on at checkout instead of making it the default.
– Bundle shipping into the price for a “free shipping” message and monitor conversion.

Be transparent about arrival windows. Saying “2–3 business days plus carrier handling” reduces anxiety while keeping expectations realistic.

### Packaging Should Support The Brand And Logistics

Packaging does double duty. It protects the product and is a marketing touchpoint. But don’t let aesthetics outweigh cost efficiency in early stages.

Use plain, secure packaging for most orders. Reserve premium unboxing experiences for higher-margin items. Track how customers react to packaging changes. If you add tissue paper or stickers, measure whether repeat purchase rates improve.

### Fraud Prevention And Shipping

High-risk orders can cause big losses when charged back. Use fraud filters and checks for high-value shipments. Require signature confirmation for expensive items or offer insured shipping as an option at checkout.

Also, be cautious with orders to new addresses that require rush shipping. A quick phone call can prevent a costly chargeback.

### Test, Measure, Iterate

A shipping strategy is a living thing. Set short experiments and measure results. Examples:

– Increase free-shipping threshold by $10 and watch AOV and conversion.
– Switch a SKU from ground to USPS Priority and measure carrier performance.
– Try a poly mailer for a lightweight product and see DIM weight savings.

Track metrics: shipping cost per order, delivery success rate, return rate, and repeat purchase frequency. Use those to make decisions, not gut feelings.

### When To Invest In Technology

You’ll know it’s time to invest when manual tasks tie up more than a day a week, or when shipping errors cause meaningful revenue loss. Basic investments to consider:

– Label printer and scale.
– Shipping software with multi-carrier support.
– Inventory and order management that syncs with your storefront.

These tools speed ops and reduce mistakes. They often pay for themselves within months if used properly.

### Customer Communication And Expectations

A surprised customer is an unhappy one. Send clear confirmations, packing slips with return instructions, and tracking updates. If an item is delayed, communicate proactively and offer a small credit or expedited replacement when appropriate.

Use consistent language: “Ships within 1 business day” is better than “Usually ships quickly.” People like precise timelines.

### Plan For Scalability

Design your shipping processes with growth in mind. Standardize box sizes, SKU dimensions, and packing workflows so you can scale headcount or move to a 3PL without chaos. Keep packaging SKUs under control. When you change a box size, update all rules immediately.

If you foresee seasonal spikes, line up temporary staff or a fulfillment partner well before peak season. Last-minute scrambling costs money and reputation.

### Common Rookie Mistakes To Avoid

– Using oversized boxes for small items because “it’s easier.”
– Promising shipping speeds you can’t maintain.
– Forgetting insurance on high-value shipments.
– Ignoring returns data for product improvements.

Avoid these and you’ll save time and money.

### Final Operational Tips

Assign one person to own shipping decisions, even if it’s you. Ownership prevents inconsistent policies and keeps rules updated. Conduct a quarterly review of carriers, rates, and returns data. Small adjustments compound over time.

Keep testing. A well-tuned ecommerce shipping strategy reduces wasted spend and improves customer satisfaction, which is exactly what a small business needs to grow.