Guidelines For Secure Mailing Of Tax Documents Safely

secure mailing of tax documents

If you’re sending W-2s, 1099s, or anything that contains Social Security numbers through the post, assume someone else could intercept it unless you take specific steps.

## Secure Mailing Of Tax Documents: Practical Steps
Secure mailing of tax documents starts before you drop an envelope in a box. Decide whether the information needs to go by physical mail at all. When it does, prepare documents to reduce risk: remove unnecessary personal details, make copies for your records, and use a clear addressing method that won’t advertise the contents.

Use a sturdy, security-tinted envelope that hides text through the paper. Seal it carefully and reinforce corners with clear tape if the contents are thick or folded. For an extra layer, insert the documents into a plain inner envelope before placing them in the outer one. That double-envelope trick defeats casual peeking.

### Preparing Documents For Mailing
Only include what’s required. For example, if you’re sending a tax return to a preparer, don’t include bank statements unless asked. If you must send multiple items, group them logically so no single sheet reveals everything.

Redact or black out unrelated account numbers and personal info that aren’t needed on the recipient’s copy. Keep a digital scan before mailing so you have an exact record. Don’t write “Tax Documents” on the outside. That phrasing invites trouble; prefer a neutral label or simply the recipient’s name and address.

When you’re packaging multiple pages, use a staple or binder clip inside. Unfolded papers move less and are less likely to be damaged. If photocopies are involved, mark them “COPY” in light ink so originals are clearly identified.

### Choosing The Right Postal Service Options
The cheapest stamp isn’t always the safest. For sensitive pieces, choose tracked services. Certified mail with a return reciept creates an audit trail and is appropriate for sending sensitive tax paperwork. Tracking numbers let you confirm delivery and spot stalled packages before they’re a problem.

Private carriers like FedEx and UPS offer signature-required delivery and more granular tracking. Their hold-for-pickup options reduce street-level theft because the recipient collects the package from a secure location. If you use a courier, request adult signature or restrict delivery to a business address during business hours.

Do not rely on standard first-class mail when sending multiple SSNs or full returns. It moves in bulk and offers no delivery confirmation. For high-value or legally required mailings, invest in the additional fees for proven delivery methods.

### Labeling, Addressing, And Handling Best Practices
Print labels when possible. Handwritten addresses can be misread and delay delivery. Include a return address that matches the sender’s official name. If privacy is a concern, use a company or PO Box as the return address instead of a personal home address.

Avoid listing contents anywhere on the outside. Don’t write “Tax Return Enclosed.” Keep labeling neutral. Place fragile or thick packages flat in the collection bin or hand them to a clerk so they’re scanned into the system properly.

If you’re handling multiple recipients, organize mailings in batches and double-check each name and address. A quick cross-check with a spreadsheet reduces misrouting errors.

#### Using Digital Alternatives And Hybrid Approaches
Sometimes a secure portal is a better choice than physical mail. Many tax professionals and services offer encrypted portals designed for tax document transfer. Upload files there and send an email that the documents are ready. If you must email attachments, encrypt the files and send the password via a different channel, like a text or phone call.

Consider hybrid tactics: ship a cover letter or low-sensitivity item by mail and deliver the high-sensitivity file through a secure portal. That approach minimizes the data moving through the postal network while keeping both parties’ workflows intact.

#### Responding To Lost Or Compromised Mail
Act fast if tracking shows a delivery problem. Contact the carrier immediately to open an inquiry. File a theft report with local law enforcement if you suspect deliberate interception.

Notify affected parties and consider placing fraud alerts with credit bureaus. For tax-specific breaches, inform your tax preparer or the IRS when appropriate; they can flag accounts or advise on identity protection steps. Keep records of all communications and claims — you’ll need them for disputes and potential reimbursements.

Secure mailing of tax documents isn’t complicated, but it requires thought and a short checklist: minimize what you send, use opaque inner and outer packaging, choose tracked delivery, and favor signature controls. These are small steps that stop most problems before they start.

If you send tax document mailing frequently, create a repeatable protocol. Tape a copy of your chosen service and addressing standards to the work area. Over time that routine becomes habit and reduces mistakes that lead to identity theft or lost paperwork.

USPS Return Address Guidelines For Proper Mail Addressing

usps return address guidelines

If mail comes back undelivered, the return address is the one thing you want to get right. It’s not just a nicety — it’s the fallback plan when an address is wrong, incomplete, or the recipient moved. Get the basics consistent and your outgoing mail behaves a lot better.

## USPS Return Address Guidelines: Placement And Visibility
The USPS return address guidelines are straightforward about where a return address should go and how it should look. For envelopes, upper-left corner on the front side is the standard. For packages, put it on the same side as the delivery address or the upper-left on the top surface. For postcards, the return address belongs on the left side of the address block or the back when space allows.

Visibility matters. Use dark ink on a light background and avoid putting the return address over seams, ridges, or patterned tape. If the mail piece will go through automated sorting, keep the address area clear of decorative elements. The post office won’t refuse irregular mail for flair, but fancy fonts, metallic inks, or translucent labels can slow processing or cause read errors.

### Formatting The Return Address
A return address should be compact and complete. One line for the sender name, one for the street or PO Box, and one for city, state and ZIP. If you can, include the ZIP+4 — it helps with routing and speeds things up.

usps return address guidelines prefer standard state abbreviations (CA, NY, TX) and USPS-recognized street suffixes (St, Ave, Blvd). Abbreviate unit or suite numbers consistently: Apt 4B or Ste 200. Avoid commas and extraneous punctuation when you want machines to read it clearly, although a comma won’t usually break delivery.

#### Address Elements And Order
– Line 1: Sender name or business name.
– Line 2: Street address or PO Box.
– Line 3: City, State ZIP+4.

Using the correct order prevents confusion. If you put the suite line below the city line, carriers may miss it when sorting by hand.

#### Abbreviations And Punctuation
The Postal Service has an address database and a list of standard abbreviations. Using those abbreviations helps sorting software. Minimize punctuation so automated readers have less to interpret. That said, legibility beats rigid rules — ugly handwriting with a comma can still be read, while a machine-smudged label cannot.

## Where To Put It On Packages And Postcards
Packages give you more space, but they also present more problems. Put the return address on the same face as the delivery address or the top-most panel. Keep it at least one inch away from the delivery address and any barcode areas. If you cover the return address with a shipping label, place a new one nearby rather than obscuring the original.

On postcards, space is tight. Place the return address on the left side of the back or along the top-left when the address is on the right. If you’re printing postcards in bulk, run a few test prints and feed them through a sorter to confirm legibility. These small checks often save returns.

### Special Cases: PO Boxes, APO/FPO, And International Mail
Using a PO Box is fine — the USPS return address guidelines accept PO Box numbers just like street addresses. For military mail (APO/FPO), follow the specific APO/FPO format and include the correct ZIP. For international return addresses, write the country name in full on the last line. The rules for formatting still apply: clear, complete, and consistent.

## Business Mail And Automation Considerations
If you send a lot of mail, you’ll want to consider automation. Avoid placing logos, barcodes, or other printing in the lower right quadrant of a mailpiece; that’s where the USPS barcode often goes. If your return address drifts into that clear zone, automated systems may reject or reprint pieces.

Keep return addresses in a single block, left aligned. Machines read predictable patterns better. If you use variable data printing, test with a sample batch. Small variations in font size or ink density can lead to misreads and returned items.

### Return Address Rules For Bulk And Marketing Mail
Return address rules change slightly for bulk mail. The USPS allows a Permit Imprint or business reply mail indicia in certain places, but a physical return address is still recommended unless you’re using a presorted, metered system that specifies otherwise. For marketing pieces, a clearly visible return address reduces the chance a mailpiece will be trashed as unidentified bulk mail.

## Using Labels, Handwriting, And Addressing Software
Stickers are fine. Just make sure they adhere well and don’t curl or come off. If the package will be exposed to moisture or rough handling, print on a weatherproof label. When handwriting addresses, use block letters and a dark permanent pen. Avoid fountain pen ink that can feather on porous cardstock.

Addressing software can normalize addresses, add ZIP+4, and correct misspellings. Run your list through a CASS-certified service when doing mass mailings. That investment reduces returned mail and helps with postage discounts where available.

### When You Can Skip A Return Address
Technically, the USPS does not require a return address on most domestic mail. But skipping it risks losing your mail entirely. The absence of a return address makes it impossible for the Postal Service to return items that are undeliverable as addressed. For legal or time-sensitive documents, always include one.

## Damage, Undeliverable-Mail, And Privacy Concerns
If a mailpiece is damaged, the USPS will try to return it if a return address is present. For privacy-minded senders worried about giving an address, consider a PO Box or a commercial mail receiving agency. Those options provide a return address that doesn’t expose your home location.

If a package is undeliverable due to customs, an incomplete address, or refusal by the recipient, the return address determines whether it comes back to you. That small label in the corner is your insurance policy. Some folks write “Return Service Requested” near the return address to prompt the USPS to forward or return per service rules, but check postage and service requirements first.

## Common Mistakes To Avoid
– Illegible or decorative fonts. Pretty, but unreadable.
– Placing the return address too close to the barcode or postage area.
– Using low-contrast colors that scanners can’t read.
– Forgetting unit numbers or ZIP+4 on apartments and condos.
– Relying on an untested template for bulk jobs.

Following plain, consistent return address rules cuts down on headaches. It helps carriers, sorting machines, and you.

#### Quick Practical Tips
– Print return addresses in a simple sans-serif font, 10-12 point.
– Use black ink on white or light-colored labels.
– Include ZIP+4 when possible.
– Test a sheet through a sorter if doing high-volume runs.
– Use a PO Box or CMRA if you don’t want to expose a home address.

If you remember nothing else, keep the address readable and in the upper-left for envelopes or top panel for packages. Those are the core usps return address guidelines that matter every time you send something out. And yes, one smudged label can cost you a day or two of chasing — so make it legible, or it will be returned, lost, or delayed.

Mail Documents Flat To Prevent Bending In Transit Safely

mail documents flat to prevent bending

If you need papers to arrive exactly as they left your desk, packaging matters more than you think. Envelopes fold, machines twist, and packages get slid around. You can cut most of that risk down with simple materials and a methodical approach that keeps documents flat and readable when they reach the other side.

## Mail Documents Flat To Prevent Bending Without Damage

Mail documents flat to prevent bending by removing slack, adding stiffeners, and choosing a mail class that treats the item as a parcel rather than a flexible envelope. Start by deciding whether the recipient must receive the pages pristine, or merely legible. A stack of invoices? Less risk. A signed contract, original certificate, or fine art print? Treat it like something fragile.

Make the item a sandwich. Put the documents in a protective sleeve, then between two pieces of rigid board. Tape around the edges so the boards can’t shift. Slip that assembly into a rigid mailer or a small box. That simple sandwich is the one thing that will stop a postal worker’s hand or a sorting machine from folding your paper.

### Choose The Right Envelope Or Mailer

Paper envelopes are designed for sheets, but they are not designed to stop bending. A regular number 10 business envelope will protect content from casual scuffs, but not from creases. To really prevent bending mail, pick one of these options:

– Rigid mailers: These are flat, thickboard sleeves sold for photos and documents. They give good protection with little bulk.
– Cardboard-backed envelopes: Thin document sleeves with stiff paperboard built in. Cheap and widely available.
– Small corrugated boxes: Best when you’re sending several pages or thicker items. They resist crushing.
– Flat rate rigid envelopes from carriers: Some services offer sturdy mailers that are treated like parcels.

Whatever you choose, the key is rigidity. Poly mailers and padded envelopes protect from moisture and shock, but they don’t stop creasing unless you add a board stiffener inside.

#### Match Mail Size To Document Size

Cut the stiffeners slightly larger than the document but small enough to fit comfortably in the mailer. For standard 8.5 x 11 pages, cut boards to about 9 x 12. That leaves space for a sleeve and tape without exposing the document to the edges. If you’re mailing legal-size or A4, use matching boards. Oversized backing that extends beyond the envelope increases the chance of catching or tearing in transit.

### Make A Stiffener Sandwich That Won’t Shift

A good sandwich is composed of layers, each with a purpose. Layering achieves two things: it keeps the document flat and prevents local pressure points that cause small creases.

1. Sleeve the document. Use a clear plastic sleeve (polyethylene or polypropylene) for water resistance. For photographs or archival certificates, choose acid-free glassine or archival sleeves.
2. Place the sleeved document on one rigid board.
3. Top with a second board. Align corners precisely.
4. Seal edges with tape so the boards can’t slide.

Use cloth-backed paper tape or wide packing tape for the edges. Run tape all the way around the perimeter, but avoid sticking tape directly to the document. If you do get tape near paper, make sure it only touches the board or the outside of the sleeve.

Keep tape application smooth. Wrinkled tape can create pressure points that show up as creases. If the boards are very thin, reinforce them with an extra layer to prevent flex.

#### Materials That Protect Photos And Certificates

Photos, certificates, and art prints need more than a rigid board. They also need a surface that won’t scratch and an inner layer that prevents movement.

– Use glassine paper between photo and board to avoid sticking or abrasion.
– For anything high-value, add a foam-core sheet as the outer layer and thin acid-free board next to the print.
– Avoid PVC sleeves for long-term storage. They can off-gas and discolor delicate inks.

Remember that lamination changes a document. It might look permanent, but it can complicate notarization or authentication. Don’t laminate legal originals unless you’re sure you want that alteration.

### Choose Carrier Service Based On Handling, Not Just Speed

Next, decide how you want the parcel handled. Carriers differ in how they sort and move items. The fastest service is not always the safest for flat items.

– USPS Priority Mail treats a rigid mailer like a parcel. It often moves quickly and with less folding risk than standard letters.
– FedEx and UPS small-package services keep items moving through parcel aisles and subject them to less bending. They are usually safer for rigid mailers.
– If you use an oversized envelope that meets the postal service’s “flat” category, it may be handled differently by automated machinery. Consider shipping as a parcel if you want to avoid machines.

Add tracking and request a signature for high-value or legal documents. Tracking won’t keep a document flat, but it does give you data if a problem occurs.

### Labeling And “Do Not Bend” Isn’t A Guarantee

Sticking a “Do Not Bend” sticker or writing it on the envelope helps. It tells people how to handle the item. But it is not a guarantee. Machines and human error still exist. Use the sticker as a last line of communication, not your only protective measure.

Place the shipping label flat on the largest rigid surface. Don’t place labels so they obscure important information or are partly on an edge. If authorities need to attach a customs form, provide a separate envelope for those forms and tape it to the outside so the document inside remains untouched.

### Steps To Mail Documents Flat To Prevent Bending (A Practical Sequence)

Follow this practical sequence to mail documents flat to prevent bending reliably:

1. Inspect and prepare the document. Remove staples or paper clips that could cause bumps. Place any loose pages in sequence and sleeve them.
2. Pick appropriate backing boards sized slightly larger than the document.
3. Sandwich the sleeved document between the boards; align carefully.
4. Tape the bundle around the edges to lock boards together.
5. Insert the sandwich into a rigid mailer or small box with minimal extra space.
6. Seal the mailer; label and affix postage on the rigid face.

This process costs a few dollars more than a simple envelope, but it eliminates most bending during transit. For critical items, it’s worth it.

### Addressing Common Document Types

Different kinds of documents need slightly different care.

– Contracts and signed agreements: Use single-thickness cardboards and clear sleeves. Add a copy inside labeled “Copy” so the original stays intact if questioned.
– Certificates and diplomas: Use archival glassine and foam-core outer layers. Consider a small box instead of an envelope for maximum protection.
– Photographs and prints: Glassine next to the print, stiff boards outside, then a waterproof outer sleeve.
– Checks and invoices: These are less sensitive but still deserve a card-backed mailer to prevent creases that could affect scanning.

If you’re sending multiple documents, stack them in order and include a table of contents sheet on top. That sheet can be a buffer too.

#### Avoid Common Mistakes That Cause Bends

People often make simple mistakes that defeat the sandwich idea. Don’t make these errors.

– Leaving slack inside the mailer. If the bundle rattles, it can rotate and end up folded by chance.
– Using a single thin board. Thin boards flex easily and don’t stop heavy folds.
– Taping in a way that allows one corner to detach. A loose corner can get bent by a sorting machine.
– Putting heavy labels or postage directly over the document area. The adhesive and pressure can leave marks.

Fix these and you’ll reduce the odds of bending dramatically.

### International Shipping And Customs Considerations

When sending documents abroad, expect additional handling. Customs clerks may open packages for inspection. To prevent bending mail in international transit, take these steps:

– Use a small box rather than an envelope in many cases. Boxes survive more handling.
– Place customs paperwork in a pouch on the outside. Do not staple it to the document.
– Consider insured or tracked services. If a customs office opens the package, tracking reduces dispute friction.

Be mindful of any rules about sending original legal documents to certain countries. Some governments prefer scanned copies for initial review. When unsure, contact the receiving agency before shipping.

### When To Use Tubes Instead Of Flat Mail

Not every document belongs flat. Posters, architectural plans, and large maps are often safer rolled. If the recipient plans to unroll and frame, mailing in a rigid tube is better. But if flattening is required at arrival, use a tube only when the recipient has the ability to store it under weight until it lies flat. Otherwise follow the sandwich approach.

### Tracking, Insurance, And Proof Of Condition

For valuable or irreplaceable documents, take a few extra steps:

– Photograph the document before packing. Include a ruler or date in the photo to prove condition and date.
– Use tracking and insurance. If something happens, you’ll have recourse.
– Choose delivery services that offer proof of delivery and signed receipts. If your document is time-sensitive, require a signature.

If a recipient claims damage, your photos and a record of packing method strengthen a claim.

### Small Tricks That Help A Lot

A few small habits prevent a lot of headaches.

– Use two boards instead of one. It costs little and reduces the chance of bending.
– Wrap the sandwich in a thin sheet of bubble wrap just at the edges. That cushions knocks while keeping the center flat.
– If using a padded envelope, first insert the sandwiched boards in a thin plastic sleeve to keep moisture away from the edges.
– For multiple similar shipments, create a simple jig to trim boards to size in bulk. It saves time and makes each package consistent.

One final note: people often over-trust labels. My reciept of several “Do Not Bend” envelopes came creased because the internal protection wasn’t there. Labels are communication, not protection.

### When Cost Competes With Protection

If budget is the main constraint, choose your battles. For low-value documents, a sturdy cardboard-backed envelope and careful taping is usually sufficient. For anything irreplaceable, prioritize protection over postage savings. It’s better to spend a few extra dollars than to lose or ruin a one-of-a-kind original.

There’s no single perfect method for every situation. But if you consistently use sleeves, matched boards, a locked edge tape job, and a rigid outer mailer or box, you’ll achieve the aim: mail documents flat to prevent bending and keep the recipient from having to smooth out someone else’s mistake.

Apartment Address Format USPS Explained for Correct Mails

apartment address format usps

## Apartment Address Format USPS: How To Write It Right

If a package or letter never shows up, the first place to look is the line that tells the carrier where to leave it. The postal system is strict about where each piece of information goes. Use the apartment address format usps and you’ll cut down on misdelivered or returned mail.

USPS has rules for a reason: machines read addresses first, humans handle exceptions later. Put the unit designator in the wrong spot or misspell the street number and automation will route it wrong or spit it back. Below I’ll walk through the practical rules, give real examples, and show how to handle weird cases like multi-building complexes, PO Boxes, and online forms.

### Why Format Matters

Machines and scanners are part of every step in sorting. They look for patterns: number, street name, unit designator, city, state, ZIP. If your apartment number is buried or has unusual punctuation, it may not register. That’s when mail ends up delayed or returned. Using the correct apartment address format usps makes the address easy for automation and for the carrier when they’re on the route.

## Basic Rules For Apartment Lines

### Put The Apartment On The Same Line When Possible

USPS prefers the secondary unit designator on the same line as the street address. That means this is good:

123 Main St Apt 4B

and this is even better for automation:

123 MAIN ST APT 4B

Avoid putting the apartment in parentheses, after a comma, or on the line with the city. Keep it with the street number and name.

### Use Standard Unit Designators

Use APT, UNIT, STE, BLDG, FL, or # where appropriate. A few examples:

– APT 4B
– UNIT 12
– STE 200
– BLDG 3
– FL 2

Don’t invent words like “Room” or “ApartmentNo.” Stick to the standard USPS abbreviations so sorting systems and carriers instantly recognize the meaning.

### No Punctuation, All Caps Works Best

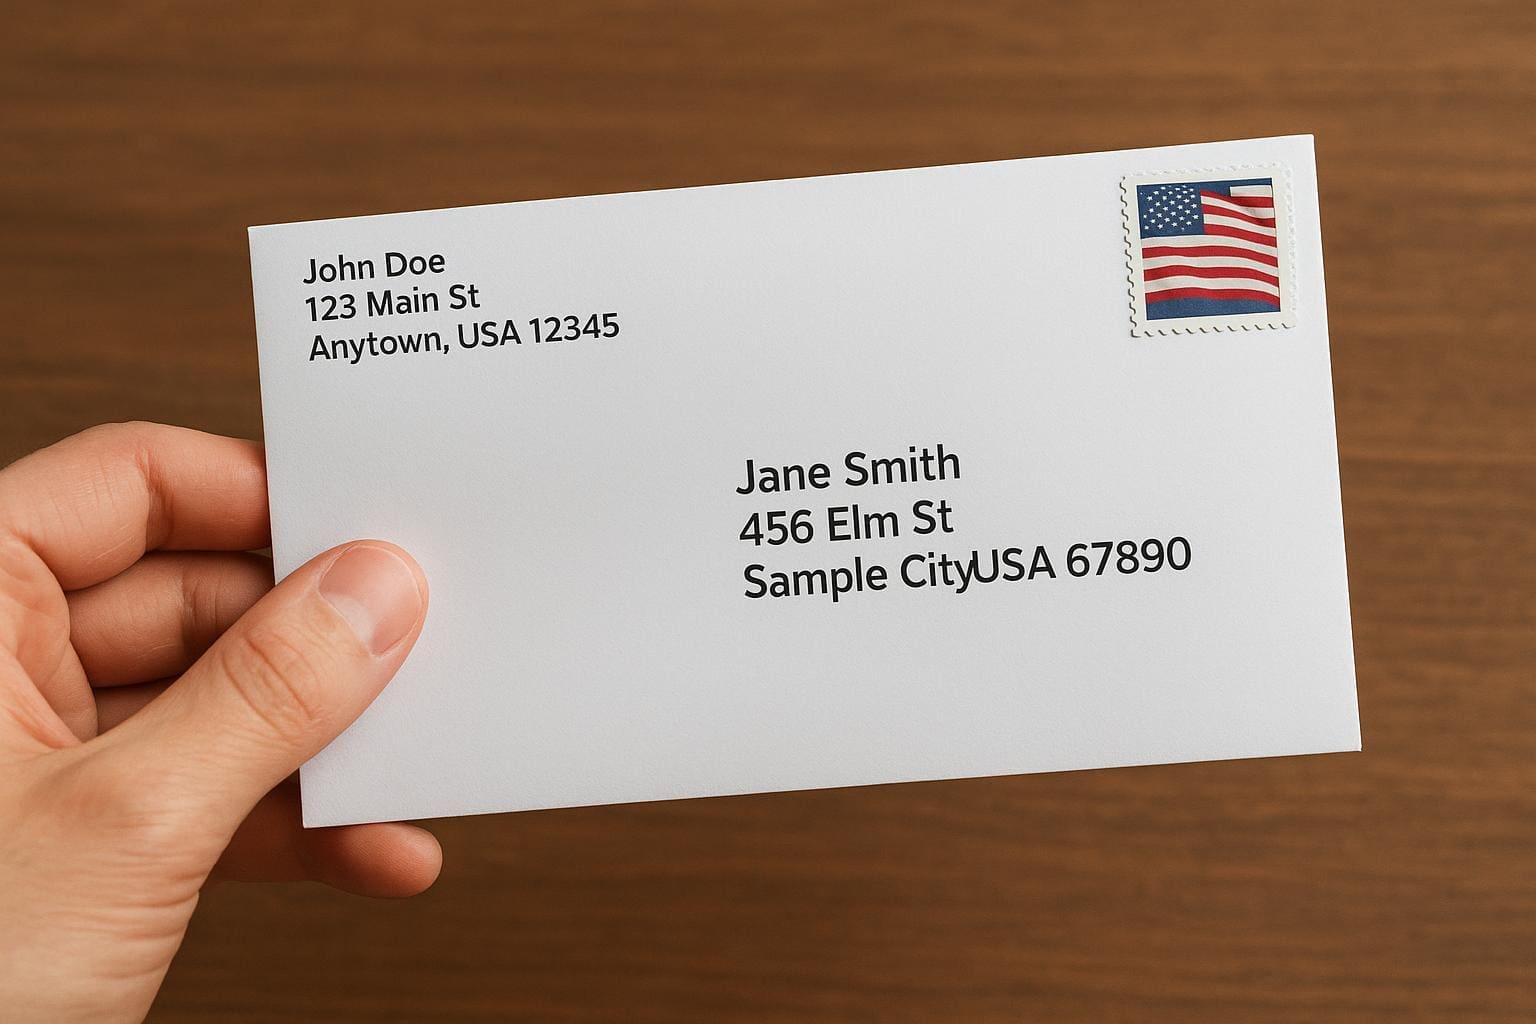
USPS addressing guidelines recommend no punctuation. Commas and periods can confuse optical character recognition. Capital letters are recommended for machine readability, though your envelope won’t be rejected for lower case. An ideal formatted line looks like:

JOHN DOE
123 MAIN ST APT 4B
SPRINGFIELD IL 62704-1234

Use the ZIP+4 when you can; it reduces ambiguity.

## Examples: Correct Vs Incorrect

### Correct
JOHN DOE
123 MAIN ST APT 4B
SPRINGFIELD IL 62704-1234

### Incorrect
John Doe, 123 Main Street, Apt. #4B, Springfield, IL 62704

The second version has punctuation and long forms that machines might not parse cleanly.

## Filling Online Forms: When There’s A Separate Apartment Field

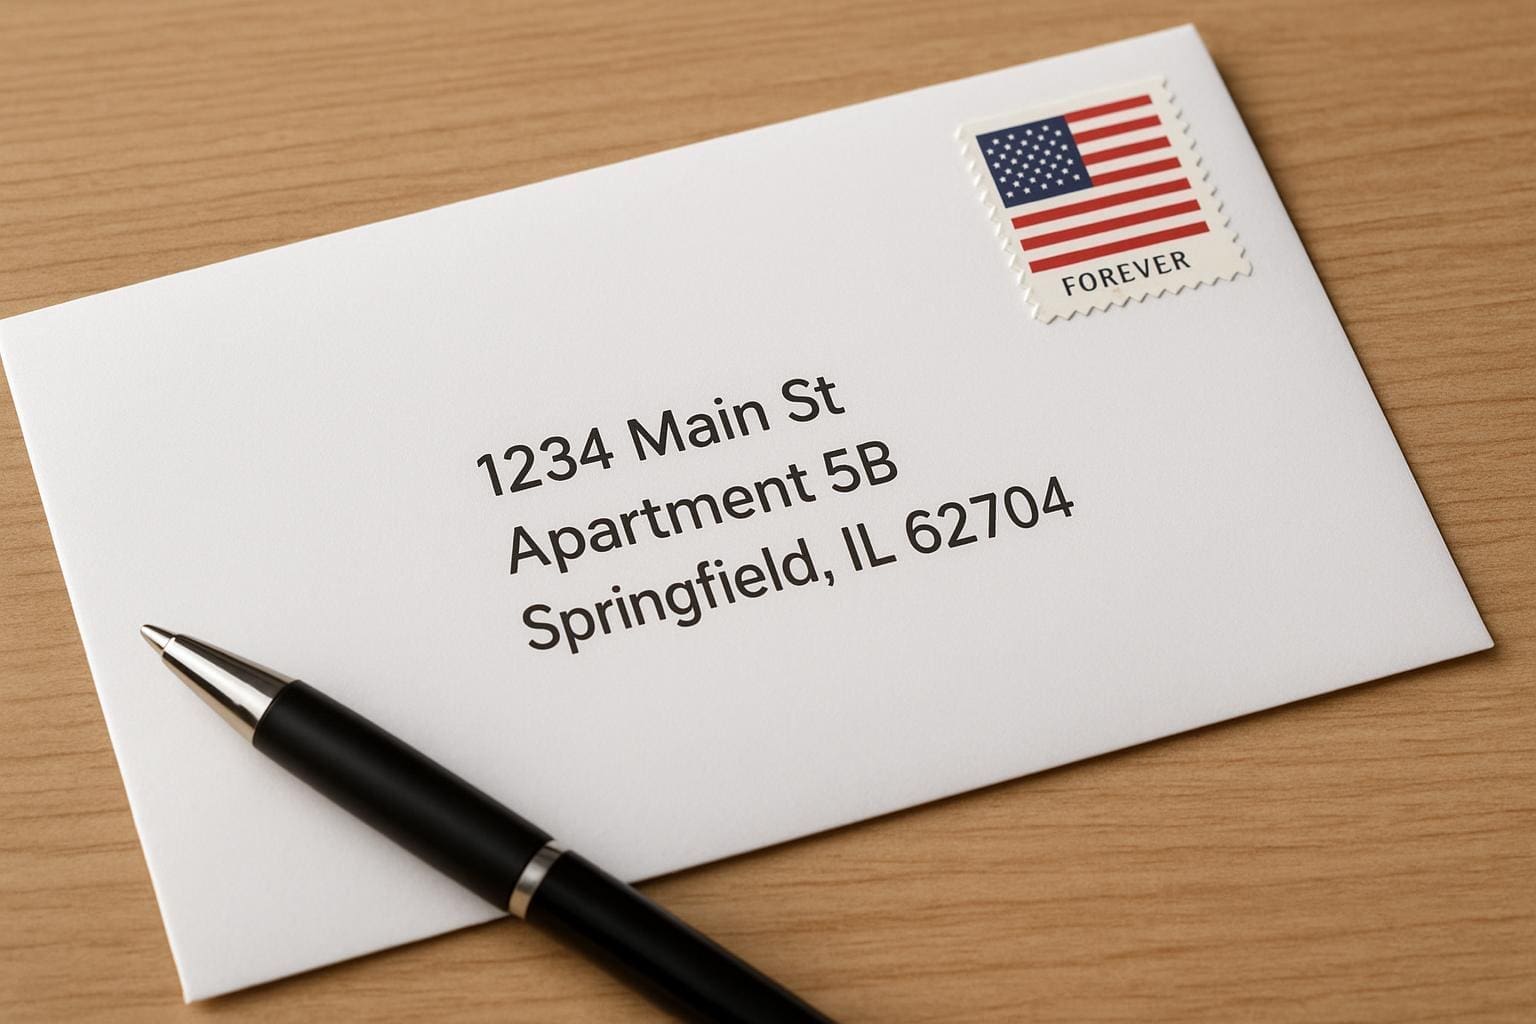
Most web forms give you a first address line and a separate apartment or unit line. Put the street address on the first line and the apartment number on the second line using the designator:

Address Line 1: 123 Main St
Address Line 2: Apt 4B

If the form only has one line for address, add the apartment after the street: 123 Main St Apt 4B. If there’s a character limit and you must shorten, discard commas and unnecessary parts first.

### When The Form Forces A Single Line

Some legacy forms collapse everything. In that case, make sure the unit designator is immediately after the street information. This is cleaner and more likely to be read by software:

123 Main St Apt 4B Springfield IL 62704

But don’t put the city on the same line if the form has a separate fields for city and state.

## Apartment Versus Suite: Why It Matters

An apartment address is residential; suite numbers typically imply business. For carriers and sorting, that can change routing inside a building. If you live in a building with both businesses and residents, using APT versus STE helps the carrier know where to deliver.

– Use APT for residential spaces.
– Use STE for business offices or commercial suites.

If your building uses “Unit” or “Bldg” in internal signage, reflect that in your address if it’s official. For example, in a campus with multiple buildings:

CAMPUS HOUSING
456 College Ave Bldg 5 Apt 210
COLLEGE TOWN NY 10001

## USPS Apartment Address Specifics To Keep In Mind

### ZIP+4 Can Help But Isn’t Always Apartment-Specific

A ZIP+4 improves accuracy. It narrows delivery to a block, a side of the street, or even a single building. It won’t necessarily be unique for every apartment, but entering the ZIP+4 tied to your building is helpful. Use the USPS ZIP Code Lookup to find the right code.

### Don’t Use PO Box If You Have An Apartment Number

If you live in an apartment, don’t combine PO Box and apartment info. If you rent a PO Box instead of receiving mail at your apartment, use the PO Box format:

JOHN DOE
PO BOX 1234
CITY ST 12345-6789

If you want mail delivered to your apartment, never put a PO Box and apartment number on the same address. Pick the correct method.

### What If Your Building Uses A Separate Mailroom Address?

A building may want mail addressed to a mailroom or to “C/O Front Desk.” Follow building instructions. If the mailroom accepts packages and your landlord requires a specific format, write what they require, then add your apartment number. For example:

JOHN DOE
C/O FRONT DESK 123 MAIN ST APT 4B
CITY ST 12345

Make sure your building’s internal policy matches USPS rules so carriers aren’t confused.

## How Carriers Handle Apartment Complexes

### Key Information For Carriers

A carrier needs three things to deliver reliably: building number, street name, and unit number. If any is missing, delivery may stall. For large complexes, carriers rely on internal unit maps. If your apartment number changed because of a renovation, notify the post office and building management immediately.

### When Packages Are Held Or Returned

If a delivery fails, carriers will often leave a notice. Common causes:

– Missing or wrong apartment number
– Illegible handwriting on the label
– Incompatible size for mailbox
– Restricted access to building

If you see frequent misses, check the address formatting and confirm that the ZIP+4 matches the building.

## Common Mistakes That Cause Returns

### Leaving Off The Unit Number Entirely

This is the number one mistake. If the street has multiple units, the carrier has no way to tell which one. Always include APT 4B or equivalent.

### Using Nonstandard Abbreviations

Stuff like “#4B” is okay in casual contexts, but some systems prefer APT 4B. If you use “#”, make sure the form or label can accept it. Best practice: use standard abbreviations.

### Typing The Apartment In The City Field

On some forms people stuff the apartment into the city field because the address line fills up. Don’t do that. Put apt info on the address line or second address line, never with city/state.

### Wrong ZIP Code

ZIP codes change occasionally. Use the USPS lookup tool. A single-digit error can send mail to a different town.

## How To Verify An Address With USPS Tools

USPS provides tools to validate addresses and find ZIP+4 codes. Use them before sending irreplaceable documents. The tools will standardize the format in USPS preferred style, which helps avoid returned mail.

– USPS ZIP Code Lookup
– Address Validation APIs (for businesses)
– Local post office for tricky cases

Use these if you manage mass mailings or if your address gives delivery problems.

## Special Cases And Edge Conditions

### Multi-Building Complexes

If the complex uses building numbers, include them. The format may look like:

123 Campus Way BLDG 7 Apt 12

Sometimes the official address lists the apartment under a different street name. If in doubt, check the building management or USPS.

### Rural Routes

If you’re on a rural route rather than a numbered street, the format changes. Use RR or HC format as instructed by USPS. Rural addressing has its own set of rules and often a required box number.

### Military Addresses

APO/FPO addresses have their own structure. Include the rank and name, unit number, and proper APO/FPO label. The unit is critical—military mail uses it to route through the base.

### International Shipping

For international shipments to US apartments, format the US destination line as USPS prefers and then add any foreign requirements on the customs form. Keep the apartment info clear on the US address lines.

## Business Mail And Amazon-Style Deliveries

Companies that ship a lot of packages should validate addresses programmatically. If you’re a seller or run a small business, use the USPS standardized format in your shipping labels. For example, Amazon and other carriers often accept “#” but if you use printed labels, follow the USPS style to minimize scanning errors.

## When In Doubt, Ask Local Post Office

If your building has unusual addressing—units labeled differently, internal unit numbers, or historical quirks—ask the local post office. They’re the ones routing your mail. Provide proof like your lease or building map and request guidance on the exact line format.

## Practical Tips For Sending Important Mail

– Print labels instead of handwriting when possible. Human handwriting adds variability.
– Use the ZIP+4. It matters.
– Verify the street suffix abbreviations (St, Ave, Rd). Wrong suffixes can point mail to the wrong block.
– If you’re sending legal or time-sensitive documents, double-check the recipient used the correct apartment address format usps and confirm the apartment number directly.

### A Couple Of Real Examples

Example 1 — Apartment resident using a common web form:
Name: SARAH MILLER
Address 1: 789 Oak St
Address 2: Apt 2A
City: OAKLAND
State: CA
ZIP: 94607-1234

Example 2 — Single-line label:
MARK JONES
1024 Elm Rd Apt 5C
FAIRVIEW NJ 07022

Example 3 — Mailroom delivery instruction:
JANE DOE
C/O MANAGEMENT 234 Pine Ave Apt 304
RIVERTON TX 76010

These all follow USPS style and make life easier for automated sorting and carriers on the street.

## Handling Returns And Misdelivered Mail

If you get mail that’s not yours or mail is missing, record tracking numbers and contact the sender. For persistent misdelivery, report it to your post office. They might update routing for your building or correct the master address file.

If you receive someone else’s mail, write “Not At This Address” on the envelope and drop it back in the mailbox. Don’t cross out the address—doing so can make it illegible to machines.

## Final Practical Notes On The Format

– Keep the recipient line clear and complete.
– Put apartment/unit designator directly after the street address.
– Use standard USPS abbreviations and ZIP+4.
– When a website separates address lines, use the second line for the apartment number.
– Confirm with local post office for unique building conventions.

Using the right apartment address format usps is not about following rules to be tedious. It’s about getting mail where it belongs without delay. If you’ve ever waited for an important package that didn’t arrive, there’s a good chance a small formatting error was the culprit. Fix that, and you’ll cut down on trips to the post office and the time spent on hold. Plus, carriers will thank you for clear, readable lines.

### Where To Learn More And Tools To Use

USPS has online resources for standardizing addresses and getting ZIP+4 codes. For businesses, address validation APIs automate this work. For individuals, a quick ZIP Code lookup before sending something important is often enough. If the building uses internal identifiers, get the official wording from management so your address matches what the carrier expects.

Keep your address simple and precise and you’ll avoid the common pitfalls that send mail awry. And remember to double-check the apartment number—most delivery problems start and end there. If you still have issues, go talk to your carrier or local office; they can often tell you what to change so your mail, packages, and ballots arrive on time.

(By the way, if you need a quick check, run the address through the USPS lookup and you’ll see the standardized version ready to copy. It’s a tiny step that prevents a lot of headaches. Also, don’t forget to recieve notifications if a carrier attempts delivery and can’t access your building.)

USPS Letter Size Requirements Guidelines For Mailers

usps letter size requirements

## USPS Letter Size Requirements For Everyday Mail

USPS letter size requirements matter if you want predictable postage and no surprise surcharges. Follow the rules and most business and personal mail will go through automated processing. Break the rules and your mail becomes nonmachinable, or might be bumped up to a flat or parcel rate.

### Minimum And Maximum Dimensions

The baseline letter size requirements from USPS are simple numbers you should memorize if you mail often:
– Minimum: 3.5 inches high x 5 inches long x 0.007 inch thick.
– Maximum: 6.125 inches high x 11.5 inches long x 0.25 inch thick.
– Maximum weight for a First-Class letter: 3.5 ounces.

If your piece is smaller than the minimum it’s classified as a nonletter and may require extra postage. If it’s larger than the maximum in any dimension, or thicker than 1/4 inch, it becomes a flat (large envelope) or a parcel and that changes the price.

### How To Measure Correctly

Measure length on the longest side and height on the shorter side. Thickness is the distance between the two largest faces at the thickest point. Don’t average thickness; measure the bulkiest spot. For a folded 8.5 x 11 sheet inside a #10 envelope, length and height are fine, but multiple pages can push you past the 3.5-ounce limit.

#### Why Thickness And Weight Matter

Machinable equipment handles thin, flexible pieces. If an envelope is too thick or stiff, machines will reject it for hand processing. That usually means extra cost. Also, items with clasps, string, metal, or excessive stiffness face a nonmachinable surcharge. If you glue in cardboard inserts or rigid enclosures they can make a mailing suddenly nonmachinable.

### When A Letter Becomes A Flat Or Parcel

Cross one of the size thresholds and you’re into different rules:
– Flats: more than 6.125 inches high, more than 11.5 inches long, more than 1/4 inch thick, or over 3.5 ounces up to 13 ounces. Flats require different handling and higher postage.
– Parcels: when weight or rigidity exceeds flat limits, or if shape is square or rigid, postal parcel rates apply.

Keep an example in mind: three sheets of standard 20-lb paper inside a #10 envelope usually stay under 3.5 ounces. Add a thick brochure or a small cardboard insert and you’ll likely tip over into the flat category.

### Common Nonmachinable Triggers

The letter size rules include both dimensions and physical characteristics. Expect a surcharge if your piece has:
– Rigid or uneven thickness.
– Clasps, strings, buttons, or exposed metal.
– Square corners that prevent smooth machine feeding.
– Enclosures that cause the envelope to be too stiff.

Even a single bowed corner from a rigid card can force hand sorting. If you’re sending invitations with double-sided mountings, test a sample at the post office before committing to bulk postage.

### Addressing And Placement Basics

Address placement affects processing speed. Use the front center for the delivery address and put the return address in the top-left corner. Leave a clear area in the upper-right for postage. Avoid printing barcodes or markings that could be mistaken for USPS tracking codes. Handwritten addresses are fine; just make sure they’re legible and not on a window that obscures the text. If you tuck a folded sheet into the envelope so the address shifts, machines may misread it.

### Practical Tips To Avoid Extra Charges

Measure a sample item before you buy postage. If sending many pieces, run a few through a local post office meter to check class and surcharges. Use softer, bendable inserts when possible. Avoid unusual shapes and keep corners rounded if your content risks catching in machinery. If you consistently mail thicker content, consider designing a flat-sized envelope instead; the rate may be simpler and less prone to variability.

### When To Contact The Post Office

If you’re preparing a business mailing, talk to your local USPS representative about presort discounts and automation-compatible formats. They can review your mailpiece, check machinability, and point out small changes that save money. For one-offs, a quick trip to the counter with a sample will tell you if your item meets the letter size requirements and whether it’s machinable.

### Real-World Examples

A single sheet 8.5 x 11 folded twice into a #10 envelope: usually meets the letter size requirements and stays under 3.5 ounces. A 4-page booklet with a cardstock cover in the same envelope: likely too thick or stiff and could be nonmachinable. A greeting card with a metal charm will trigger a surcharge for the charm alone.

Pay attention to the numbers and to materials. The difference between a cheap mailing and an expensive one is often a small detail like a bracket or a stiff insert. Test, measure, and talk to the post office when in doubt. And remember that reciept stamps or meter marks don’t change machinability, but the physical shape does.