Nonmachinable Letter Meaning Explained For Mailers

nonmachinable letter meaning

## Nonmachinable Letter Meaning: What Mailers Should Know

If your mailpiece gets dinged as nonmachinable, it changes the game. You’ll pay more, and your item might be handled by hand instead of a machine. Knowing the nonmachinable letter meaning stops those surprise charges and prevents delays.

### Who Calls It Nonmachinable

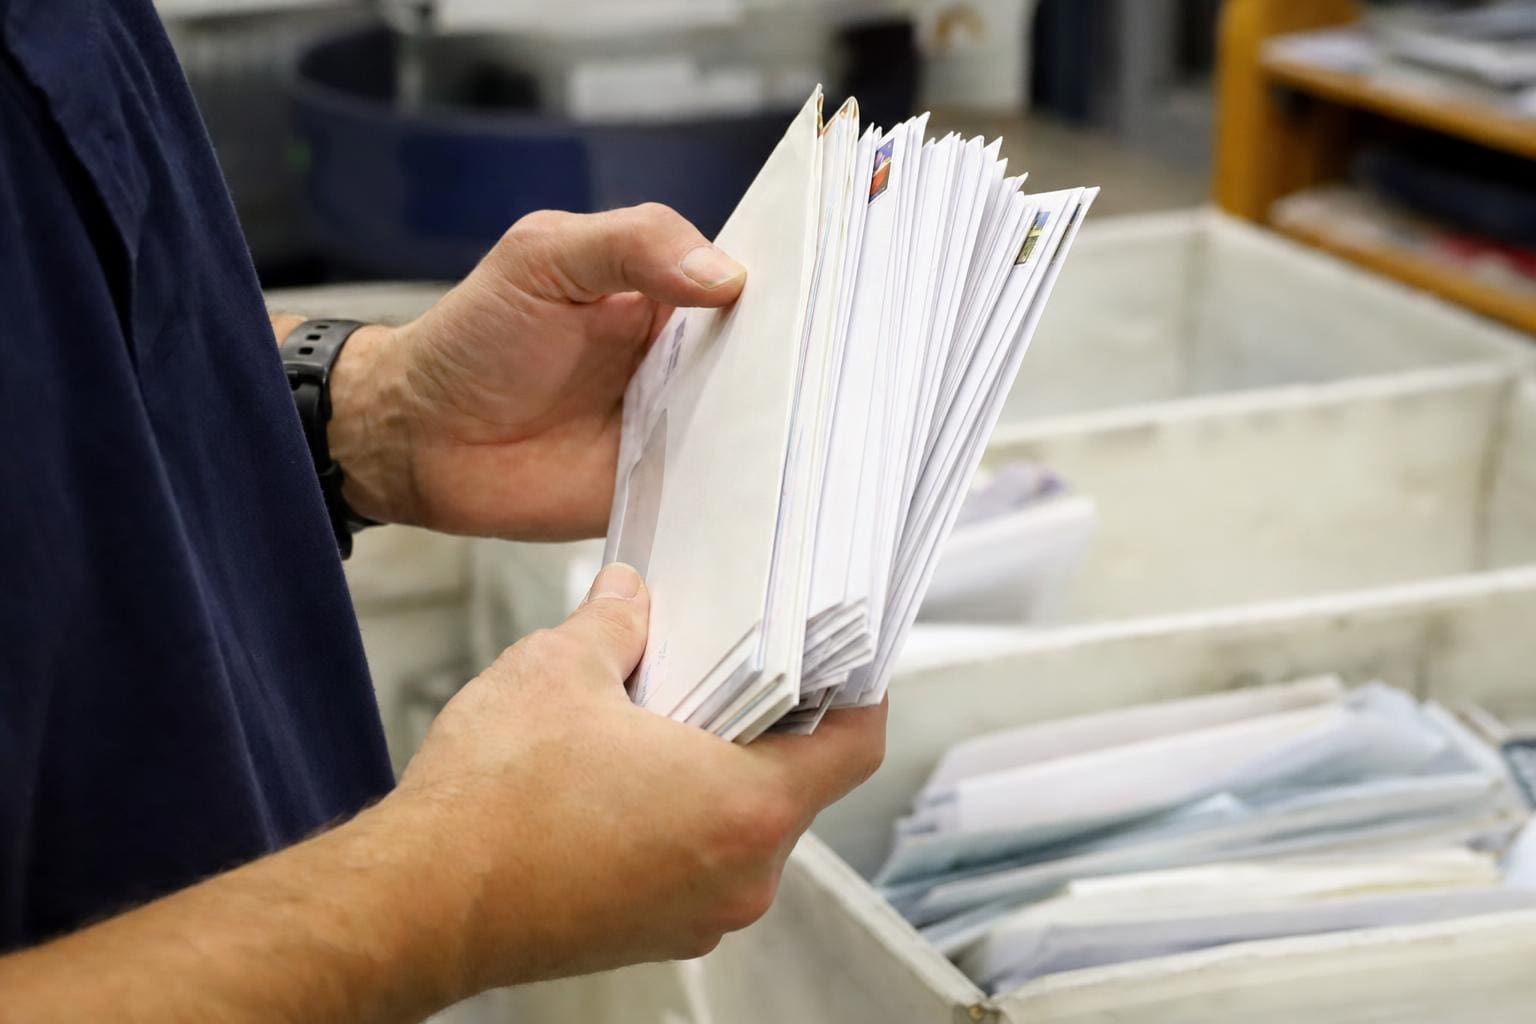
The United States Postal Service decides whether a letter is machinable. The judgment comes from whether automated sorting machines can reliably process the piece. Machines look for consistent size, flexibility, smooth surfaces, and predictable thickness. If any of those are off, the piece is flagged nonmachinable and may incur a surcharge or be routed as a flat or package.

The classification matters for everyone who prepares mail: small businesses, nonprofits, designers who run invitation suites, and anyone who sends bulk mailings. If you use postage meters, presort services, or automation discounts, the machinability rules affect price and eligibility. For single-piece mail, the carrier at acceptance can also mark items nonmachinable if they don’t meet the criteria.

### What Makes A Letter Nonmachinable

Nonmachinable isn’t a single thing. It’s a list of traits that make automated processing unreliable.

– Rigidity: If the envelope or its contents are stiff and won’t flex, machines can’t bend them through rollers.
– Non-uniform thickness: Lumpy spots, staples, or bulky enclosures cause jams.
– Square envelopes: When length and height are equal, feeders and readers struggle.
– Clasps, buttons, strings, or metal: Any protrusion or metal closure is a problem.
– Too thick or too thin: If the thickness falls outside the letter-size limits, it’s nonmachinable.
– Odd sizes or aspect ratios: Pieces that are too narrow, too tall, or outside the accepted length-to-height ratio trip the rule.
– Loose or uneven contents: Envelopes that bulge or have shifting items inside will be dinged.

Those conditions are the usual culprits. A plain one-ounce business letter is rarely nonmachinable. An invitation with multiple enclosures and a belly band often is.

### Dimensions, Thickness And Aspect Ratio

Measure carefully. Size and proportion are concrete things you can control.

– Minimum letter dimensions: 3.5 inches high by 5 inches long. Thickness must be at least 0.007 inch (roughly the thickness of a standard sheet of paper).
– Maximum letter dimensions: 6-1/8 inches high by 11-1/2 inches long, and 1/4 inch thick.

Aspect ratio matters for automation discounts. The ratio of length to height should fall between about 1.3 and 2.5. If the ratio is outside that range, machines won’t feed predictably and the piece risks being nonmachinable.

If your envelope is right on the limits, double-check with a ruler and a caliper if you have one. A fraction of an inch can change how the USPS treats the piece.

### Common Real-World Examples

Concrete examples make this easier to picture.

– Wedding Invitations: A square invitation suite with thick cardstock and envelopes that contain response cards and RSVP stamps is a classic nonmachinable letter. Multiple layers and square sizes make sorting machines choke.
– Window Envelopes: Most window envelopes are fine, but if the window obscures addressing or the plastic causes uneven thickness, the piece becomes nonmachinable.
– CD or DVD Enclosed: Even thin discs create rigidity and uneven thickness. That almost always moves the item out of letter category.
– Small Gifts: Keys, coins, or samples inside an envelope produce lumps and metal. Nonmachinable.
– Bubble Wrap or Corner Protectors: Protective inserts intended to prevent damage can turn a mailpiece into a nonmachinable item.
– Cloth or Fabrics: Textiles can have irregular thickness and edges that catch; they’re risky for machines.

In every case, think like a machine: will rollers and feeders be able to move this smoothly? If not, expect nonmachinable.

### How Nonmachinable Affects Postage And Handling

When a letter is nonmachinable, two things happen: it’s routed differently and postage goes up. Nonmachinable letters are often charged a surcharge on top of the regular postage. For presorted or automation-rate mailings, classification as nonmachinable can disqualify pieces from discounts.

Handling changes too. Instead of zipping along automated lines, the piece may be hand-sorted or routed as a flat or package. That can increase transit time and raises the chance of damage if the mailpiece wasn’t packed for manual handling.

If you run a business that relies on predictable postage and delivery times, losing machinability on a big batch can be expensive.

### Simple Tests You Can Do Before Mailing

You don’t need special equipment to spot common problems. Try these practical checks.

– Flex Test: Fold the mailpiece gently. If it doesn’t flex easily, it’s likely nonmachinable.
– Thickness Sweep: Run your thumb across the length of the piece. Any lumps or abrupt changes mean trouble.
– Square Check: Measure length and height. If they’re equal, that’s a red flag.
– Closure Inspection: Remove staples and metal fasteners. Replace with glue or tape if suitable.
– Try a Mock Feed: If you have access to a local mail shop, ask them to run a quick feed test. They often can spot issues that are easy to miss.

These checks catch most of the situations that trigger a nonmachinable label.

### How To Avoid Being Nonmachinable

You can often fix the problem without redesigning everything.

– Choose flexible envelopes and lighter papers when possible.
– Remove metal clips, staples, and any protruding closure hardware.
– Avoid square envelopes and keep aspect ratio within the recommended range.
– If you must include enclosures, stack them flat and use thin paper stock.
– For thick packages, consider First-Class Package Service or Priority Mail instead of trying to force letter rates.
– When sending invitations, consider mailing response cards separately to reduce bulk.

Small product changes—thinner inserts, different envelopes, or a single-fold design—can restore machinability and save money.

### When Nonmachinable Is Unavoidable Or Intentional

Sometimes you can’t or don’t want to change the piece. A thick, ornate invitation or an envelope with a glued embellishment might be a design choice worth paying for. In those cases:

– Expect the nonmachinable surcharge and build it into your cost planning.
– Use appropriate packaging and labeling so handlers know the piece is fragile.
– Consider hand-cancel or drop-off options at a post office window for better acceptance handling.
– If the item is time-sensitive, opt for a service designed for parcels to avoid unexpected delays.

There are also cases where being nonmachinable is preferable. A fragile item wrapped for protection might survive better with manual handling than with automated sorting pressure.

### Business Mailers, Automation Discounts, And Barcodes

If you manage bulk mailings, automation discounts and Intelligent Mail barcodes are valuable. But they come with strings attached about machinability.

Automation discounts require mail to meet strict size, weight, and readability standards. That includes correct placement of addresses, permitted type sizes, proper barcode placement, and adherence to the aspect ratio and thickness rules. If a piece is nonmachinable, you lose those discounts and may have to reclassify the entire batch.

Presort bureaus and in-house mailing systems often scan pieces. Make sure your artwork leaves a clear address area, use dark ink on light backgrounds, and avoid decorative elements that cover the delivery address. That reduces the chance your well-designed piece turns into a nonmachinable headache.

### Address Placement And Readability Rules

Address placement isn’t just etiquette. Machines need consistent location and contrast to read addresses automatically.

– Place recipient address parallel to the longest side of the piece.
– Leave a clear address block—avoid printing over seams, windows, or decorations.
– Use a simple, legible font in dark ink on a light background.
– Don’t use handwriting for large batches; it reduces readability and increases nonmachinable risk.

If the person who processes a piece can’t quickly find the address or if optical readers can’t decode it, expect manual intervention.

#### Measuring And Documentation Tips For Mail Departments

If you’re responsible for verification or for submitting mailings, keep a quick checklist:

– Record dimensions and weight for each mail type.
– Photograph a representative sample front and back.
– Keep documentation of envelope stock and paper weights.
– Keep examples of accepted and rejected pieces for reference with staff or vendors.

This reduces back-and-forth with the postal service and gives you evidence if a contested surcharge shows up.

### Alternatives To Reworking A Nonmachinable Piece

Sometimes reengineering the piece is impractical. Here are alternatives:

– Ship as a First-Class Package or Priority Mail to avoid letter rules.
– Use a poly-mailer or padded envelope that’s designed for parcels.
– If the piece is part of a marketing campaign, design an alternative mailer that retains brand feel without the nonmachinable triggers.
– For bulk runs, work with a mail house that offers presort and sorting services and can advise on rate trade-offs.

Changing services rather than the product is often faster than redesigning the stationery or packaging.

### Common Mistakes That Trip Mailers Up

People keep repeating the same expensive mistakes.

– Assuming window envelopes are always okay. They’re not if the window shifts the address or adds too much thickness.
– Ignoring the aspect ratio. Square invitations look great but cost more to mail.
– Stapling enclosures. Staples and metal fasteners are a near-certain nonmachinable cause.
– Trusting rough estimates. Small deviations in thickness or length add up across a mailing.

Avoid those pitfalls and you’ll save time and money.

### How To Handle A Nonmachinable Surcharge Dispute

If you receive a surcharge and think it’s in error, don’t panic. Gather measurements, photos, and any documentation about your envelope stock and mail preparation. Contact your local post office or the business mail entry unit. Often a clarifying conversation or posting your sample piece again with proper labeling can resolve disputes. Keep records—if you make the same mailing regularly, a documented standard helps prevent future surprises.

If you work with a mail vendor, ask them to certify machinability before they postage your run. They should be able to tell if a piece meets automation standards and show the tests they used.

### Small Tips That Add Up

These quick changes make a real difference.

– Swap thick card stock for lighter-weight paper when possible.
– Use single sheets instead of folded stacks inside the envelope.
– Replace metal clasps with printed bands or adhesive seals.
– Train staff who stuff mailings on what to look for.

Pay attention to these details and your nonmachinable incidents will drop.

### Where To Find Official Guidance

USPS publications and their website contain the full criteria and measurements for letter and flat machinability. For large campaigns, ask for a mailing guide or consult a postal inspector for ambiguous cases. If you run into a confusing rule, local postal business centers can provide practical advice and sometimes will test samples for you.

If you want to get picky about one detail, bring a sample to your post office. They’ll tell you if it’s likely to be processed by machine or flagged nonmachinable. That small step saves money over time, and it’s surprisng how often a friendly check avoids a surcharge later. Recieve feedback and adjust before the whole batch goes out.

Click-N-Ship Vs Post Office Counter Sparks Shipping Showdown

click-n-ship vs post office counter

You can save time with a printed label or you can hand your package to a live person. Both are valid strategies. Which one makes more sense depends on what you ship, how often, and how you hate waiting in lines.

## Click-N-Ship Vs Post Office Counter: Which Works Best For You?
The basic choice is simple: use click-n-ship to make a label at home, or go to the post office counter and let the clerk handle it. If you ship a couple of small boxes a month, click-n-ship usually beats a trip. For complicated international shipments or odd sizes, the post office counter still wins more often.

I’ll use plain examples. I print a label, tape it on, drop it in the blue box, and the package is gone. That’s click-n-ship in its simplest form. But once, I had a package with a weird weight and the automated rate was wrong. I went to the post office counter and avoided a surprise surcharge. Both methods do the job, but they solve different problems.

### Cost And Fees
Rates from the carrier are the same whether you print a label online or buy one at the counter in many cases. However, click-n-ship often shows discounts left out at retail. If you have a scale at home and print exact postage, you can save a few dollars on small parcels. For high-volume sellers, those dollars add up.

At the post office counter you may pay retail handling fees on top of postage for special services. Clerks can sell you boxes, packing materials, and extra services. That convenience costs money. If you’re shipping a 15-pound box, the difference might be $5 to $10. For light items, click-n-ship usually wins on price.

### Speed And Convenience
Click-n-ship is designed to be fast. You can create labels at 2 a.m. in your pajamas, schedule a carrier pickup, and hand the box to a driver the next day. No lines. No paper customs forms to fill out in person. For sellers who ship daily, that workflow is essential.

At the post office counter you get in-person help. That’s slower, but sometimes necessary. The clerk can measure, weigh, and suggest better packing to avoid damage. They can submit customs forms for you when a site balks at the paperwork. If your day requires a real person to look at the box, go to the counter.

### Accuracy And Disputes
Labels you print at home are only as accurate as your measurements. Weigh it on a scale that’s off by an ounce and you’ll likely be fine. But if the package is mismarked and the carrier flags it later, you’ll be the one paying the adjustment.

If a clerk at the post office counter weighs and stamps your parcel, there’s a clearer record. That can help if a claim arises. On the flip side, the counter record is only as good as the clerk’s thoroughness. Sometimes they rush, just like anywhere.

#### Insurance And Tracking Differences
Both methods provide tracking and optional insurance. Click-n-ship usually lets you buy and print insurance online, and attach electronic tracking immediately. Buying insurance at the post office counter gets you a physical receipt that some people prefer when making claims. Either way, read the fine print on coverage limits.

### Packaging And Supplies
If you have flat-rate boxes or standard envelopes, click-n-ship is a breeze. You print, apply, drop, and go. But if you need specialty boxes, tape, or a last-minute filler, the post office counter stocks supplies. That matters when you’re mid-pack and you discover a fragile item needs extra padding.

There’s also the reality of measuring and resizing. Some online systems assume cubic weight differently. At the counter, clerks can propose alternative packaging that costs less. That insight can save money on large but light shipments.

### International Shipments And Customs
International paperwork is where the post office counter often helps. Online forms exist for customs declarations, but mistakes happen. If you mislabel a commodity code or undervalue an item, the parcel can be delayed or returned. Clerks can review forms with you face to face and catch errors.

That said, click-n-ship handles many routine international packages perfectly. For low-value, simple shipments, it’s faster and fine. For higher-value goods or anything requiring certificates and special handling, go to the post office counter.

### Security And Identity Verification
Certain services require ID verification at the counter. For example, some mail holds, registered mail, or services that require signatures may need a person at a counter to confirm identity. If your shipments regularly need that extra layer, the post office counter is unavoidable.

Click-n-ship is largely electronic. That’s great until you need a proof of hand-off with a stamped receipt. You can schedule a pickup, but pickups can be missed. For time-sensitive or legally sensitive items, the physical receipt from the counter is reassuring.

#### Small Business Considerations
If you run a small shop and ship dozens of packages a day, click-n-ship integrates into workflows. Many platforms let you batch-print labels, apply discounts, and schedule pickups. That saves labor and cuts mistakes. You can also invest in scales, label printers, and rolls of labels to speed throughput.

If your business is low-volume or you sell high-ticket items sporadically, the post office counter’s expertise and on-site problem solving may justify the extra time. You’ll trade a bit of price for a lower chance of a shipping error that costs more than the fee.

### When Technology Fails
Click-n-ship depends on a working printer, internet, and accurate measurements. If your printer jams or your Wi-Fi drops, you’re stuck. I once had a batch of labels ruin a roll and spend an afternoon reprinting from the office. At that point, a trip to the post office counter would have been faster.

On the other hand, the post office can be unreliable too. Lines, staffing shortages, and limited business hours complicate things. If you need a late pickup or want to avoid a missed delivery, click-n-ship lets you manage timing more precisely.

### Practical Tips To Choose
Pick click-n-ship when:
– You ship regularly and can print labels at home.
– Items are simple, light, and fit common boxes.
– You want to save time and use batch processing.
– You can manage returns and paperwork electronically.

Pick the post office counter when:
– Shipments are heavy, odd-shaped, or fragile and need in-person review.
– You’re unsure about customs forms or need documented proof of handoff.
– You require identity verification or extra services that online systems won’t accept.
– You need supplies and packing help on the spot.

### How To Blend Both Methods
You don’t have to pick just one. Many people print labels at home and still visit the post office counter occasionally for tricky items. Some print click-n-ship labels and ask the clerk to weigh the box so they can avoid a surprise. Others print labels and keep a stash of prepaid return labels in each order so customers can ship back without fuss.

A hybrid approach keeps options open. Use click-n-ship for routine parcels and the post office counter for the exceptions. That minimizes cost and maximizes protection.

### Real-World Example
A friend ran a small ceramics shop. She printed labels at home for most orders. One week a glazed vase chipped in transit and the buyer claimed wrong packing. For future fragile pieces she started taking them to the post office counter for clerk-assessed packing and a stamped receipt. The added time cost paid off in fewer claims.

There’s no universal winner. The argument is practical not ideological. When I weigh the trade-offs, click-n-ship is my default for speed and cost. I go to the post office counter when the package or paperwork is unusual or when I need that physical proof of service.

Now think about your typical shipment. If you mostly send T-shirts, click-n-ship will probably save you time and money. If you sell glassware, electronics, or anything that could trigger a customs headache, the post office counter will save you grief. Decide based on patterns, not a one-off experience. And keep tape and a decent scale at home so click-n-ship doesn’t lead to unexpected fees or a run back to the mall to buy supplies you should have on hand.

One typo in an online label can cause a bad day, so double-check the address and reciepient name before printing. If it looks wrong, go to the post office counter and let someone else take a look.

Lithium Battery Shipping Rules International Explained

lithium battery shipping rules international

Lithium cells and packs catch fire differently from most other cargo. Treating them like ordinary goods invites fines, delays, and the occasional airport emergency. Know the rules before you pack.

## Lithium Battery Shipping Rules International: What They Actually Require
When people talk about “lithium battery shipping rules international,” they usually mean a cluster of overlapping regulations: UN Model Regulations, ICAO Technical Instructions, IATA Dangerous Goods Regulations for air, IMDG Code for sea, ADR for road in Europe, and national implementations such as 49 CFR in the United States. Together they decide how batteries are classified, tested, packed, labeled, and documented.

### What Regulatory Systems Apply And Why It Matters
The UN Model Regulations set the baseline: lithium-ion batteries are UN3480 (cells/batteries alone) or UN3481 (packed with or installed in equipment). Lithium metal batteries are UN3090 and UN3091. From that baseline, ICAO/IATA translate specifics for air transport, and the IMDG Code covers sea. Countries then adopt or adapt those rules into national law.

This matters because airlines, ports, and customs check for compliance. Noncompliant shipments can be rejected, returned at your expense, or destroyed. In the worst cases, shippers face penalties or criminal charges.

### How Batteries Are Classified
Classification begins with chemistry and capacity.

– Lithium-ion vs lithium metal: different UN numbers and different treatment.
– Cells vs batteries vs battery packs: a cell is the basic electrochemical unit; batteries are multiple cells; packs include battery plus protective circuitry.
– Watt-hour (Wh) rating and lithium content: these thresholds determine which packing instructions and whether limits or approvals apply.

Getting classification wrong is the most common mistake I see. Test reports, spec sheets, and manufacturer declarations are your best friends here.

## The Hard Rule: UN38.3 Testing And Documentation
UN38.3 is the checkpoint. It’s a battery of tests (altitude simulation, thermal, vibration, shock, external short circuit, overcharge, forced discharge) that cells and batteries must pass before being offered for transport as dangerous goods.

### What You Need From Manufacturers
Ask for a UN38.3 test summary and a certificate. If you’re repackaging or building your own battery packs, keep test records for the cells used and any relevant electical protection validation. If the vendor can’t provide UN38.3 documentation, don’t ship through regulated channels.

#### When UN38.3 Doesn’t Apply
There are exceptions and limited quantity provisions, but relying on an exception without knowing the details is risky. Examples exist where a small consumer device shipped in limited quantity avoided a full dangerous goods declaration, but those scenarios are tightly defined.

## Air Transport: The Tightest Controls
Airlines are highly risk-averse. Fires at altitude are catastrophic, so ICAO/IATA rules are detailed and strictly enforced.

### Categories For Air
For air, lithium batteries are grouped by how they’re packed:
– Installed in equipment.
– Packed with equipment.
– Shipped alone (spare batteries).

Each has different packing instructions and labeling. Generally, batteries shipped alone face the strictest requirements.

### State Of Charge And Wh Limits
A critical practical rule: many air regulations limit the state of charge for lithium-ion batteries carried as cargo on passenger aircraft to 30 percent of their rated capacity. Also, batteries above 100 Wh but at or below 300 Wh may be allowed in equipment or as spares with airline approval; above 300 Wh is typically forbidden on passenger aircraft.

These numbers are where shippers get tripped up. If you manufacture a device with a 200 Wh pack and you expect to fly it in checked baggage or ship it by air without notifying the carrier, expect trouble.

### Documents And Labels For Air
Air shipments generally need a shipper’s declaration for dangerous goods unless they qualify for excepted quantity or limited quantity provisions. They also require specific labels: the Class 9 label, and for many air shipments, the lithium battery handling label that warns handlers not to load on passenger aircraft if restricted.

## Sea Transport: IMDG Rules And Stowage
Shipping large numbers of batteries by sea is common for manufacturers. The IMDG Code classifies lithium batteries as Class 9 dangerous goods, with specific packing groups and stowage provisions.

### Stowage And Segregation
On ships, batteries must be stowed in a way that limits risk of overheating and allows firefighting access. Some batteries are treated as marine pollutants and must be declared. For full container loads, carriers will want to see proper documentation and packaging that prevents movement and short circuits.

### When Sea Is Simpler
Sea transport allows larger quantities and heavier batteries with fewer of the state-of-charge constraints that aircraft impose. Still, don’t treat it as a free-for-all. The IMDG Code has mandatory marking, documentation, and training requirements. In practice, ocean carriers will ask for UN38.3 reports and packing declarations.

## Road And Rail: ADR, 49 CFR, And Local Rules
Road and rail tend to be less restrictive than air, but they are not lax. ADR in Europe requires proper classification, packaging, and limited quantity labels. In the U.S., the DOT enforces 49 CFR rules which incorporate many UN provisions.

### Practical Points For Ground Transport
If you prepare a pallet for road transport across borders, double-check that ADR or local requirements match what your carrier expects. Drivers need training, and some vehicles are restricted in mixed loads. Keep your paperwork handy—inspectors will ask for it.

## Packaging: How To Stop A Battery From Starting A Fire
Packaging is where theory meets reality. A battery that shifts in a carton and has terminals shorted is a fire waiting to happen.

### Packaging Basics
– Prevent movement: use cushioning so cells or packs can’t bang into each other.
– Insulate terminals: tape or terminal covers, or place each battery in individual pouches.
– Use strong outer packaging: boxes that withstand stacking without crushing contents.
– Avoid metal-to-metal contact inside the package.

Manufacturers sometimes provide tested packaging instructions. Use them. If you’re shipping many pieces, invest in tested, certified packaging rather than improvising.

## Labels, Markings, And Paperwork
Labels are not optional decorations. They inform handlers, pilots, and inspectors about risk and handling.

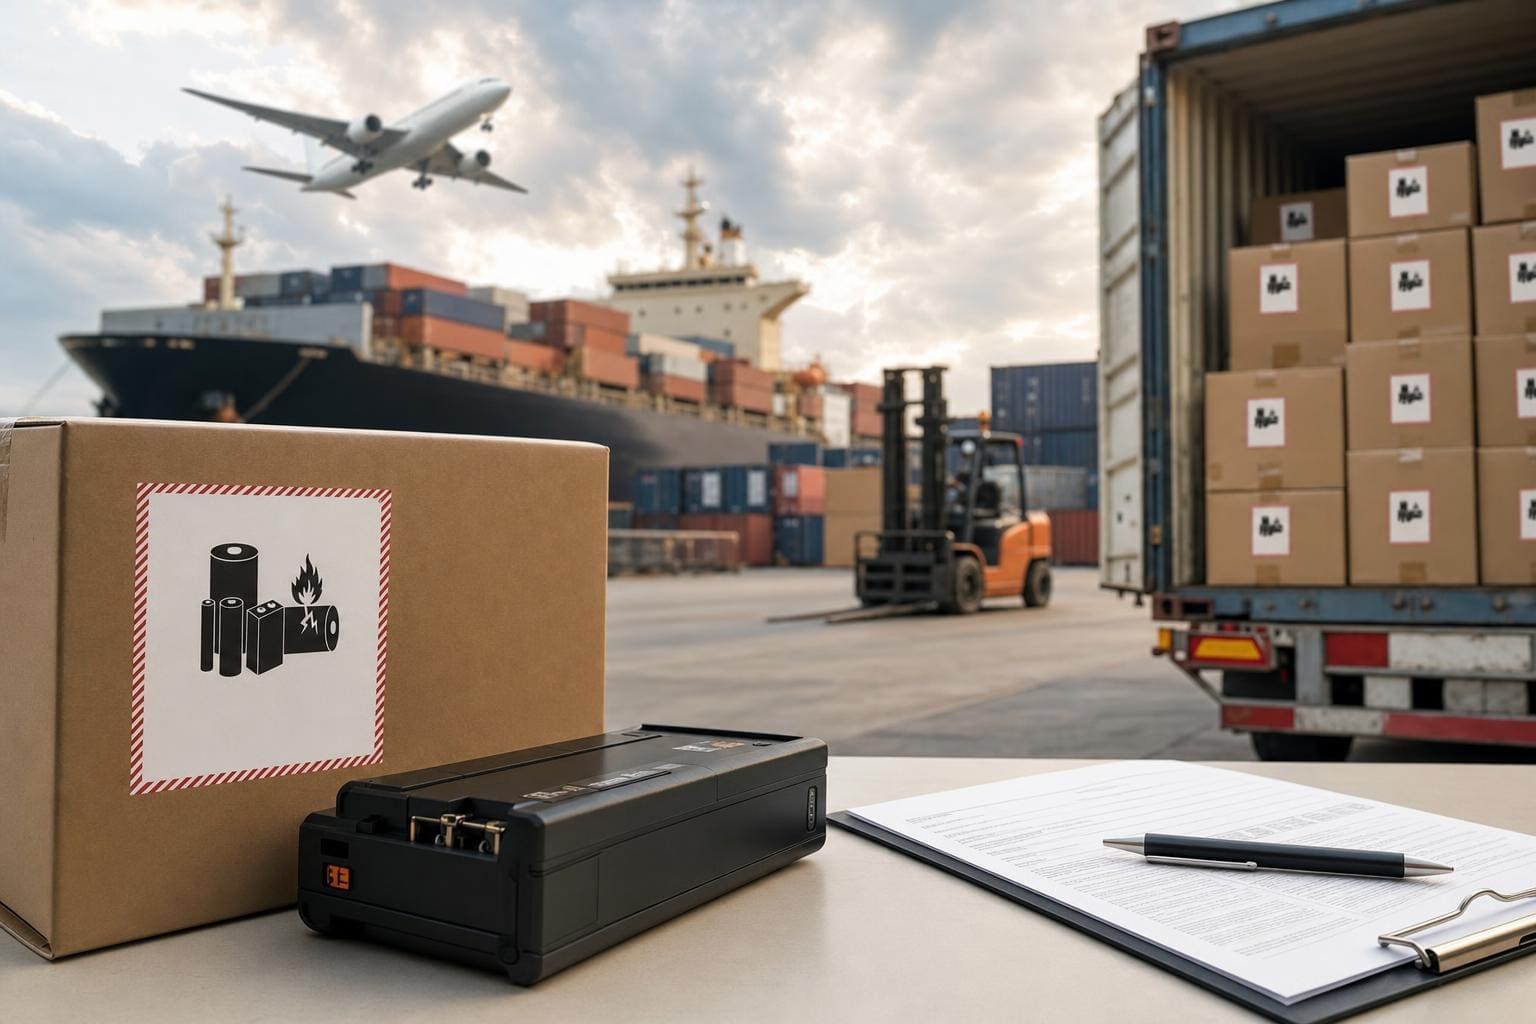
### Key Marks
– UN number and proper shipping name: UN3480, UN3481, UN3090, or UN3091 as applicable.
– Class 9 hazard label.
– Lithium battery handling label: shows the battery icon and emergency procedures.
– “Cargo Aircraft Only” label if the item is restricted from passenger flights.

Documentation includes the shipper’s declaration for dangerous goods (for many air shipments), packing certificates, and copies of UN38.3 reports. Keep digital and paper copies.

## Training And Accountability
Regulations mandate training. If you sign the paperwork, you are accountable.

### Who Needs Training
Anyone offering lithium batteries for transport, packaging them, signing shipping papers, or accepting them for carriage must receive dangerous goods training appropriate to their role. Training must be recurrent, usually every 24 months. Carriers audit this normally.

## Common Compliance Traps And How To Avoid Them
A few mistakes repeat across companies. Fix these and you’ll eliminate most headaches.

– Treating a battery in a product the same as a spare battery. They are different in the rules.
– Not checking state-of-charge requirements for air transport.
– Accepting used or recalled batteries without proper testing or approval.
– Using improvised packaging that fails in transit.
– Assuming limited quantity or exempted provisions apply without verifying specifics.

Practical fixes: label spares differently, request manufacturer test data, buy pre-tested packaging, and keep an incident response plan.

## Real-World Examples
A small company once tried to ship a batch of replacement packs for scooters by air because “it’s faster.” The packs were 150 Wh each and not declared. The shipment was stopped at the airline and returned. The company paid return freight, repackaging costs, and a fine. They switched to sea freight and redesigned the pack to 95 Wh to meet lighter rules for future shipments.

Another case: a service center sent a pallet of used phone batteries to a recycler. They had terminals exposed and no UN38.3 paperwork. At a consolidation depot, one battery shorted and caused smoke, triggering a costly emergency response. The recycler refused the consignment. The lesson: even used batteries have to be prepared and documented.

## How Regulators Are Changing Things
Regulations evolve in response to incidents and technology. Recent trends include more stringent labeling, clearer state-of-charge limits for air, and increased scrutiny of e-commerce sellers. Airlines and postal operators sometimes add their own requirements on top of international rules. Expect incremental tightening rather than sudden overhaul.

### What To Watch For
– Updates to IATA and ICAO that tighten passenger aircraft restrictions.
– Expanded testing or additional performance criteria for new high-energy cells.
– Postal rules that restrict sending spare batteries in parcels.

Stay subscribed to IATA bulletins and your national transport agency notices.

## Practical Checklist Before You Ship
Here’s a short checklist to run through before you hand a consignment to a carrier:
– Confirm battery chemistry and UN number.
– Obtain UN38.3 test reports and manufacturer declarations.
– Determine if the item is installed in equipment, packed with equipment, or shipped alone.
– Check Wh rating and state-of-charge limits for your mode of transport.
– Use approved packaging and protect terminals.
– Apply correct labels and prepare required documents.
– Verify carrier and route accept lithium shipments (some airlines and post offices restrict them).
– Train staff and keep records.

## When To Bring In Help
If you move bulk quantities, large-format batteries, prototypes, or damaged/recalled units, call a dangerous-goods specialist. A DG consultant or freight forwarder experienced with lithium battery shipping can save money by preventing delays and avoiding regulatory penalties. They can also tell you when you need special approvals, such as shipper’s certifications or modal-specific waivers.

### Working With Freight Forwarders
Not all forwarders are equal. Ask for their lithium shipping experience, references, and examples of similar shipments they’ve handled. Get written confirmation they will accept your battery type and volume.

## E-Commerce And Small Parcel Shippers
Selling batteries online complicates things. Marketplaces and postal services have strict rules and routinely block or delay parcels with undeclared batteries. Many platforms require sellers to comply with postal regulations and to label items correctly.

A simple oversight—like shipping spare batteries installed in a product and marking it as “electronics”—can stop a parcel. If you sell items that contain batteries, build a checklist into your fulfillment workflow.

## Enforcement And Penalties
Penalties vary by country. They include fines, seizure of goods, suspension of shipping privileges, and in extreme cases criminal charges. Carrier contracts often allow carriers to recoup cleanup costs and penalties from shippers. Insurance may not cover fines caused by regulatory noncompliance.

## Where To Get Reliable Updates
– IATA Dangerous Goods Regulations (subscription).
– ICAO Technical Instructions (public summaries and national notices).
– IMDG Code publications.
– Your national transport authority (DOT in the U.S., MCA or equivalent in other countries).
– Reputable freight forwarders and industry associations.

Sign up for email alerts from these sources. Rules change with little fanfare.

## Small Steps That Prevent Big Problems
If you only do one thing, make it this: standardize how your operation handles batteries. Create a simple SOP that covers verification, packaging, and documentation. Train staff, and audit shipments quarterly. Most incidents are process failures, not technical surprises.

If you ever recieve a refusal from an airline or port, don’t repackage and send it out again. Stop, ask why, and fix the root cause. Repeated mistakes cost more than hiring a consultant for a few hours.

#### Quick Reference: Common Terms To Know
– UN38.3: Mandatory transport testing for cells and batteries.
– UN3480/UN3481: Lithium-ion cells/batteries (alone or with equipment).
– UN3090/UN3091: Lithium metal cells/batteries.
– State Of Charge (SoC): The battery’s charge level, often restricted for air transport.
– Class 9: Hazard class for miscellaneous dangerous goods, including lithium batteries.

Keep these terms handy when talking to carriers or customs. They speed up communication and reduce errors.

USPS International Tracking Not Updating Causes Delays

usps international tracking not updating

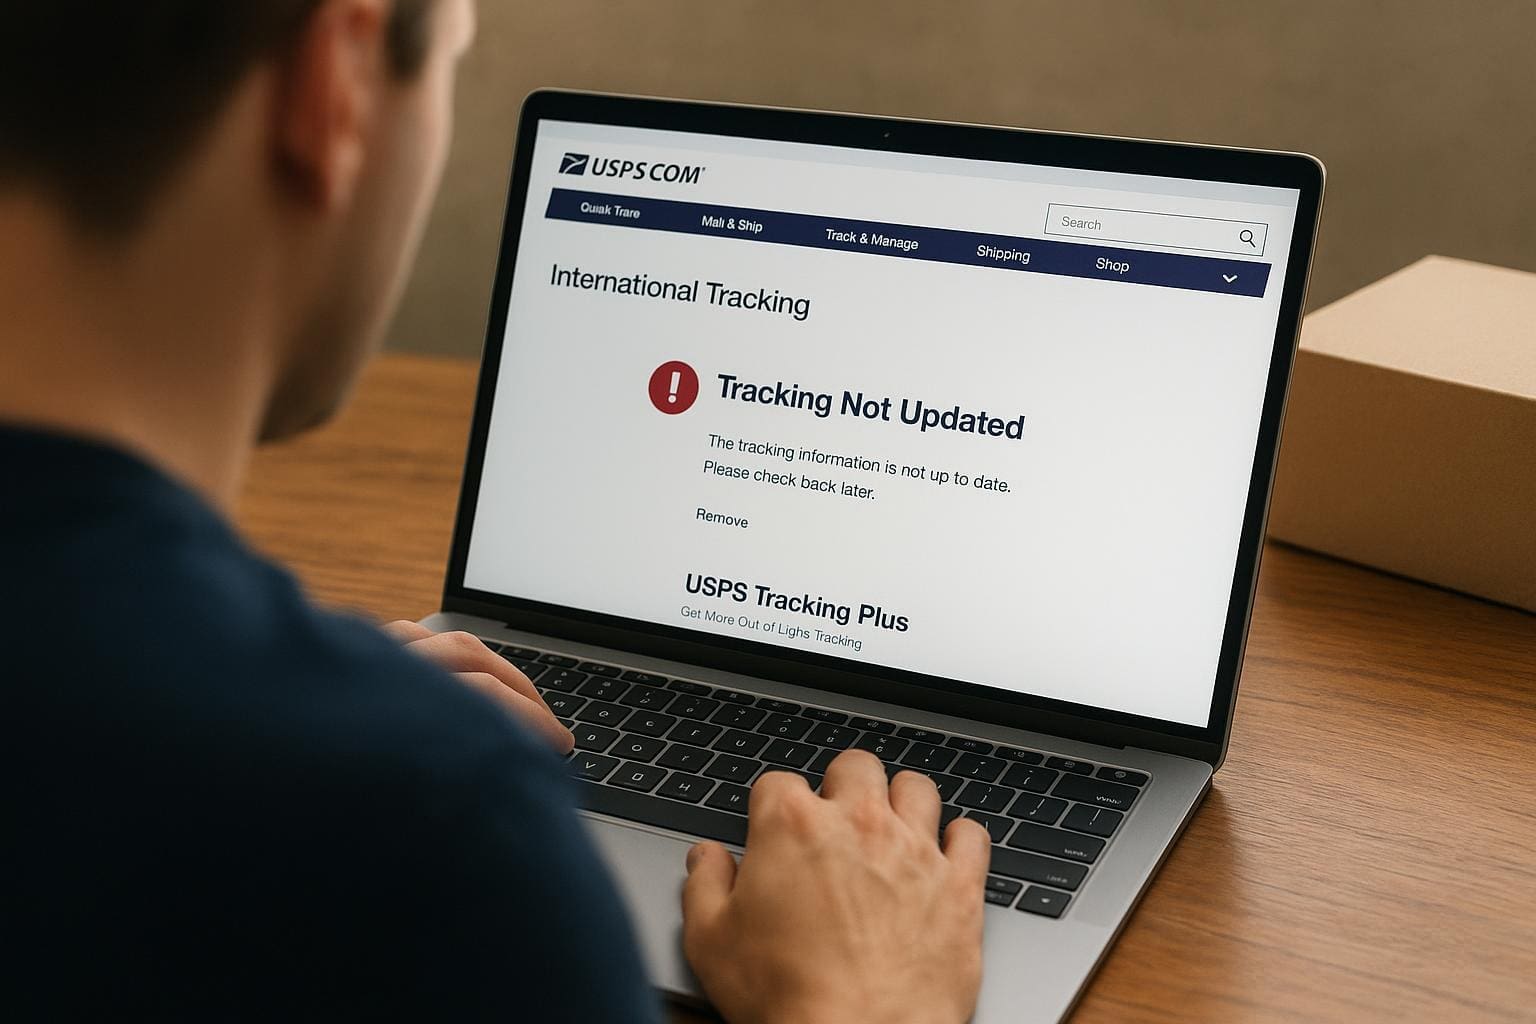
Direct point: packages going overseas often stop showing progress, and that silence is the problem people call into USPS about. You see a status like “Accepted at USPS Origin Facility” and then nothing. Days turn into weeks. That gap is what creates real headaches for senders and recipients.

## Why USPS International Tracking Not Updating Happens
There are a few common failure points. The most frequent is a scan gap when the package moves from USPS hands to a foreign postal partner. Once a package leaves U.S. soil, tracking depends on another system. If that country’s postal service doesn’t scan arrivals or customs, the online record freezes. That’s why you’ll search for “usps international tracking not updating” and find posts from people with packages sitting in limbo.

### Handoffs And Scan Gaps
USPS hands packages to airlines and foreign carriers all the time. The handoff gets logged, but the follow-up scans are out of USPS control. Sometimes the barcode warps or the label is smudged and the receiving clerk skips a scan. Other times, a package waits in customs for inspection and no one updates the tracking during that hold. So the status you saw last may be the last digital note anyone makes.

### Customs And Local Postal Practices
Customs holds are notorious. They can add days or weeks without an update. Some countries insist on paper forms or extra fees before a parcel clears. Local postal services vary wildly. In some places, every step is scanned and posted. In others, a package is moved a dozen times with zero electronic record. That inconsistency is the real cause behind many reports of usps international tracking not updating.

## How USPS Tracking Shows Different Statuses
You need to read the record differently. “Origin Scan” means USPS accepted it. “Departed USPS Facility” means it left U.S. control. “Processed Through Facility” is domestic routing and not a promise of international movement. If the last status is one of those and then silence, it usually means the package is with a partner or in customs. People confuse lack of updates with loss. They are different things.

### Common Status Messages And What They Mean
– Accepted At USPS Origin Facility: Item entered USPS system.
– Departed USPS Facility: Item left the last domestic hub.
– Arrived at Unit: Local USPS facility has it, not necessarily the final step.

These messages explain the path but not the handoff. That gap feeds the narrative of “usps international tracking not updating.”

#### When An Item Shows Delivered But The Receiver Hasn’t Got It
Sometimes the partner carrier reports delivery and USPS reflects that. If the recipient claims no delivery, ask for proof from the carrier. If the entry reads “Delivered to Agent,” that could mean the local postal partner left it with a third party. Keep receipts, photos, and email trails. Those matter if you need to file a claim.

## What You Can Do When Tracking Stops Updating
First, don’t panic. Wait times vary. For many countries, 7 to 21 days is typical. For others, especially during peak seasons, expect more. If it’s been over 30 days, take action.

### Steps To Take
1. Check the full tracking history on the USPS site and copy the number.
2. Ask the seller or sender to confirm the shipping method and that customs forms were attached.
3. Open a Missing Mail Search with USPS if 30 days have passed. You can do that online or at a local post office.
4. Contact the destination country’s postal service if you know which one took over. Sometimes they can look up the item with the same tracking number.

Filing a search early helps. If you paid for insurance, gather proof of value, purchase reciept, and any photos of the package. A small but important typo on the label can cause a long delay, so confirm the adress used.

### When To Contact The Seller Or Carrier
If you’re the buyer, the seller often has access to shipping tools and can escalate faster. If you’re the sender, keep receipts and any scan copies. Use official channels rather than social media rants. That produces records and moves things forward.

## Reducing The Chance Tracking Will Stop
If you ship internationally regularly, pick services that emphasize tracking continuity. Paid services often have better international scanning because they include contracted carriers that provide end-to-end tracking. Priority Mail International and Global Express Guaranteed tend to give more consistent updates than basic First-Class International options.

### Packing, Labeling, And Documentation Tips
– Use a clear, legible label and heavy ink for barcodes.
– Fill out customs forms completely with clear descriptions and values.
– Add a return address and phone numbers for both sender and recipient.

These small details reduce friction at customs and make it easier for foreign carriers to scan and route correctly. They won’t guarantee avoidance of international tracking delays, but they lower the odds.

#### Choose A Service With Better Visibility
If you need real-time assurance, consider courier options like FedEx or DHL. They manage customs and have their own tracking ecosystems. That costs more but often yields faster resolution when something goes wrong.

## What Airlines, Weather, And Holidays Have To Do With It
Flights are part of the chain. A canceled flight can hold thousands of parcels at an airport with limited staff to scan. Weather events and public holidays in either country can add silence to the tracker. Expect that kind of non-technical delay. When those externalities stack up, the phrase usps international tracking not updating starts to look like the norm rather than the exception.

### When To File An Insurance Claim Or Refund Request
If your item is declared lost after the required waiting period, then submit the claim. Have proof: purchase receipts, tracking screenshots, and proof of postage. If you sold the item, the buyer’s loss may be your cost. If you bought it, check the seller’s policy on refunds. Waiting before jumping to claims is smart; often a scan pops up after a quiet week.

Use the USPS Help pages for the official steps, but don’t rely solely on automated responses. Human follow-up through local post offices, or the seller’s shipping department, moves things along for many cases.

Keep in mind one common pattern: silence followed by a batch update. Systems can hold scans for days and then upload a cluster of records. That’s annoying, but it happens.

If you need step-by-step help with a specific tracking number, tell me the timeline, country of destination, and the last visible status. I can suggest the next best step or wording for a Missing Mail Search.

Guidelines For Secure Mailing Of Tax Documents Safely

secure mailing of tax documents

If you’re sending W-2s, 1099s, or anything that contains Social Security numbers through the post, assume someone else could intercept it unless you take specific steps.

## Secure Mailing Of Tax Documents: Practical Steps
Secure mailing of tax documents starts before you drop an envelope in a box. Decide whether the information needs to go by physical mail at all. When it does, prepare documents to reduce risk: remove unnecessary personal details, make copies for your records, and use a clear addressing method that won’t advertise the contents.

Use a sturdy, security-tinted envelope that hides text through the paper. Seal it carefully and reinforce corners with clear tape if the contents are thick or folded. For an extra layer, insert the documents into a plain inner envelope before placing them in the outer one. That double-envelope trick defeats casual peeking.

### Preparing Documents For Mailing
Only include what’s required. For example, if you’re sending a tax return to a preparer, don’t include bank statements unless asked. If you must send multiple items, group them logically so no single sheet reveals everything.

Redact or black out unrelated account numbers and personal info that aren’t needed on the recipient’s copy. Keep a digital scan before mailing so you have an exact record. Don’t write “Tax Documents” on the outside. That phrasing invites trouble; prefer a neutral label or simply the recipient’s name and address.

When you’re packaging multiple pages, use a staple or binder clip inside. Unfolded papers move less and are less likely to be damaged. If photocopies are involved, mark them “COPY” in light ink so originals are clearly identified.

### Choosing The Right Postal Service Options
The cheapest stamp isn’t always the safest. For sensitive pieces, choose tracked services. Certified mail with a return reciept creates an audit trail and is appropriate for sending sensitive tax paperwork. Tracking numbers let you confirm delivery and spot stalled packages before they’re a problem.

Private carriers like FedEx and UPS offer signature-required delivery and more granular tracking. Their hold-for-pickup options reduce street-level theft because the recipient collects the package from a secure location. If you use a courier, request adult signature or restrict delivery to a business address during business hours.

Do not rely on standard first-class mail when sending multiple SSNs or full returns. It moves in bulk and offers no delivery confirmation. For high-value or legally required mailings, invest in the additional fees for proven delivery methods.

### Labeling, Addressing, And Handling Best Practices
Print labels when possible. Handwritten addresses can be misread and delay delivery. Include a return address that matches the sender’s official name. If privacy is a concern, use a company or PO Box as the return address instead of a personal home address.

Avoid listing contents anywhere on the outside. Don’t write “Tax Return Enclosed.” Keep labeling neutral. Place fragile or thick packages flat in the collection bin or hand them to a clerk so they’re scanned into the system properly.

If you’re handling multiple recipients, organize mailings in batches and double-check each name and address. A quick cross-check with a spreadsheet reduces misrouting errors.

#### Using Digital Alternatives And Hybrid Approaches
Sometimes a secure portal is a better choice than physical mail. Many tax professionals and services offer encrypted portals designed for tax document transfer. Upload files there and send an email that the documents are ready. If you must email attachments, encrypt the files and send the password via a different channel, like a text or phone call.

Consider hybrid tactics: ship a cover letter or low-sensitivity item by mail and deliver the high-sensitivity file through a secure portal. That approach minimizes the data moving through the postal network while keeping both parties’ workflows intact.

#### Responding To Lost Or Compromised Mail
Act fast if tracking shows a delivery problem. Contact the carrier immediately to open an inquiry. File a theft report with local law enforcement if you suspect deliberate interception.

Notify affected parties and consider placing fraud alerts with credit bureaus. For tax-specific breaches, inform your tax preparer or the IRS when appropriate; they can flag accounts or advise on identity protection steps. Keep records of all communications and claims — you’ll need them for disputes and potential reimbursements.

Secure mailing of tax documents isn’t complicated, but it requires thought and a short checklist: minimize what you send, use opaque inner and outer packaging, choose tracked delivery, and favor signature controls. These are small steps that stop most problems before they start.

If you send tax document mailing frequently, create a repeatable protocol. Tape a copy of your chosen service and addressing standards to the work area. Over time that routine becomes habit and reduces mistakes that lead to identity theft or lost paperwork.