Best Practices Including Return Labels In Orders Online

including return labels in orders

## Why Including Return Labels In Orders Improves Customer Experience

If you want fewer angry emails and more repeat buyers, start with the basics: make returns painless. Including return labels in orders removes a barrier that often stops customers from buying in the first place. When a buyer sees a return label already in the box, they feel safer trying new things. That confidence translates into higher conversion rates and lower friction at the first point of contact.

### Make It Clear What Type Of Return Label You’re Using

Not all return labels are the same. Prepaid labels mean you cover the postage. QR-code labels let customers print at home. Return-to-store labels route items back to a physical location. Decide which option fits your margins and brand promise, and document it on the packing slip. If you’re including return labels in orders, note whether postage is deducted from refunds or fully covered up front.

### Practical Steps For Integration

Label software and fulfillment workflows need tweaks, not a full rebuild. Here’s what works in practice:
– Generate return labels when the order ships, and include them in the same packing station.
– Put a small card explaining the steps: how to affix the label, where to drop the package, or how to scan the QR code.
– Attach return-tracking numbers to the original order record so customer service can see the inbound movement.

## Operational Benefits Of Including Return Labels In Orders

Returns can be expensive, but they also create data. When you handle returns proactively, you collect information about why products come back and how quickly they’re processed.

### Reduce Customer Service Time

When a return label is present, customers call less. The fewer steps they must take, the fewer support tickets you’ll see. Customer service reps spend time on exceptions: international returns, damaged items, or worn merchandise. The common cases are handled automatically when you include a return label in the box.

#### Keep Your Warehouse Workflow Lean

Plan the routing of return shipments so they return to the nearest processing center. This cuts transit time and lowers cost per unit. If you use regional hubs, set up label logic to choose the closest location. That way your shipping labels aren’t sending packages back across the country for no reason.

## Pricing Strategies And Cost Controls

Deciding who pays matters. Some retailers offer free returns to compete; others charge a fee or deduct shipping from the refund. Both choices send a message. Make sure your policy matches the product price point and margin.

### Pricing Examples That Work

Low-margin, high-volume categories often need strict rules. For example, a clothing brand might absorb a small flat fee to boost conversions on new styles. A furniture company might require returns at the customer’s expense, since freight costs are high. If you’re including return labels in orders, model the cost per return in your unit economics and adjust the policy accordingly.

## How To Reduce Fraud And Abuse

Return fraud is real. Include simple safeguards without making the return process painful for honest customers. Use return windows, require original packaging for certain products, and flag accounts with excessive returns. When you include return labels in orders, tie each label to the order number and validate returns against purchase history in your system.

### Use Technology To Track And Verify

Barcode scans and photo uploads accelerate validation. Customers can scan the shipping labels to start the return, and the system can cross-check weight and SKU information. If the inbound package doesn’t match the original shipment, the return goes to a manual review queue. That saves time and reduces losses.

## Design And Environmental Considerations

Paper return labels create waste. If sustainability matters to your customers, offer a digital return label option. A QR code printed on a small card or the packing slip lets the customer generate a postage-paid label at home, or drop the item at a partner location. You can still include a preprinted label for convenience, but offering choices reduces returns-related trash.

### Packaging Tips That Make Returns Easier

Use a single-sided packing slip that folds into a small envelope for the label. Include clear placement instructions so customers don’t cover tracking bars with tape. If you’re including return labels in orders, make sure they’re easy to find—tucked under the invoice or housed in a dedicated sleeve to avoid getting lost with bubble wrap.

## Measuring Success With Returns Data

Track the full lifecycle: label issued, package picked up, arrival at processing center, inspection, refund completed. Those metrics show whether including return labels in orders is worth the cost. Watch for improvements in conversion, decreases in support volume, and reductions in inspection time. Use that data to iterate your policy and the type of return label you provide.

### Quick Metrics To Start Watching

Look at return rate by SKU, time-to-refund, average cost-per-return, and repeat returners. Tie those figures back to marketing campaigns and product descriptions. Often a small change in copy reduces mismatch returns more than changing the label itself.

Reciept of returns should be predictable. When it is, you can make smarter choices about inventory, pricing, and customer communication—so the next sale feels less risky for everyone involved.

Certified Vs Registered Mail Explained For Everyday Mailers

certified vs registered mail explained

## Certified Vs Registered Mail Explained: Practical Differences

If you need to send something and want a record that it left your hands and reached someone else, you don’t have to muddle through the USPS jargon. Certified vs registered mail explained: here’s the short, usable version that actually helps you pick one or the other without a tech degree.

### What Certified Mail Actually Is

Certified mail gives you a proof of mailing and a proof of delivery signature. You buy it at the counter, the clerk gives you a green-and-white receipt with a tracking number, and the recipient has to sign when it’s delivered. For most routine legal notices, bills, contracts, or anything where you want to show you mailed something and it was received, certified mail does the job.

Certified mail is relatively cheap. It’s not insured beyond $50 automatically, so if you’re shipping something valuable you’ll add insurance or choose another service. The tracking is basic: acceptance and delivery. For many small businesses and individuals, that level of traceability is enough.

#### When Certified Mail Makes Sense

Use certified mail when you need proof that you mailed and that the item was delivered, but you’re not shipping a high-value object. Examples: sending a termination notice, mailing final invoices, notifying tenants, or sending signed agreements. It’s efficient and the post office has a standard, recognized procedure for it. You’ll keep that reciept in case a dispute comes up.

### What Registered Mail Actually Is

Registered mail is the heavy-duty option. It moves under tight control, often tracked at many more points, and is handled separately from the regular mail flow. The chain of custody is emphasized: each transfer between postal employees can be recorded. That makes it both slower and more secure.

Registered mail includes more protection and can be insured for high values. It’s often used for jewelry, wills, original documents, and items where loss would be a major problem. Because of the extra handling and security, fees are higher and delivery can take longer.

#### When Registered Mail Is The Right Call

If you’re sending something irreplaceable—an original deed, legal documents with no copies, or items worth thousands—use registered mail. The extra cost buys you documented handling and a better chance of recovery if something goes wrong.

### Key Differences You Can Feel

The practical differences boil down to three things: proof, security, and cost.

Proof: Certified mail gives you a signature and a proof of mailing. Registered mail gives deeper custody records.

Security: Registered mail has stricter handling rules and storage. Certified mail rides with regular mail once it’s accepted.

Cost: Registered mail is more expensive and can be slower. Certified mail is affordable and faster in most cases.

I tell clients that certified mail is the “I need a signature” option. Registered mail is the “I need this to be accounted for every step of the way” option.

### How Tracking And Insurance Work

If you choose certified mail, you’ll get a tracking number that shows acceptance and delivery. The tracking history is sparse but sufficient to prove a signature was collected. Insurance for certified mail is available but limited unless you buy extra coverage.

Registered mail offers more detailed tracking and higher insurance limits. You can insure registered items for significant values, and the claims process is built for high-value losses. Because registered items are logged at multiple points, the chance of pinpointing where something went missing is greater.

### Costs, Timing, And Practical Trade-Offs

Certified mail is cheaper and usually faster. If you need to get a notice out quickly but want evidence the recipient received it, certified mail is usually the sensible path. Registered mail expenses add up: higher fees, possible added insurance, and sometimes a trip to a special counter. It’s worth it when replacement cost or legal exposure justifies the price.

For a small business sending hundreds of notices, certified mail scales better. For a lawyer shipping an original, signed document you can’t replace, registered mail is the responsible choice.

### Common Myths And Mistakes

Myth: Certified mail guarantees someone will open the envelope. Not true. It only guarantees someone signed for it. If a person signs and refuses to open, your proof is still the signature.

Myth: Registered mail is always faster. Not true. Registered mail’s extra controls can slow things down. It’s about security, not speed.

Common mistake: using certified mail for high-value items without adding proper insurance. People assume the signature covers losses. It doesn’t cover damage or loss beyond the insurance limits.

### How To Choose Right Now

If you need to pick between the two on a walk-in visit: ask yourself three quick questions. Is the item replaceable? What is the monetary or legal value? How fast does it need to arrive? If it’s replaceable and you mainly need a delivery signature, pick certified mail. If it’s irreplaceable or very valuable and you want chain-of-custody documentation, pick registered mail.

### Real-World Examples

A landlord mailing an eviction notice. Certified mail. It’s a document, needs a signature, low cost.

An estate lawyer sending original wills. Registered mail. High value, legal importance, needs traceable handling.

A small online seller shipping a $25 handmade item. Probably neither. Use standard tracking and insurance. For a $500 watch, registered mail makes sense.

### Filing Claims And Proof

If something goes wrong, the paperwork matters. With certified mail you file a claim with the tracking number and the signed return receipt. With registered mail the claim will include the more detailed custody records. Keep copies of everything: receipts, tracking numbers, and any return delivery slips.

If you’re mailing often, consider electronic systems that print forms and track numbers. They make it easier to store records and retrieve proof when needed.

### Extra Tips For Everyday Mailers

Don’t assume local post office staff will always know the best choice. They can help, but they don’t decide your liability. Read the forms and ask specifically about insurance limits. Consider taking photos of the item and documentation before you send it.

If you use certified mail frequently, ordering labels and forms online can save time. Registered mail often requires a counter transaction and more processing, so plan for that time hit.

Certified vs registered mail explained doesn’t have to be confusing: certified mail handles proof-of-delivery needs, and registered mail handles high-security, high-value needs. Use that rule of thumb and you’ll make better decisions on the spot.

#### When The Rules Change

Be aware that postal policies evolve. Fees, insurance limits, and procedures can shift. If your shipping decisions carry legal consequences, double-check the current rules before you send that final, important envelope.

Now pick the service that matches the risk, not the fear, and you’ll save money while protecting what matters.

SMS Delivery Alerts Elevating Package Delivery Tracking

sms delivery alerts

Sms delivery alerts are quietly reshaping what customers expect from shipping. They don’t need flashy apps or extra downloads. A short, timely text can stop confusion, cut no-shows, and make a carrier look competent. That plain fact matters more than marketing fluff.

## How SMS Delivery Alerts Improve Visibility

Carriers used to rely on tracking numbers and web portals. Those work when you have time and patience. Most people don’t. They want a quick yes/no and a window they can plan around. That’s where SMS delivery alerts shine: they land in the one place people check dozens of times a day. A simple message — “Your package is out for delivery, ETA 2–4 PM” — removes uncertainty in a way an email rarely does.

SMS messages also reach people offline. If a delivery van is delayed by traffic, a text can tell the recipient to wait or to instruct the driver where to leave the box. Those micro-adjustments prevent missed deliveries and fewer dropped-off packages at the curb. When a business measures customer satisfaction, those moments add up.

### Why Real-Time Updates Matter

Timing is the most predictable variable in package disappointment. Real-time status changes reduce wasted time for both drivers and customers. When a driver updates a scan, that can trigger a delivery alerts message that tells the recipient the parcel’s exact status. People can make decisions — leave for work later, step outside to meet the driver, or ask a neighbor to recieve the package. That’s practical.

Text notifications are effective because they’re immediate and readable. The open rate for SMS far surpasses email. That doesn’t mean you should spam people. The message should be short, precise, and actionable: where the package is, if a signature is required, and what options the customer has if they’re not home. A one-line instruction beats a page-long tracking detail.

#### Tracking With Precision

Good systems map the delivery route to a live ETA. Combining GPS, route progress, and last-mile scans lets systems offer delivery windows that are narrower than the old “today between 8 AM and 8 PM.” That precision makes sms delivery alerts more useful — people can plan around a two-hour window instead of an entire day.

Some carriers provide a link in the text that shows the driver’s live progress. Others keep it simple: a time and the status. Both approaches work, but the latter reduces friction for recipients who don’t want to click through. Either way, the update needs to be accurate. An incorrect ETA teaches consumers to ignore future delivery alerts. Trust is built on follow-through.

### Reducing Missed Deliveries And Friction

Missed deliveries are expensive. Carriers pay for reattempts, storage, and the customer service work that follows. For customers, there’s the inconvenience and the stress of wondering whether a high-value item is safe. Delivery alerts reduce those costs by letting people make quick adjustments.

Text notifications also change driver behavior. If a driver knows their scan will notify the recipient, they’re more likely to attempt a doorstep delivery before defaulting to a pickup location. For businesses selling high-ticket or time-sensitive goods, that small behavior change can lower return rates and improve net promoter scores.

#### Handling Exceptions Efficiently

Not every delivery goes smoothly. Weather, address issues, and access problems happen. Good sms delivery alerts include clear instructions for exceptions: reschedule options, redelivery fees (if any), or nearby pickup points. The message should also make it easy to reply or tap a quick action to fix the problem.

A helpful exception workflow avoids long phone trees. Imagine receiving a text at 9 AM saying: “Driver needs gate code. Reply ‘GATE ****’ to grant access or reschedule.” That’s less friction than calling support and wastes less time for everyone.

## Operational Steps For Reliable Delivery Messaging

Rolling out a dependable system for texts is more about process than technology. Here’s what operational teams actually need to do.

Start with data hygiene. Messages are pointless if the phone number is wrong. Validate contact details early — at purchase, in account settings, or via an opt-in confirmation. That simple step reduces bounce rates and customer annoyance.

Next, define triggers. What sends a message? Shipment creation, out-for-delivery, failed attempt, delivered, or return initiated. Prioritize the signals that reduce the most uncertainty for your customers. Out-for-delivery and delivered messages are usually non-negotiable.

Integrate driver tools. Drivers should have an easy way to update status that feeds the text system in real time. If the driver’s scan app is clunky, updates will be delayed and the value of sms delivery alerts evaporates.

Measure and iterate. Track delivery success rates, customer replies, and complaint volumes before and after you enable messages. Small changes in wording or timing often produce outsized improvements.

### Balancing Frequency And Value

Text notifications work because they’re useful, not repetitive. Too many messages lead to opt-outs. Think like a human: would you want another update ten minutes after you were told the package was delivered? Probably not. Limit messages to key touchpoints and give recipients control over the types they receive.

Offer preferences: only out-for-delivery plus delivered, or full-step updates for the power users. Let people pause messages for a period. Respecting those choices prevents churn.

#### Timing And Message Content Best Practices

Keep copy short. Include a one-line status, a time, and an action. Use plain language and avoid jargon. For example: “Your package ending in 1234 will arrive Today between 2:00–3:30 PM. Reply ‘HOLD’ to reschedule.” That’s concise and actionable.

Include safety cues. If a signature isn’t required, say so. If the package will be left at a doorstep, suggest secure options: “Leave with neighbor” or “Deliver to secure locker.” These small details reduce complaint calls and lost-item claims.

## Choosing The Right Provider For Messaging

Not all messaging platforms are equal. Some offer high deliverability and carrier-level troubleshooting. Others provide cheap bulk SMS with little support. Make choices based on the reliability your customers expect.

Look for providers that can handle two-way messaging. The ability for recipients to respond — even with short codes — lets you capture reschedule requests or gate codes without manual intervention. Two-way capabilities also let you detect failed deliveries earlier and act faster.

Text notifications should be tracked. Choose a system that logs delivery status, bounce codes, and recipient replies. That traceability helps with dispute resolution and operational improvements.

### API Features To Look For

Robust APIs matter when you want to connect sms delivery alerts to your order management system. Real-time webhooks, templating, and rate management are the basics. Also consider localization: can the provider send messages in the recipient’s language and local time zone? That’s easily overlooked but important for larger operations.

Failover options are valuable. If an SMS provider has outages, what’s the fallback? Some platforms can switch to a secondary carrier or fallback to email with a single API call. That redundancy prevents silence when the system is most needed.

#### Security And Compliance

Messaging touches personal data. Be clear about opt-in rules and local regulations. Maintain logs for consent and allow users to opt out with a single reply. Encrypt message content where appropriate and limit sensitive information in the text itself. For example, avoid full account numbers or detailed address lines in an SMS.

Keep in mind regional rules for SMS frequency and content. Where rules are strict, a light, permissioned approach is safer and more predictable.

## Practical Examples From Real Operations

A regional retailer reduced missed deliveries by 35% after adding an out-for-delivery text with a two-hour window and a one-tap reschedule link. Drivers reported fewer abandoned drops and reties dropped significantly. Customers were quieter — in the good way.

A subscription box service used delivery alerts to solve an identity problem. Boxes required a person to sign. By sending a message the morning of delivery that asked recipients to confirm a pickup location, the company cut its signature failure rate and saw fewer claims for missing packages.

Another carrier experimented with too many notifications and saw opt-outs spike. They trimmed messages to the essentials and introduced preference controls. Opt-out rates dropped, and customer satisfaction ticked upward.

Small changes matter. Even rewording a message to say “Arriving Today 1:00–2:00 PM” instead of “Arrival Window Today” improved click-throughs on action links. People respond to clarity.

### Common Pitfalls To Avoid

Don’t rely on a single channel. SMS is powerful, but it should be part of an omnichannel strategy that includes email and in-app updates for people who prefer those channels. Also, avoid sending messages that can’t be acted upon. If you tell someone the driver is five minutes away but the driver is stuck and can’t respond, you create frustration.

Avoid overly aggressive marketing in transactional messages. Transactional delivery alerts are some of the most trusted messages you’ll send. Don’t dilute that trust with promotions in the same thread.

A subtle human touch in messaging goes a long way. Little empathy phrases — “We’ll do our best” — matter. Make sure messages are useful first, friendly second.

There are lots of smart, inexpensive ways to integrate sms delivery alerts into an operation. The trick is to focus on reducing real points of friction and to measure the outcome. When done right, these texts do more than notify — they let a delivery experience feel competent and predictable.

USPS Hold For Pickup Guide Unveiled For Mail Managers

usps hold for pickup guide

If you run mail for an office, a retail shop, or a small apartment building, “just handling mail” is a task that quietly saps time. The USPS hold-for-pickup option is the one smart shortcut most managers miss. It stops packages from sitting in a lobby or on someone’s desk and gives you a predictable pickup window instead.

## USPS Hold For Pickup Guide: How It Works
The idea is simple: a sender or recipient can request that a parcel be held at a specific post office for pickup instead of being delivered to the street address. That’s the core of this usps hold for pickup guide. The post office logs the package, holds it behind the counter, and the person who’s authorized signs for it. For a busy mailroom, that reduces misdelivered items and the constant last-mile juggling.

Packages eligible for hold are usually trackable items with a barcode. If a sender chooses the service, the item will be routed to a retail counter instead of the carrier’s route. If a recipient requests the hold after shipping, they can do that too, in many cases, via the tracking page or at a nearby post office. Expect a hold period of a week or so; specifics vary by mail class.

### Who Should Use This Service
Anyone who manages maillines where people come and go or where security matters should consider it. Offices with multiple teams, construction sites, college mailrooms, and property managers benefit the most. If you’ve lost a high-value package inside a busy building once, you understand the appeal.

Small businesses that don’t have a secure receiving area will find it useful. Instead of risking a porch theft or a dropped box in the lobby, choose to route the item to a post office. That’s especially true for weekend deliveries when no one is around to sign.

#### When It’s Not The Right Choice
Hold for pickup adds friction for the end recipient. If someone expects home delivery or cannot go pick up a package during post office hours, don’t force them into this option. Also, oversized freight and certain restricted items won’t qualify. Know your carrier rules before promising this to a sender.

## Step-By-Step: Setting Up A Hold For Pickup
This guide isn’t theory. Here’s how you actually do it, broken into manageable actions.

1. Track the item. You need the tracking number, period.
2. Go to the USPS tracking page or call your local office. Some requests can be done via the website; others are processed at the counter.
3. Choose the post office you want the item held at. Pick one that’s convenient for the pickup party.
4. Provide authorization details. The post office will ask who is allowed to pick up and for an ID at pickup.

If you run a mailroom, create a simple intake form that asks for sender, tracking number, requested hold office, and authorized pick-up names. Keep a spreadsheet. It sounds basic, but keeping those details in one place stops confusion when multiple packages arrive.

### Online Versus In-Person Requests
Online requests are fast for standard items. When the tracking record supports a hold, you’ll see an option. For more complex situations — partial shipments, consolidated vendor deliveries, or when the recipient needs a proxy to pick up — visit the post office or call them. You get better control that way.

#### Tips For Mail Managers
– Notify recipients by email and include the post office address, hours, and the tracking number.
– Ask for a backup pick-up person on the authorization form. People forget IDs or get stuck in meetings.
– Label the internal logs with expected pickup dates so you can follow up on unclaimed items.

## Common Mistakes And How To Avoid Them
A few patterns keep repeating across offices that use the service poorly. Fix these and the process becomes frictionless.

– Assuming every package can be held. Not true. Check the mail class first.
– Failing to get the tracking number up front. Without it, the post office can’t place the hold.
– Not documenting authorized pick-ups. That leads to identity mismatches and wasted trips.

One real-world example: a property manager accepted a hold request but didn’t record an authorized pickup name. A tenant’s friend showed up to collect the package and was turned away. Result: double trips and a frustrated tenant. Record names and IDs. It matters.

### Handling Unclaimed Packages
Holds eventually expire. After that, packages may be returned to sender or placed in general hold status. Track expiration dates and nudge recipients before the deadline. If a package is critical, consider scheduling pickup reminders via calendar invites. A simple text or quick call prevents returns.

## Integrating Hold For Pickup In Office Workflows
This usps hold for pickup guide is useful only if you bake the process into your routine. Make it part of your mail intake cadence.

Start with a single checklist item: “Is this package eligible for hold for pickup?” If yes, decide whether the sender should request it or your office will. Add a policy: if the package value exceeds a certain dollar amount, require hold for pickup by default. That reduces theft and misplacement.

Train front-desk staff to recognize the tracking codes that qualify and to ask for holds at the point of arrival. Put a short script at the counter: “Do you want this held at the post office for pickup?” It’s a small prompt that catches a lot of problems.

### Using Hold For Pickup With Multiple Vendors
If you deal with many vendors, standardize vendor instructions in your purchasing documents. Tell vendors: “Shipables over $X should use hold for pickup at [post office].” That sets expectations and makes returns simpler when something goes wrong.

#### Small Technical Tricks
– Save the local post office’s retail number in your phone. You’ll call faster.
– Use the USPS tracking feed to automate notifications. Some mailroom software can ingest tracking numbers and ping recipients.
– Keep a physical clipboard at the counter with the day’s held items. It’s low-tech but effective.

## Troubleshooting Specific Issues
Sometimes packages are labeled for the wrong address or a sender didn’t select the hold service. Here are practical fixes.

If the package is en route and you need it held, call the post office with the tracking number immediately. Acting quickly increases the chance they can intercept it. If the package has already been delivered, file a help request and consider requesting a return-to-sender for sensitive items.

When a recipient cannot pick up due to hours, arrange an authorized pickup person and make sure they bring acceptable ID. The post office can accept a proxy if the authorization details match what you provided when initiating the hold.

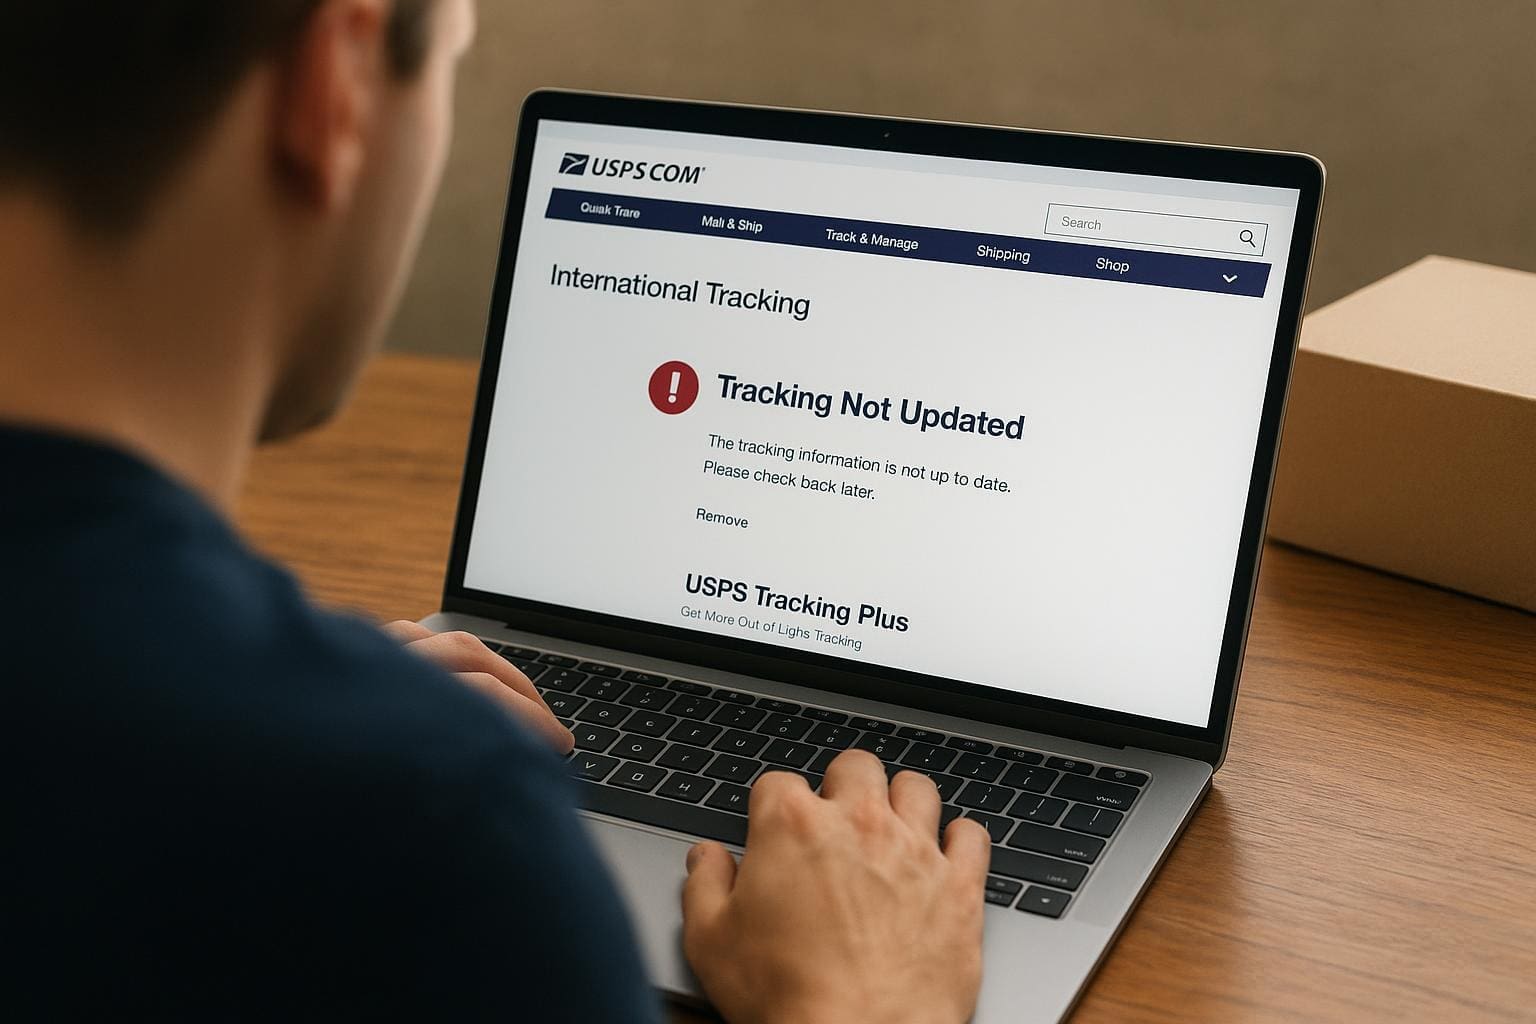
A note about tracking updates: they aren’t always instantaneous. Don’t assume the absence of a “held” status means the request failed. Verify in person or confirm with a store clerk.

## When To Use A Different Strategy
Hold for pickup isn’t a silver bullet. For high-frequency suppliers or bulky items, consider coordinated freight delivery that drops at a loading dock. For critical items that need same-day pickup, courier services might be faster. Use this usps hold pickup option when the balance tips toward security and predictable pickup windows.

Use this usps hold for pickup guide as a playbook, not a rulebook. Pick the parts that fit your operation and skip the rest. If you set up simple policies, people learn them quickly and the number of lost or misdelivered packages will drop. It’s practical, low-cost, and can save you hours every month.

recieve one package safely and you’ll see why this process matters.

Step By Step Guide To Filling Out USPS Customs Forms?

step-by-step guide to filling out usps customs forms

## Step-By-Step Guide To Filling Out USPS Customs Forms For International Shipments

If you’ve shipped abroad even once, you know the paperwork can feel like the worst part. This step-by-step guide to filling out usps customs forms strips the guesswork away and walks you through what to write, where to sign, and what to avoid so your package doesn’t get stuck at customs.

### Which Form Do You Need And Why It Matters

There are a few different usps customs forms, and using the wrong one is the quickest way to create a delay. For small parcels and envelopes that weigh less than 4 pounds and are being mailed to most countries, you’ll typically use CN 22 (often printed with labels or as PS Form 2976). For heavier or higher-value packages, CN 23 (PS Form 2976-A) is required. CN 23 has more fields for detailed descriptions and value breakdowns.

Pick the right form before you start. If you try to squeeze detailed information onto a CN 22 when the destination requires CN 23, customs will likely hold the item for clarification. That’s a waste of time and money.

### The Exact Phrase To Remember (And Use Often)

This article is a step-by-step guide to filling out usps customs forms, not a theory class. Expect hands-on tips, sample entries, and the common mistakes people make when they rush.

### Gather What You Need First

Before filling anything out, put these items on the table:

– The package and its contents
– Sales receipts or invoices for declared value
– Full sender and recipient addresses (including postal code)
– Harmonized System (HS) codes, if you can find them for your items
– A printer, if you’ll use online forms
– Pen and ruler, if filling out paper forms

If you’re mailing a gift, write “GIFT” in the description field. If it’s merchandise, mark “SOLD” and include the total value. Don’t guess the value. Customs officers can and will ask for proof. I once saw a seller declare a watch as “accessory” with no value — the package was held for weeks.

### How To Complete The Sender And Recipient Sections

These are straightforward, but sloppy handwriting or missing details causes returns. Use block letters if you’re writing by hand.

– Sender: Full name, street address, city, state, ZIP, and country. Include a phone number and email if possible.
– Recipient: Full name exactly as used at the destination. Some countries require ID matching the name on the package. Add phone number and accurate postal code.

Double-check country names. Use the official country spelling — not abbreviations. If the recipient’s address has an apartment or suite number, don’t skip it.

### Describe The Contents Clearly

This is the place where people get creative and vague. “Clothing” is okay. “Electronics” is not detailed enough. Customs wants a clear idea of what’s inside without opening the box.

– Use short, specific phrases: “Men’s cotton T-shirt,” “Stainless-steel kitchen knife,” “Lithium-ion battery (contained in equipment).”
– For multipacks, list each item and quantity. “3 × ceramic mugs.”
– Avoid vague terms like “samples,” “parts,” or “accessories” unless you immediately clarify.

This step is central to a step-by-step guide to filling out usps customs forms because a clear description speeds customs clearance.

### Declared Value And Why It Matters

Declared value is what customs uses to assess duties and taxes. You’re required to use a truthful value — not a lower number to dodge fees. For commercial items put the sale price. For gifts, estimate fair market value.

State currency clearly. If the form asks for USD, convert other currencies. If you send an item worth $1,200 and write $200, expect trouble. Customs will ask for receipts, order confirmations, or invoices.

### HS Tariff Codes: Do You Need Them?

HS codes identify the type of goods for duty calculation. Not every sender can find the right code, and many small senders skip it. If you can supply the HS code, include it — it helps customs, especially for bulk or regulated items. For common items like clothing or books, an HS code saves time.

If you don’t have one, the postal agent or an online lookup can help. It’s not mandatory on every usps customs form, but it’s a good habit for regular shippers.

### Declaring Restricted Or Prohibited Items

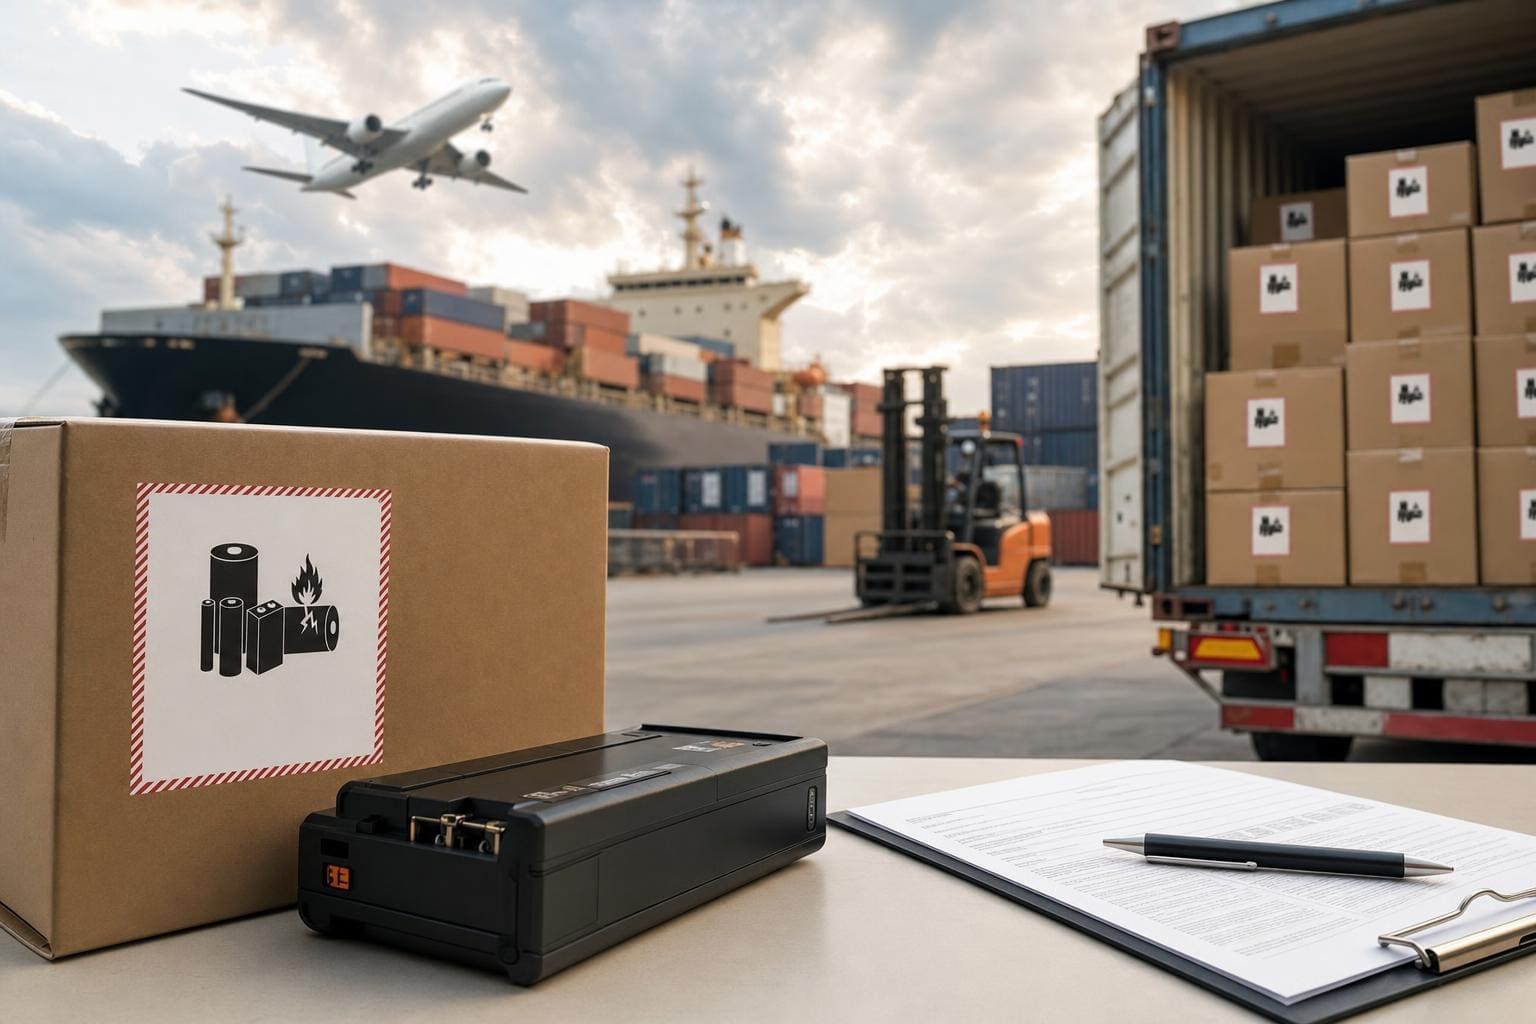
Don’t try to be clever. Certain items need permits or are outright prohibited. These include, but aren’t limited to: weapons, hazardous materials, some foodstuffs, plants, and certain batteries. Lithium batteries are a major headache — they need special handling and declarations.

If you misdeclare a restricted item, the package may be returned or destroyed. Save yourself the trouble and check the destination country’s import rules first.

### Weight And Quantity — Be Accurate

Customs officers use weight to verify contents. If you understate weight by a lot, they’ll flag it. Weigh the package on a reliable scale and enter gross weight (including packaging). Write quantity next to each described item.

### Signature And Certification

Near the end of the form you’ll find a declaration that the information is true and that you’re signing under penalty of perjury in some cases. Sign and date it. Without a signature the form is invalid and the package can be held.

If you’re using an online label, the signature will be electronic. Keep a copy of the supporting documents you used to prepare the form — receipts, invoices, or photos.

### How To Attach The Form To The Package

For CN 22, there is usually a space on the printed postage label or a small sticker to attach. CN 23 often comes in a clear plastic pouch (CP 72) that sticks to the outside of the package. If you print a customs form online, attach firmly in the pouch or tape around the edges to prevent water damage. Don’t tape over barcodes or important fields.

Include copies of invoices or packing lists inside the package for larger shipments. That way, if customs opens the package, they still have the paperwork.

### Filling Out Forms Online Versus By Hand

Using USPS.com or approved postage vendors to fill out forms is faster and reduces errors. Online systems often validate addresses, calculate postage, and guide you through fields. But they won’t choose the right HS code for you. If you’re filling things out by hand, use a ballpoint pen and write legibly. Print in BLOCK LETTERS.

For frequent shippers, set up templates with common item descriptions and HS codes to speed future shipments.

### Common Mistakes And How To Avoid Them

These are the recurring issues I see:

– Vague descriptions: “gift” without detail.
– Missing recipient phone number: some countries won’t accept without it.
– Wrong currency or omitted value fields.
– No signature or incorrect date.
– Incorrect form type: using CN 22 for items that need CN 23.
– Mislabelling commercial goods as gifts to avoid duties.

This step-by-step guide to filling out usps customs forms stresses clarity. Don’t be tempted to skip details to “simplify” the form.

### If Customs Contacts You

If customs reaches out, respond quickly. Provide invoices, proof of shipment, or other requested documents. Slow replies mean longer holds and potentially returned items.

Keep digital copies of everything. I once had to resend an invoice three months after shipping because customs changed their request. Being organized saved the shipment.

#### How Duties And Taxes Are Calculated

Duties are set by the destination country, not USPS. Customs uses declared value and HS codes to calculate taxes. Some countries have duty-free thresholds (e.g., items under a certain value). If your recipient is responsible for duties, note that clearly on the shipping label or tell them ahead of time.

If you choose to pay duties on behalf of the recipient using cash on delivery or a brokerage service, check if your postal product supports it. Not every usps customs form option includes prepaid duties.

#### Tips For Specific Shipping Methods

– First-Class International: Cheaper, but limits on weight and tracking. CN 22 is common here.
– Priority Mail International: Includes better tracking and faster delivery. CN 23 may be required for higher-value items.
– Priority Mail Express International/Global Express Guaranteed: Premium options, often have detailed customs support.

Choose the mail class based on value, tracking needs, and budget. Cheaper isn’t always better when customs is involved.

### Real Example Entries (Practical Samples)

Here are concise examples to show what “good” looks like:

– Item: “Women’s cotton blouse, 1 pc” — Quantity: 1 — Value: 25.00 USD — HS Code: 6206.40 — Weight: 0.2 kg — Purpose: SOLD
– Item: “Handmade ceramic vase” — Quantity: 1 — Value: 45.00 USD — HS Code: 6913.10 — Weight: 1.1 kg — Purpose: GIFT

Put the currency, value, and purpose next to each line item if the form allows. If there’s limited space, include the most important details: full description, value, and purpose.

### Where To Find Help And Official Resources

USPS provides support pages and videos, and your local post office can usually advise on form choice. For tricky items like electronics with batteries or restricted goods, contact the destination country’s customs website or a customs broker.

Using the official USPS online form generator reduces mistakes because it formats the CN 22 or CN 23 correctly and prints the barcodes needed.

### Handling Returns And Undeliverable Packages

If a package is returned, inspect the returned form for reasons: insufficient address, unpaid duties, or prohibited item. Learn from it and correct the error before reshipping. If customs destroyed the contents, you might need to file insurance or claim forms depending on the reason. Keep records. I once had a returned package because “color mismatch” was marked — turns out the recipient hadn’t confirmed color choices. A quick call could have avoided the return.

This second step-by-step guide to filling out usps customs forms point: document everything and communicate with recipients in advance.

### Final Practical Notes Before You Ship

Always retain copies of the form and associated receipts for at least six months. Customs questions can arise late. Be honest about contents and value. If the package contains multiple items, list them individually if possible. If you’re shipping something delicate, note “Fragile” separately but remember that “Fragile” doesn’t affect customs; it’s for carriers.

Remember, this is a step-by-step guide to filling out usps customs forms designed to get your parcel moving, not stuck. Small details matter. A misplaced decimal, a missing phone number, or a vague description can add days or weeks to delivery time.

If you want, I can walk you through a sample form for a specific item you plan to send and show exactly what to write. Just tell me the contents, value, weight, and destination country and I’ll help fill it out step by step — and make sure you don’t accidentally mislabel anything before you go to the counter.