Bulk Shipping Supplies Buying Guide For Small Businesses

bulk shipping supplies buying guide

## Bulk Shipping Supplies Buying Guide: Practical Steps
If you sell physical products, buying shipping materials in bulk is one of the simplest ways to cut costs. This bulk shipping supplies buying guide walks through the real decisions you’ll face: what to buy, how much to hold, and where to save without sacrificing customer experience.

### Decide What You Ship Most Often
Small businesses vary wildly. Some ship soft goods like T-shirts that fit in poly mailers. Others send fragile ceramic mugs that need boxes and foam. Look at your last three months of orders and categorize by size, weight, and fragility. That simple audit will tell you which items to buy in bulk and which to keep as one-off purchases.

#### Match Packaging To Product Dimensions
Measure your most common items. Don’t guess. If 70% of orders fit inside a 9x6x2 envelope, buying pallets of 9x6x2 padded mailers is smart. Larger boxes should match the next tier of items. That reduces wasted space, lowers dimensional weight costs, and keeps items from bouncing around inside the box.

### Understand Core Materials And Their Tradeoffs
There are only a few categories you need to know well: boxes, mailers, filler, tape, labels, and ink/thermal printers.

– Boxes: Corrugated boxes come in single-, double-, and triple-wall. Double-wall is overkill for most e-commerce, but necessary for heavy or fragile items.
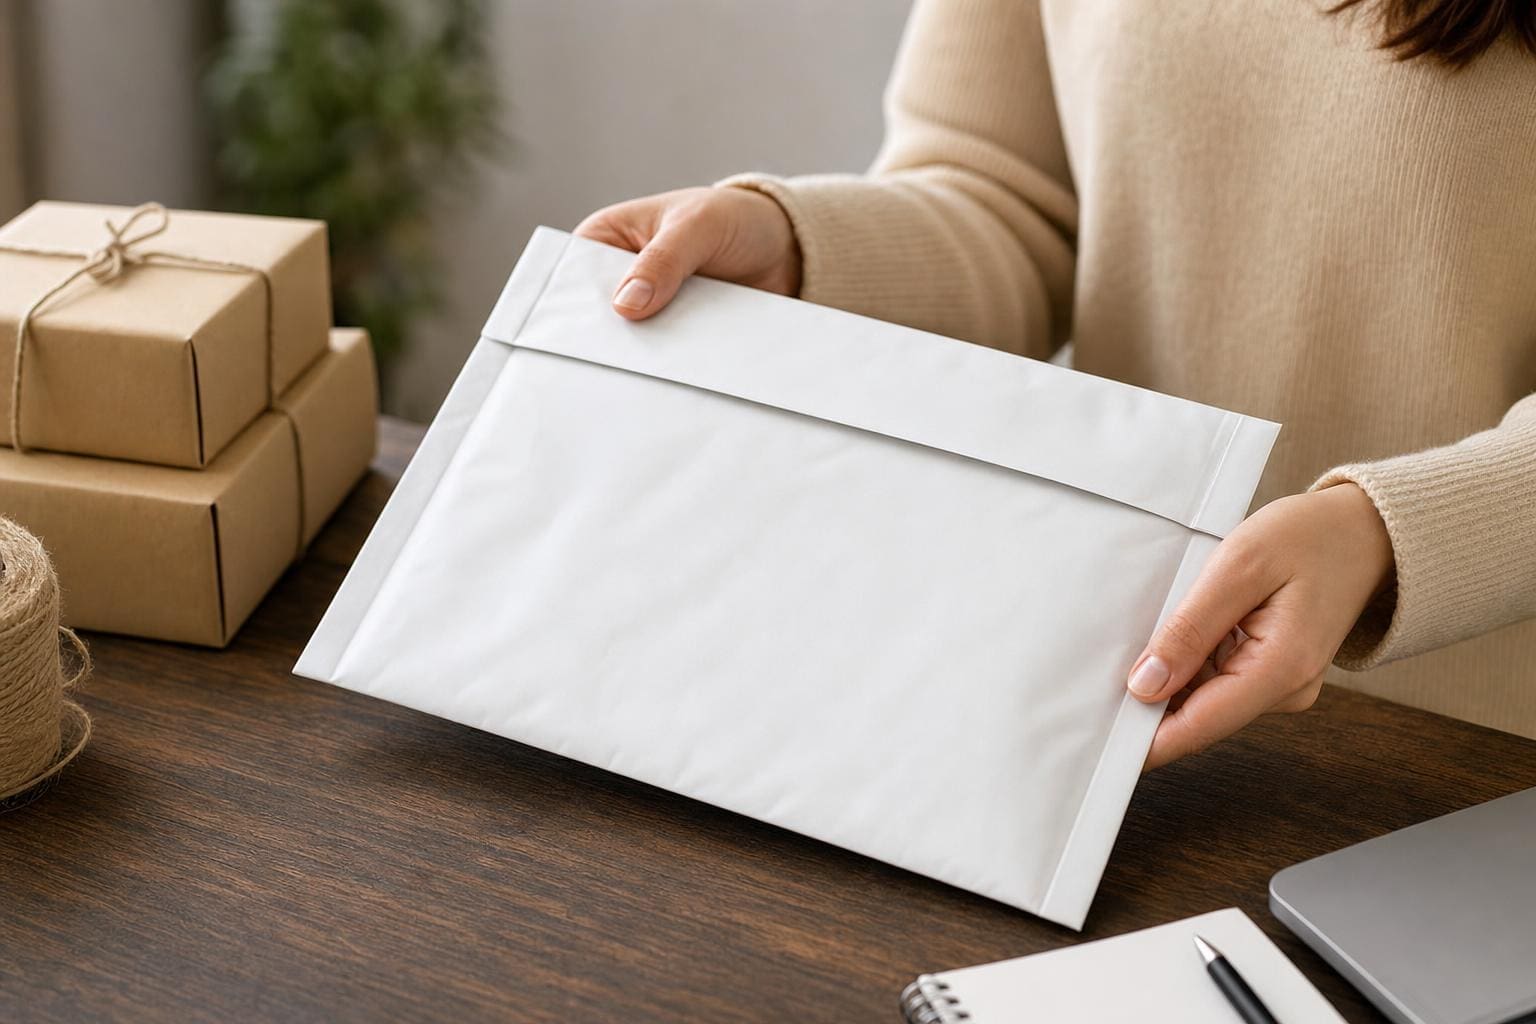
– Mailers: Poly mailers are cheap and light; padded mailers add protection without much extra bulk.
– Filler: Paper fill, air pillows, and biodegradable peanuts all protect differently. Air pillows save space but require inflators; paper fill is denser and more sustainable in many eyes.
– Tape: Water-activated tape sticks well for shipping boxes and scales better when sealing many shipments. Hot-melt tape is cheap and fast for everyday cartons.
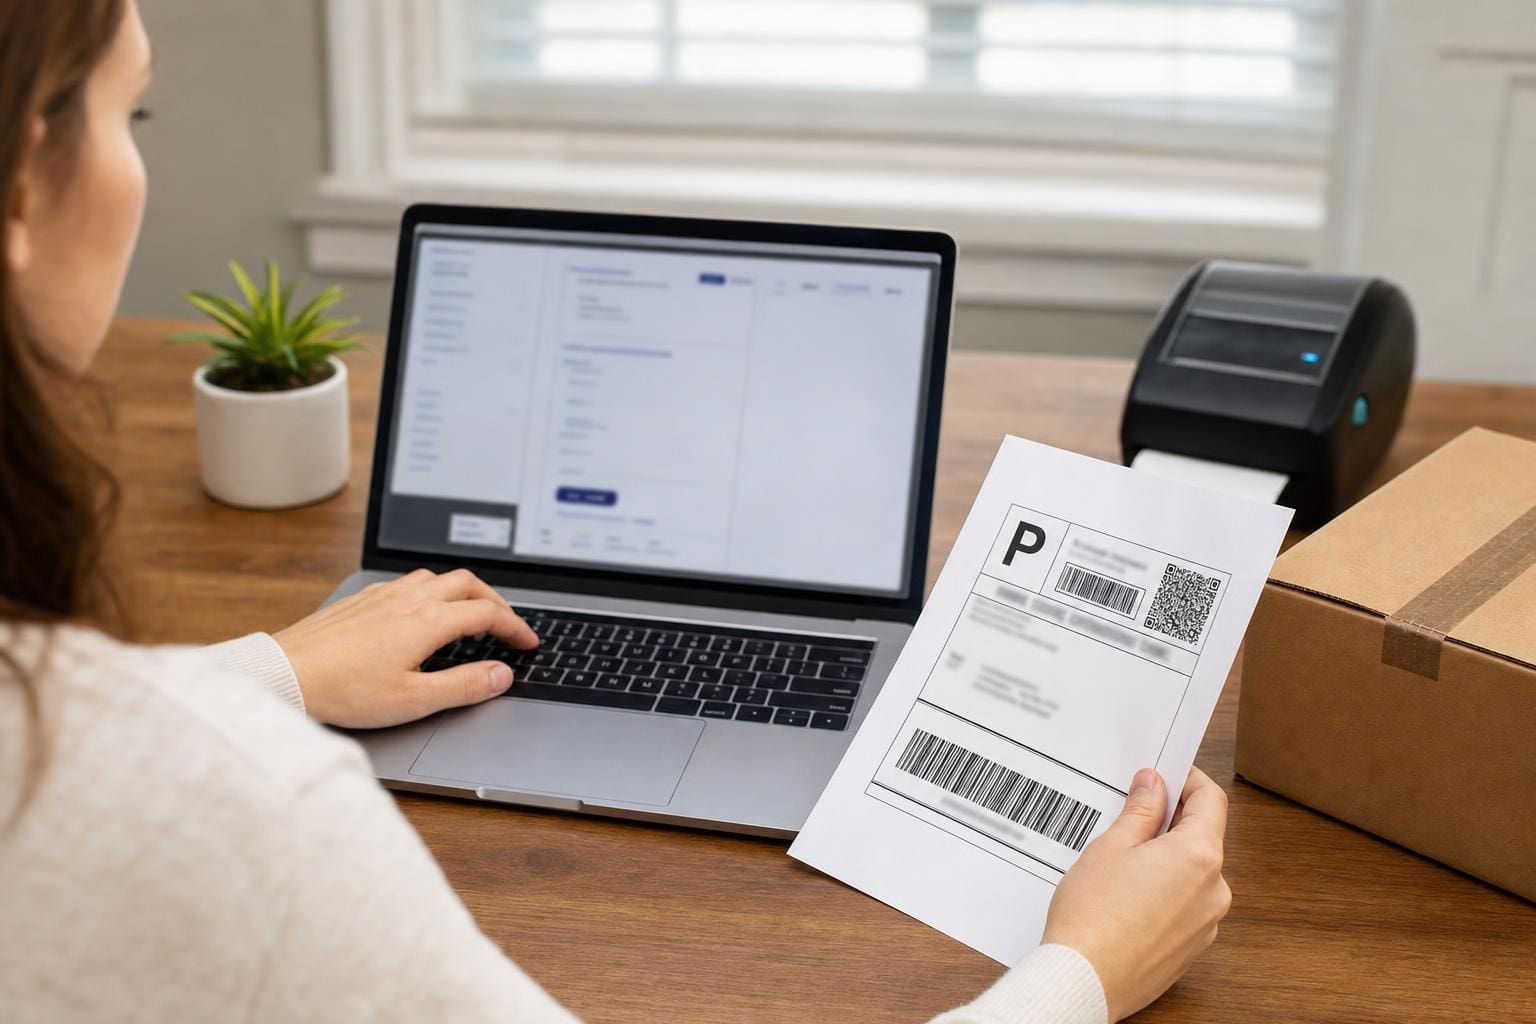
– Labels and Printers: Thermal printers are a workhorse. They remove the need for ink and keep label costs predictable.

### How To Calculate How Much To Buy
Stock too little and you’ll pay rush fees. Stock too much and you tie up cash and space. Here’s a realistic approach. First, pick a baseline: two months of usage for fast-moving items, one month for slow-moving. Then adjust for seasonality. If holiday orders triple your volume, bring in an extra month’s supply a quarter ahead.

A quick formula:
– Average monthly usage × safety factor (1.5 for high variability, 1.2 for steady demand) = order quantity.

This bulk shipping supplies buying guide recommends tracking usage weekly for the first quarter after a big change—new product, new fulfillment partner, or seasonal shift—so your safety factor matches reality.

#### Where To Store Inventory
Shelving beats floor stacks. Keep lightweight items like mailers on higher shelves; keep heavy boxes low. Use clear bins for smaller parts—bubble roll, mailer labels, tape cores—so you can visually assess stock. Label each shelf with quantity ranges. It takes a few hours to set up and saves frantic midnight searches before shipping cutoff.

### Vendor Selection: What To Ask Before You Buy
Not all suppliers are created equal. Ask these things up front:
– Minimum order quantity and lead time.
– Price breaks at volume thresholds.
– Return policy for damaged or incorrect shipments.
– Sample availability and cost.
– Shipping costs and whether freight is included.

A reliable supplier will send free or low-cost samples. Test samples with actual products. If you find a 1% defect rate in lab tests, that’s a red flag. Vendors who accept returns on damaged goods or offer credits are easier to work with when something inevitably goes wrong.

### Comparing Pricing And Total Cost
Unit price matters, but carrying cost and shipping cost matter too. A box that’s 10% cheaper but twice as heavy can cost more in carrier fees over time. Compare:
– Unit price
– Freight into your warehouse
– Storage cost (space and handling)
– Increased carrier fees due to weight or dimensional size

This bulk shipping supplies buying guide emphasizes calculating cost per shipped order, not cost per unit. If a heavier mailer reduces product damage and saves refunds, it may be worth the higher unit cost.

### Sustainability And Branding Considerations
Customers notice packaging. Unbranded plastic mailers are cheap, but compostable or recycled options can improve perceptions. Branded tape and custom-printed boxes add cost, but also promote repeat business. Decide which matters for your brand now—don’t pretend you’ll change everything overnight. If sustainability is important, trial compostable mailers on a subset of orders first.

#### Customization Versus Stock Options
Custom printing requires minimums. If your volume doesn’t justify custom boxes, use stickers or printed packing slips to add a personal touch. Even a simple thank-you card can offset a generic exterior. Keep customization choices small and repeatable.

### Tools And Equipment Worth Buying
Some tools pay for themselves quickly: a good tape dispenser, a pneumatic stapler for heavy corrugated boxes, a heat sealer for poly bags, and a scale that reads to an ounce. If you ship many small packages, a label applicator speeds things up and reduces misapplied barcodes.

A thermal printer is almost mandatory if you print labels in-house. It’s fast, reliable, and cheaper per label than inkjet once you factor in ink costs. Buy a backup compatible feed roller. It’s cheap insurance.

### Common Mistakes Small Businesses Make
Don’t buy pallets of one SKU just because the unit price is great. You’ll end up with obsolete sizes if product dimensions change. Avoid buying supplies with excessive tolerances; cheap, thin boxes save money up front and cost you in breakage and returns. And don’t forget to re-evaluate suppliers yearly. Prices and lead times change.

This bulk shipping supplies buying guide also warns against ignoring packaging controls. Train one or two people to be the “packager” experts. Consistent packing reduces damage, speeds fulfillment, and makes inventory forecasting easier.

### Negotiating Better Deals
If you’re buying regularly, ask for account pricing. Offer to consolidate purchases or set up scheduled orders to get better freight terms. If you can promise a monthly volume, suppliers are willing to hold inventory or provide better unit costs.

Keep your bookkeeping tidy. Suppliers are more willing to negotiate with buyers who pay on time and have clear purchase orders. One honest rep told me that standing orders beat one-off high-dollar orders because they smooth manufacturing runs.

### Integrating With Fulfillment Partners
If you use a 3PL, coordinate packaging types and size tiers. 3PLs often have their own handling rules and preferred pack types. Ask how they bill for storage and pick-and-pack, and whether they accept palletized shipments of bulk shipping supplies. Some 3PLs charge a receiving fee for large supply deliveries. Factor that into your ordering plan.

### Test, Measure, Iterate
Start small, test materials with real shipments, and measure damage rates, customer feedback, and time to pack. Adjust your orders and reorder points based on that data. This bulk shipping supplies buying guide isn’t theory; it’s about tweaking one variable at a time until your per-order cost and customer satisfaction lines meet.

Keep reciepts organized, track what works, and don’t be afraid to switch vendors if the math changes.

What To Put On Customs Declaration Reveals Hidden Risks

what to put on customs declaration

Start with this: if you lie or obscure details on the paperwork at the border, you’re not just risking a fine. You’re exposing your shipment, your reputation, and possibly your freedom. That’s the blunt truth people soften when they advise travelers or shippers about paperwork. But customs paperwork isn’t just about ticking boxes. It forces choices—what to declare, how much detail to provide, and when to be vague. Those choices have consequences.

## What To Put On Customs Declaration: Common Mistakes

People treat the question what to put on customs declaration like it’s a trivial formality. It isn’t. The top mistakes I see repeatedly are under-declaring value, describing items vaguely, and failing to list restricted or controlled goods. A mislabelled antique vase becomes a problem when a customs officer suspects commercial intent. A cheap watch declared as “accessory” can turn into a seizure if the paperwork and receipt don’t back it up.

If you’re shipping goods, you can’t rely on “gifts” as a catch-all label to dodge duties. If customs finds a commercial volume, they’ll reclassify items, levy duties, and charge penalties. For travelers, leaving your camera battery out of the list because you assume it’s spare can be a big oversight—lithium batteries have special rules. Know the categories. Write them down correctly.

### How Detail Changes Risk

When filling out customs forms, detail matters in three ways: legal clarity, logistical processing, and risk assessment. Legal clarity means that officials can quickly match your declarations to regulations. If you write “electronics” instead of “smartphone, model X,” they may open a deeper inspection. Logistical processing: accurate HS codes and values speed things up; wrong ones slow you down. Risk assessment: vague descriptions flag your package for a closer look.

Being precise isn’t about trying to outsmart the system. It’s about reducing friction. A detailed description plus a reciept or invoice that matches reduces the chance someone else will interpret your item as suspicious.

## Why Honesty Often Saves Money

Customs can impose fines that dwarf the duties you tried to avoid. For example, a shipment understated by 30% might face penalties of 20% or more on the unpaid duties, plus storage fees while it’s held. If you declare items honestly, you avoid recalculation and penalties.

There’s another angle people forget: insurance. Insurers often require the customs declaration to match the value on your shipping paperwork. Under-declare and you may find your claim rejected after damage or theft. Declare properly and your claim stands a better chance.

### Practical Steps To Fill Out Customs Forms Correctly

– Use specific item descriptions: “men’s leather shoes, size 10” rather than “clothing.”
– List the correct quantity and unit value. Don’t batch five items as one if they’re separate for resale.
– Include HS codes when possible. If you don’t know them, ask your carrier or a customs broker.
– Attach invoices and receipts that match declared values.
– Note restricted components like batteries, plant material, or animal products.

A few carriers and countries allow digital attachments. If you can upload a purchase invoice, do it. That single file can prevent a customs hold.

#### When To Hire A Customs Broker

If you ship frequently, handle bulk shipments, or import regulated goods (pharma, food, tech with dual-use components), a customs broker pays for themselves. They know tariff schedules, can advise on correct HS codes, and catch mistakes before your shipment is stopped. Brokers also negotiate or contest duty assessments, which is useful when valuations are subjective.

You don’t need a broker for a single personal item, but if you regularly answer the question what to put on customs declaration with guesses, get professional help.

## The Gray Areas That Cause Real Trouble

Some items live in legal gray zones or depend on the destination country’s rules. Examples: secondhand electronics, repaired goods, or items with mixed materials (animal skins plus synthetic fabrics). For instance, declaring an old leather jacket without noting the animal origin can trigger wildlife trade regulations in some countries.

Another common gray area: samples and prototypes. Marking something as “sample—no commercial value” won’t always be accepted. Customs looks for intent: if there’s a commercial label, multiple units, or accompanying price lists, they’ll treat it as commercial. Be ready to prove otherwise with supporting documents.

### Travel-Specific Pitfalls

Travelers often wind up in trouble by not separating commercial items from personal effects. Bringing back a box of gifts? Don’t assume “personal use” covers it. If you exceed duty-free allowances or bring in items intended for sale, declare them properly. Also, remember that unrestricted personal items like prescription medication may still need documentation. A doctor’s note, original packaging, and a prescription can save a lot of trouble.

Subtle items trip travelers up too. Declare large amounts of cash or monetary instruments. Many countries require you to report sums above a threshold—failure to declare can lead to seizure.

## How Enforcement And Technology Change The Game

Customs agencies increasingly use data analytics and risk profiling. They cross-check shipment data with other databases: invoices, carrier manifests, trade histories. That means inconsistencies that used to slip through are likelier to get flagged. A mismatch between the declared value and the market price of an item can trigger an audit.

Mobile lounges and e-gates make declarations faster at airports, but digital declarations also create an audit trail. You can’t claim you scribbled something hastily when everything is timestamped. That accountability is good if you were honest; it’s a problem if you tried to shade facts.

### Red Flags Customs Officers Watch

Customs officers look for patterns more than single errors. Red flags include:
– Repeated low values for high-ticket goods.
– Vague descriptions that differ across documents.
– Frequent shipments from the same sender marked “gift.”
– Missing invoices or purchase proofs.

If your shipments have any of these flags, expect delays and inquiries. The fix is simple: stop repeating the same behavior and provide clear documentation.

## Common Misconceptions About Declaring Gifts And Samples

Many people believe labels like “gift,” “sample,” or “personal use” automatically exempt them from duties. They don’t. Exemptions depend on value, quantity, and country rules. Small gifts may be duty-free; a box with five identical branded items probably isn’t.

Another misconception: that declaring an item as “used” avoids taxes. Customs cares about value and intent, not an item’s age. A “used” designer handbag could still be dutiable based on its assessed value. If you want to lower duties legitimately, provide proof of purchase date and prior use; be prepared to show that the current value is reduced accordingly.

### Paper Trail Best Practices

Keep a folder—physical or digital—of receipts, invoices, and correspondence for every shipment or valuable travel purchase. If customs asks for proof, you want to present it quickly. This is especially true for items that have subjective values like art or antiques. A recent appraisal or a purchase invoice can prevent a revaluation that hikes your duty.

Don’t throw away import papers after transit. They can help resolve disputes months later.

There’s no magic wording that fits every situation when people search for what to put on customs declaration. The right answer is simple: accurate descriptions, consistent values, and supporting documents. Be clear, not clever. Be specific, not vague. The small extra effort up front avoids headaches later and keeps your goods moving.

Restocking Fee Policy Examples For Ecommerce Returns

restocking fee policy examples

## Restocking Fee Policy Examples For Different Product Types

Ecommerce returns aren’t all the same. A t-shirt that comes back unworn is different from a smartphone returned with scratches and missing parts. That’s where restocking fee policy examples help: they show how to tailor rules to product risks and operational costs. Use them as templates, not commandments.

### Why Use Restocking Fees At All

Returns cost money. Not just the refund. There’s inspection, repackaging, restocking, and sometimes refurbishment. A small percentage fee can cover those costs and discourage casual returns that eat margin. You don’t want to punish customers unnecessarily, but you do need a fair, transparent policy that reflects reality.

#### A Quick Practical Rule

Charge a restocking fee when the return causes extra handling or unrecoverable value loss. For simple returns in perfect condition, waive it.

## Concrete Restocking Fee Policy Examples

Below are several tested examples you can adapt. Each one explains the logic, the percentage range, and a suggested wording you can paste into your returns page.

### Electronics: 10–30%

Electronics are high value and often damaged in transit or by user testing. You can justify a larger fee for opened or used units.

Suggested Wording:
– “Opened electronics returned within 30 days are subject to a 20% restocking fee to cover testing and refurbishment. Unopened items are eligible for full refund.”

Variant: For premium items or those with activated subscriptions, use 25–30% for opened returns.

Use Case Note: If your product requires activation or contains license keys that can’t be reused, apply the higher end.

(Restocking fee policy examples for electronics often sit at 15–25% in the market. Use that as a baseline.)

### Apparel And Accessories: 5–15%

Clothing is low-tech but condition-sensitive. A returned item with scent, makeup, or signs of wear can’t be resold as new.

Suggested Wording:
– “Clothing must be returned unworn, with tags attached and in original packaging. Returns that fail inspection may incur a 10% restocking fee.”

Variant: For seasonal items after the season ends, consider a 15% fee to cover markdowns.

### Consumables And Personal Care: No Returns Or 20–50% If Opened

Once a consumable is opened it’s usually not resellable. Most merchants either exclude returns entirely or refund only unopened packages.

Suggested Wording:
– “Unopened consumables are eligible for return within 14 days. Opened or partially used items are not refundable.”

If you accept opened items for store credit, apply 30–50% restocking to cover disposal or discounting.

### Custom And Made-To-Order: Non-Refundable Or Minimal Exceptions

Custom goods are inherently non-returnable, except in the case of defects. State that clearly.

Suggested Wording:
– “Custom or personalized items cannot be returned unless defective. Please review custom details carefully before ordering.”

You might allow returns only if the error is yours, in which case there is no fee.

### Large Or Bulky Items: 15–40% Plus Return Shipping

Furniture and large appliances cost a lot to ship and handle. Add a restocking fee plus charge return shipping.

Suggested Wording:
– “Large items returned within 30 days are subject to a 25% restocking fee and the customer is responsible for return shipping.”

Operational Tip: If you can resell an item as open-box locally, use a lower fee. If you must dispose of it, charge more.

### Open-Box Or Used Resale: Variable Based On Condition

If you accept returns into a refurbished inventory, calculate the fee based on refurb cost plus lost resale margin.

Suggested Wording:
– “Used or opened items will be assessed a restocking fee based on condition and refurbishment needs. Typical fees range from 10–30%.”

A simple tiered approach works: pristine (10%), light wear (20%), heavy wear (30%).

## How To Phrase A Restocking Fee Policy (Examples Of Clear Language)

Customers get angry when the policy reads like legalese. Clear, direct sentences build trust. Here are phrasing examples that actually reduce disputes.

### Simple, Customer-Friendly Option

“We’ll issue a full refund for returns received in original condition within 30 days. Items returned opened or damaged may incur a restocking fee equal to 10–25% of the purchase price.”

### Precise, Operational Option

“Returns must be postmarked within 30 days. Items must be unused, in original packaging, with all accessories. Non-compliant returns will be inspected and may be subject to a restocking fee (10%–30%) based on condition and inspection findings.”

Pick the tone that matches your brand. The goal is clarity, not legal intimidation.

## Calculating Restocking Fees: Examples With Numbers

People understand numbers better than percentages. Show an example on your returns page.

– Order: $200 speaker. Customer returns opened item; inspection finds minor wear. Restocking fee 20% = $40. Refund = $160 minus original shipping if not refundable.

– Order: $50 t-shirt. Returned with makeup stain. Restocking fee 15% = $7.50. Refund = $42.50.

These examples set expectations and cut disputes.

## Legal And Compliance Considerations

Rules vary by state and country. Some jurisdictions limit the maximum restocking fee or require advance disclosure. Others consider certain fees deceptive if not clearly disclosed at point of sale.

– Disclose fees at checkout and on the product page.
– Avoid hidden fees that appear only after return initiation.
– For augmented fees like return shipping plus restocking, show the total potential cost.

If you sell internationally, check local consumer protection laws. Compliance is practical: the last thing you want is a refund reversal and a fine.

## Communicating Fees During The Customer Journey

Transparency matters more than the fee size. People hate surprises. Put key points in three places: product page, checkout, and confirmation email. Use short bullets and one concise sentence on the product page.

Example product-page blurb:
“30-day returns. Opened electronics: 20% restocking fee.”

Also mention exceptions: free returns for defective items, or free return window for VIP customers.

### Handling Customer Disputes

When a customer disputes a restocking fee, follow this sequence:
1. Explain with evidence: inspection photos, checklist.
2. Offer reduced fee or store credit for first-time offenders.
3. Escalate only if communication stalls.

A small goodwill concession often saves time and reputation.

## Operational Steps To Implement A Restocking Fee Policy

Policies are words until your operations support them. Here’s how to make them work.

#### Inspection Checklist

Create a short checklist for returns inspectors: original packaging, tags, accessory presence, signs of wear, activation/serial note. Record photos for documentation.

#### Refund Workflow

Automate calculations: system deducts restocking fee and refunds remainder. Flag exceptions for manual review.

#### Inventory Flow

Decide where returned items go: restock as new, refurb, clearance, or disposal. Each path needs its own recording and fee logic.

#### Reporting

Track three KPIs: return rate, average restocking fee collected, and net recovery on returns. Use those to refine fee levels.

## Examples Of How Different Brands Apply Restocking Fees

Seeing real-world examples helps you pick a sensible approach.

– Electronics retailer: 15–25% on opened items; free return within 15 days unopened.
– Subscription box company: No returns for consumables; exchange only for defective products.
– Direct-to-consumer furniture brand: 25% restocking fee, customer pays return freight.
– Fashion marketplace: 10% fee for returns outside the promised trial period.

These are restocking fee policy examples you can adapt to your margins and customer expectations.

## Exceptions And Promotions

Don’t apply the fee across the board. Use exceptions strategically.

– VIP customers get one free return per year.
– Seasonal sales may offer free returns to boost conversion, accepting higher overall return costs.
– If product defects are frequent, waive restocking fees and focus on fixing quality issues.

A flexible policy can be a competitive tool, not just a defensive cost recovery.

## Testing And Iteration

Set a baseline fee and test. Raise or lower the fee in small increments and watch conversion, average order value, and return rate. Restocking fees influence behavior: too high and conversion drops; too low and returns spike.

A/B test fee messaging too. Sometimes clearer wording reduces returns more than raising a fee does.

## Sample Policy Snippets You Can Adapt

Short snippets work best on product pages and checkout.

– “Free returns within 30 days for new, unopened items. Opened items may incur a restocking fee of up to 20%.”
– “Custom items are non-returnable unless defective.”
– “Return shipping is the responsibility of the customer unless the item is defective or shipped in error.”

Place one of these snippets on each product page and link to the full returns policy.

## Pricing Psychology And Customer Perception

A 10% fee feels reasonable. A 30% fee feels punitive. Consider the optics. If your product already carries a strong warranty or service promise, a restocking fee can seem stingy. Balance financial reality with brand positioning.

If you offer free returns, communicate that loudly. It can be a conversion booster. If you must charge, frame it as covering actual costs rather than as a penalty.

## International And Marketplace Considerations

If you sell on Amazon, Etsy, or other marketplaces, check their return rules. They may require you to offer certain return terms or reimbursements. Your own restocking fee policy may need to be adjusted for those channels.

For cross-border sales, remember import restrictions and return shipping complexity. Sometimes it’s cheaper to offer a partial refund and let the customer keep the item.

## Common Mistakes Merchants Make

– Hiding the fee until after purchase. This sparks complaints.
– Applying the same fee to all products. That ignores different handling needs.
– Not documenting inspections. Without records, disputes blow up.
– Confusing return shipping responsibility. Make it clear who pays and when.

Avoid these and you’ll save time and trust.

## Example Template For Full Returns Page

Here’s a practical full-policy layout to drop into your site. Keep it short and scannable with a few examples and an FAQs section addressing “when will I recieve my refund?” and “how is the fee calculated?”

Include a contact link and a promise to show inspection photos if a fee is charged. That transparency cuts disputes.

When you write your policy, use specifics: days, percentages, and examples. Vague phrases create suspicion. Use the restocking fee policy examples above to match the tone and level of detail you need.

End with a short FAQ that answers the most common customer questions and points them to how to initiate a return. Remember: a well-worded policy and smooth operational follow-through reduce headaches for everyone.

Apartment Address Format USPS Explained for Correct Mails

apartment address format usps

## Apartment Address Format USPS: How To Write It Right

If a package or letter never shows up, the first place to look is the line that tells the carrier where to leave it. The postal system is strict about where each piece of information goes. Use the apartment address format usps and you’ll cut down on misdelivered or returned mail.

USPS has rules for a reason: machines read addresses first, humans handle exceptions later. Put the unit designator in the wrong spot or misspell the street number and automation will route it wrong or spit it back. Below I’ll walk through the practical rules, give real examples, and show how to handle weird cases like multi-building complexes, PO Boxes, and online forms.

### Why Format Matters

Machines and scanners are part of every step in sorting. They look for patterns: number, street name, unit designator, city, state, ZIP. If your apartment number is buried or has unusual punctuation, it may not register. That’s when mail ends up delayed or returned. Using the correct apartment address format usps makes the address easy for automation and for the carrier when they’re on the route.

## Basic Rules For Apartment Lines

### Put The Apartment On The Same Line When Possible

USPS prefers the secondary unit designator on the same line as the street address. That means this is good:

123 Main St Apt 4B

and this is even better for automation:

123 MAIN ST APT 4B

Avoid putting the apartment in parentheses, after a comma, or on the line with the city. Keep it with the street number and name.

### Use Standard Unit Designators

Use APT, UNIT, STE, BLDG, FL, or # where appropriate. A few examples:

– APT 4B
– UNIT 12
– STE 200
– BLDG 3
– FL 2

Don’t invent words like “Room” or “ApartmentNo.” Stick to the standard USPS abbreviations so sorting systems and carriers instantly recognize the meaning.

### No Punctuation, All Caps Works Best

USPS addressing guidelines recommend no punctuation. Commas and periods can confuse optical character recognition. Capital letters are recommended for machine readability, though your envelope won’t be rejected for lower case. An ideal formatted line looks like:

JOHN DOE
123 MAIN ST APT 4B
SPRINGFIELD IL 62704-1234

Use the ZIP+4 when you can; it reduces ambiguity.

## Examples: Correct Vs Incorrect

### Correct
JOHN DOE
123 MAIN ST APT 4B
SPRINGFIELD IL 62704-1234

### Incorrect
John Doe, 123 Main Street, Apt. #4B, Springfield, IL 62704

The second version has punctuation and long forms that machines might not parse cleanly.

## Filling Online Forms: When There’s A Separate Apartment Field

Most web forms give you a first address line and a separate apartment or unit line. Put the street address on the first line and the apartment number on the second line using the designator:

Address Line 1: 123 Main St
Address Line 2: Apt 4B

If the form only has one line for address, add the apartment after the street: 123 Main St Apt 4B. If there’s a character limit and you must shorten, discard commas and unnecessary parts first.

### When The Form Forces A Single Line

Some legacy forms collapse everything. In that case, make sure the unit designator is immediately after the street information. This is cleaner and more likely to be read by software:

123 Main St Apt 4B Springfield IL 62704

But don’t put the city on the same line if the form has a separate fields for city and state.

## Apartment Versus Suite: Why It Matters

An apartment address is residential; suite numbers typically imply business. For carriers and sorting, that can change routing inside a building. If you live in a building with both businesses and residents, using APT versus STE helps the carrier know where to deliver.

– Use APT for residential spaces.
– Use STE for business offices or commercial suites.

If your building uses “Unit” or “Bldg” in internal signage, reflect that in your address if it’s official. For example, in a campus with multiple buildings:

CAMPUS HOUSING
456 College Ave Bldg 5 Apt 210
COLLEGE TOWN NY 10001

## USPS Apartment Address Specifics To Keep In Mind

### ZIP+4 Can Help But Isn’t Always Apartment-Specific

A ZIP+4 improves accuracy. It narrows delivery to a block, a side of the street, or even a single building. It won’t necessarily be unique for every apartment, but entering the ZIP+4 tied to your building is helpful. Use the USPS ZIP Code Lookup to find the right code.

### Don’t Use PO Box If You Have An Apartment Number

If you live in an apartment, don’t combine PO Box and apartment info. If you rent a PO Box instead of receiving mail at your apartment, use the PO Box format:

JOHN DOE
PO BOX 1234
CITY ST 12345-6789

If you want mail delivered to your apartment, never put a PO Box and apartment number on the same address. Pick the correct method.

### What If Your Building Uses A Separate Mailroom Address?

A building may want mail addressed to a mailroom or to “C/O Front Desk.” Follow building instructions. If the mailroom accepts packages and your landlord requires a specific format, write what they require, then add your apartment number. For example:

JOHN DOE
C/O FRONT DESK 123 MAIN ST APT 4B
CITY ST 12345

Make sure your building’s internal policy matches USPS rules so carriers aren’t confused.

## How Carriers Handle Apartment Complexes

### Key Information For Carriers

A carrier needs three things to deliver reliably: building number, street name, and unit number. If any is missing, delivery may stall. For large complexes, carriers rely on internal unit maps. If your apartment number changed because of a renovation, notify the post office and building management immediately.

### When Packages Are Held Or Returned

If a delivery fails, carriers will often leave a notice. Common causes:

– Missing or wrong apartment number
– Illegible handwriting on the label
– Incompatible size for mailbox
– Restricted access to building

If you see frequent misses, check the address formatting and confirm that the ZIP+4 matches the building.

## Common Mistakes That Cause Returns

### Leaving Off The Unit Number Entirely

This is the number one mistake. If the street has multiple units, the carrier has no way to tell which one. Always include APT 4B or equivalent.

### Using Nonstandard Abbreviations

Stuff like “#4B” is okay in casual contexts, but some systems prefer APT 4B. If you use “#”, make sure the form or label can accept it. Best practice: use standard abbreviations.

### Typing The Apartment In The City Field

On some forms people stuff the apartment into the city field because the address line fills up. Don’t do that. Put apt info on the address line or second address line, never with city/state.

### Wrong ZIP Code

ZIP codes change occasionally. Use the USPS lookup tool. A single-digit error can send mail to a different town.

## How To Verify An Address With USPS Tools

USPS provides tools to validate addresses and find ZIP+4 codes. Use them before sending irreplaceable documents. The tools will standardize the format in USPS preferred style, which helps avoid returned mail.

– USPS ZIP Code Lookup
– Address Validation APIs (for businesses)
– Local post office for tricky cases

Use these if you manage mass mailings or if your address gives delivery problems.

## Special Cases And Edge Conditions

### Multi-Building Complexes

If the complex uses building numbers, include them. The format may look like:

123 Campus Way BLDG 7 Apt 12

Sometimes the official address lists the apartment under a different street name. If in doubt, check the building management or USPS.

### Rural Routes

If you’re on a rural route rather than a numbered street, the format changes. Use RR or HC format as instructed by USPS. Rural addressing has its own set of rules and often a required box number.

### Military Addresses

APO/FPO addresses have their own structure. Include the rank and name, unit number, and proper APO/FPO label. The unit is critical—military mail uses it to route through the base.

### International Shipping

For international shipments to US apartments, format the US destination line as USPS prefers and then add any foreign requirements on the customs form. Keep the apartment info clear on the US address lines.

## Business Mail And Amazon-Style Deliveries

Companies that ship a lot of packages should validate addresses programmatically. If you’re a seller or run a small business, use the USPS standardized format in your shipping labels. For example, Amazon and other carriers often accept “#” but if you use printed labels, follow the USPS style to minimize scanning errors.

## When In Doubt, Ask Local Post Office

If your building has unusual addressing—units labeled differently, internal unit numbers, or historical quirks—ask the local post office. They’re the ones routing your mail. Provide proof like your lease or building map and request guidance on the exact line format.

## Practical Tips For Sending Important Mail

– Print labels instead of handwriting when possible. Human handwriting adds variability.
– Use the ZIP+4. It matters.
– Verify the street suffix abbreviations (St, Ave, Rd). Wrong suffixes can point mail to the wrong block.
– If you’re sending legal or time-sensitive documents, double-check the recipient used the correct apartment address format usps and confirm the apartment number directly.

### A Couple Of Real Examples

Example 1 — Apartment resident using a common web form:
Name: SARAH MILLER
Address 1: 789 Oak St
Address 2: Apt 2A
City: OAKLAND
State: CA
ZIP: 94607-1234

Example 2 — Single-line label:
MARK JONES
1024 Elm Rd Apt 5C
FAIRVIEW NJ 07022

Example 3 — Mailroom delivery instruction:
JANE DOE
C/O MANAGEMENT 234 Pine Ave Apt 304
RIVERTON TX 76010

These all follow USPS style and make life easier for automated sorting and carriers on the street.

## Handling Returns And Misdelivered Mail

If you get mail that’s not yours or mail is missing, record tracking numbers and contact the sender. For persistent misdelivery, report it to your post office. They might update routing for your building or correct the master address file.

If you receive someone else’s mail, write “Not At This Address” on the envelope and drop it back in the mailbox. Don’t cross out the address—doing so can make it illegible to machines.

## Final Practical Notes On The Format

– Keep the recipient line clear and complete.
– Put apartment/unit designator directly after the street address.
– Use standard USPS abbreviations and ZIP+4.
– When a website separates address lines, use the second line for the apartment number.
– Confirm with local post office for unique building conventions.

Using the right apartment address format usps is not about following rules to be tedious. It’s about getting mail where it belongs without delay. If you’ve ever waited for an important package that didn’t arrive, there’s a good chance a small formatting error was the culprit. Fix that, and you’ll cut down on trips to the post office and the time spent on hold. Plus, carriers will thank you for clear, readable lines.

### Where To Learn More And Tools To Use

USPS has online resources for standardizing addresses and getting ZIP+4 codes. For businesses, address validation APIs automate this work. For individuals, a quick ZIP Code lookup before sending something important is often enough. If the building uses internal identifiers, get the official wording from management so your address matches what the carrier expects.

Keep your address simple and precise and you’ll avoid the common pitfalls that send mail awry. And remember to double-check the apartment number—most delivery problems start and end there. If you still have issues, go talk to your carrier or local office; they can often tell you what to change so your mail, packages, and ballots arrive on time.

(By the way, if you need a quick check, run the address through the USPS lookup and you’ll see the standardized version ready to copy. It’s a tiny step that prevents a lot of headaches. Also, don’t forget to recieve notifications if a carrier attempts delivery and can’t access your building.)

USPS Letter Size Requirements Guidelines For Mailers

usps letter size requirements

## USPS Letter Size Requirements For Everyday Mail

USPS letter size requirements matter if you want predictable postage and no surprise surcharges. Follow the rules and most business and personal mail will go through automated processing. Break the rules and your mail becomes nonmachinable, or might be bumped up to a flat or parcel rate.

### Minimum And Maximum Dimensions

The baseline letter size requirements from USPS are simple numbers you should memorize if you mail often:
– Minimum: 3.5 inches high x 5 inches long x 0.007 inch thick.
– Maximum: 6.125 inches high x 11.5 inches long x 0.25 inch thick.
– Maximum weight for a First-Class letter: 3.5 ounces.

If your piece is smaller than the minimum it’s classified as a nonletter and may require extra postage. If it’s larger than the maximum in any dimension, or thicker than 1/4 inch, it becomes a flat (large envelope) or a parcel and that changes the price.

### How To Measure Correctly

Measure length on the longest side and height on the shorter side. Thickness is the distance between the two largest faces at the thickest point. Don’t average thickness; measure the bulkiest spot. For a folded 8.5 x 11 sheet inside a #10 envelope, length and height are fine, but multiple pages can push you past the 3.5-ounce limit.

#### Why Thickness And Weight Matter

Machinable equipment handles thin, flexible pieces. If an envelope is too thick or stiff, machines will reject it for hand processing. That usually means extra cost. Also, items with clasps, string, metal, or excessive stiffness face a nonmachinable surcharge. If you glue in cardboard inserts or rigid enclosures they can make a mailing suddenly nonmachinable.

### When A Letter Becomes A Flat Or Parcel

Cross one of the size thresholds and you’re into different rules:
– Flats: more than 6.125 inches high, more than 11.5 inches long, more than 1/4 inch thick, or over 3.5 ounces up to 13 ounces. Flats require different handling and higher postage.
– Parcels: when weight or rigidity exceeds flat limits, or if shape is square or rigid, postal parcel rates apply.

Keep an example in mind: three sheets of standard 20-lb paper inside a #10 envelope usually stay under 3.5 ounces. Add a thick brochure or a small cardboard insert and you’ll likely tip over into the flat category.

### Common Nonmachinable Triggers

The letter size rules include both dimensions and physical characteristics. Expect a surcharge if your piece has:
– Rigid or uneven thickness.
– Clasps, strings, buttons, or exposed metal.
– Square corners that prevent smooth machine feeding.
– Enclosures that cause the envelope to be too stiff.

Even a single bowed corner from a rigid card can force hand sorting. If you’re sending invitations with double-sided mountings, test a sample at the post office before committing to bulk postage.

### Addressing And Placement Basics

Address placement affects processing speed. Use the front center for the delivery address and put the return address in the top-left corner. Leave a clear area in the upper-right for postage. Avoid printing barcodes or markings that could be mistaken for USPS tracking codes. Handwritten addresses are fine; just make sure they’re legible and not on a window that obscures the text. If you tuck a folded sheet into the envelope so the address shifts, machines may misread it.

### Practical Tips To Avoid Extra Charges

Measure a sample item before you buy postage. If sending many pieces, run a few through a local post office meter to check class and surcharges. Use softer, bendable inserts when possible. Avoid unusual shapes and keep corners rounded if your content risks catching in machinery. If you consistently mail thicker content, consider designing a flat-sized envelope instead; the rate may be simpler and less prone to variability.

### When To Contact The Post Office

If you’re preparing a business mailing, talk to your local USPS representative about presort discounts and automation-compatible formats. They can review your mailpiece, check machinability, and point out small changes that save money. For one-offs, a quick trip to the counter with a sample will tell you if your item meets the letter size requirements and whether it’s machinable.

### Real-World Examples

A single sheet 8.5 x 11 folded twice into a #10 envelope: usually meets the letter size requirements and stays under 3.5 ounces. A 4-page booklet with a cardstock cover in the same envelope: likely too thick or stiff and could be nonmachinable. A greeting card with a metal charm will trigger a surcharge for the charm alone.

Pay attention to the numbers and to materials. The difference between a cheap mailing and an expensive one is often a small detail like a bracket or a stiff insert. Test, measure, and talk to the post office when in doubt. And remember that reciept stamps or meter marks don’t change machinability, but the physical shape does.